Stay up to date with the latest SiteGround product updates, new features, and improvements designed to enhance your website’s performance, security, and hosting experience.
Starting a website usually means one of two things: scrolling through templates hoping one feels right, or staring at a blank page trying to figure out where to even begin.
Skip both. SiteGround Website Builder now make creating a site just as smooth as running one. Describe what you’re building, and an AI Wizard turns it into a real website or online store, using the same Page Builder you’d use to build one yourself. And if you’d still rather pick a template yourself, that option isn’t going anywhere.
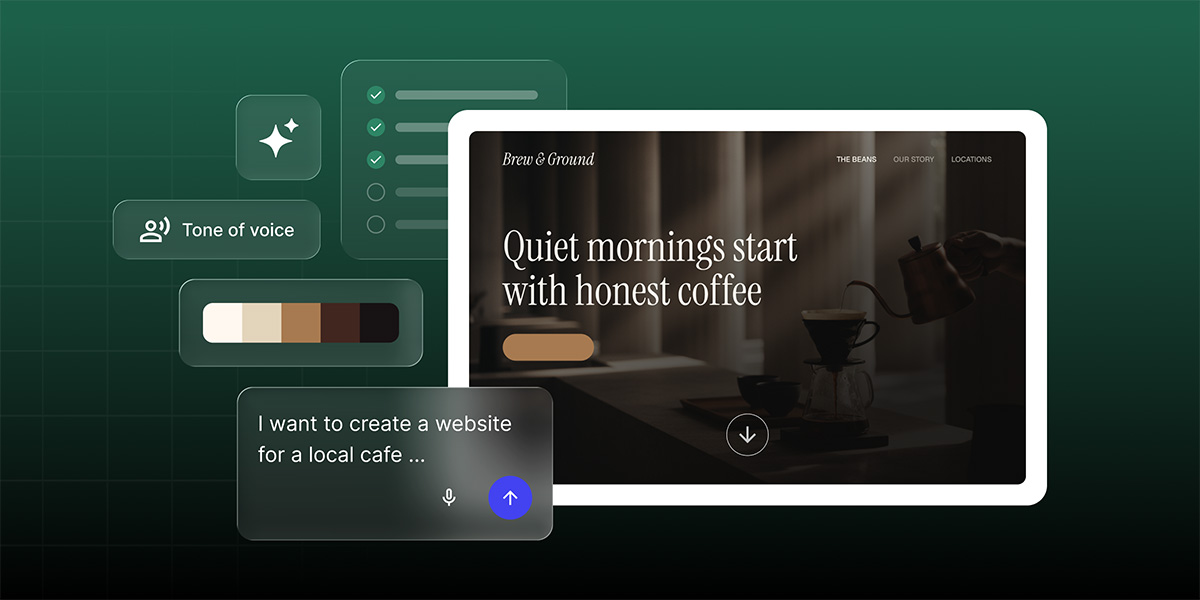
Describe your site in your own words
Type it out, or say it out loud, whichever’s easier. Simply describe what you have in mind, whether that’s a consulting business, a boutique, a photography portfolio, or otherwise. Pages and sections, tone, any color inspiration you have, all of it goes into the description.
Check the details before your site is generated
Once you’ve described your website needs, nothing gets built from a guess. You’ll see an editable summary based on what you described, including details such as your site name, the main goal (showcase your work, get bookings, sell products, and so on), the tone of voice, a color palette, plus a blank text field for anything else worth mentioning. When everything looks right to you, the site gets built. And while you wait, a short video walks you through the Page Builder itself, so by the time your site’s ready, you already know your way around it.
A starting point built around your description
What comes out is a real starting point: structure, layout, and sections built around your description. It fills in the gaps, choosing pages that fit if you didn’t spell them out, adding placeholder copy, and only including specifics like your address, hours, or contact info if you’ve described them. The more detail you give it, the less of that filling-in it has to do.
From there, everything is yours to edit directly in the Page Builder. Want a different starting point altogether? You can regenerate the whole site from a new description anytime.
Pick up where you left off, no matter what interrupts you
Setting up a website in one sitting isn’t always realistic. Maybe your laptop dies, maybe you get pulled into a call, maybe you just close the tab by mistake.
With SiteGround Website Builder’s AI Wizard, though, you can come back later and see a simple prompt to pick up exactly where you left off, whether that’s back at the review step or partway through generation. Your site sits marked as unpublished with editing paused until setup’s done, so there’s no confusion about what’s live and what isn’t.
If generation fails partway through, it retries on its own. Separately, if you refresh the page by accident, you land back on the right step, not a blank tab wondering what happened.
Same foundation, built around exactly what you need
Using the AI Wizard feature offers a faster way to get started inside SiteGround Ecommerce and Website Builder. And using it doesn’t draw from your AI tokens yet, so there’s no cost to try it now. Once your site or store is generated, you’re working in that same setup, running on the same solid infrastructure, backed by the same support behind every other SiteGround site or store, AI-built or not. Now you can just say it, and the rest follows.
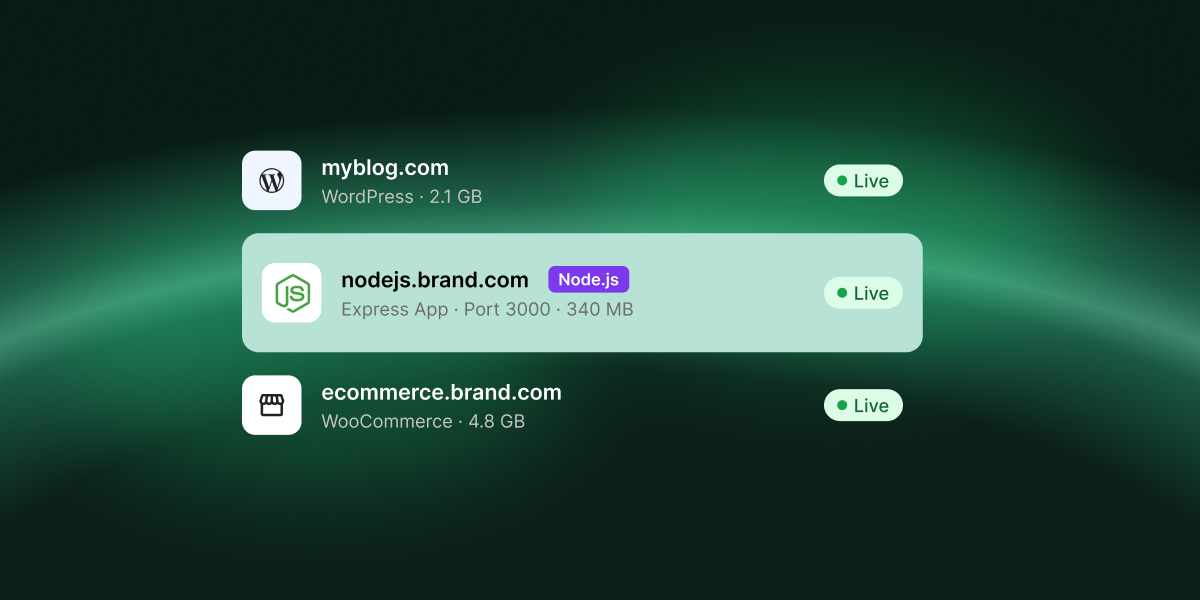
If you’re on a GrowBig, GoGeek or Cloud, you can now host Node.js apps in your existing plan. Connect a GitHub repository or upload your code, and we build, deploy and run it for you. Your apps are managed from the same Client Area as your sites, and they can use what your plan already includes: managed databases, free SSL, and email once the app is on your own domain.
What is Node.js?
Node.js is an open-source runtime that lets JavaScript run on a server, not just in the browser. That means one language can power both what people see on screen and the logic behind it: handling requests, reading and writing to a database, sending emails and connecting to other services.
It’s one of the most widely used technologies for building on the web. Popular frameworks like Next.js, Nuxt and Astro run on it, and many of the apps created with AI coding assistants and app builders are built on it too.
What types of Node.js projects can you host?
Anything that runs on Node.js. That includes apps built with Next.js, Express.js, NestJS, Nuxt, Remix, Astro, Fastify and Koa, as well as React, Vue.js, Angular, Svelte and Vite.
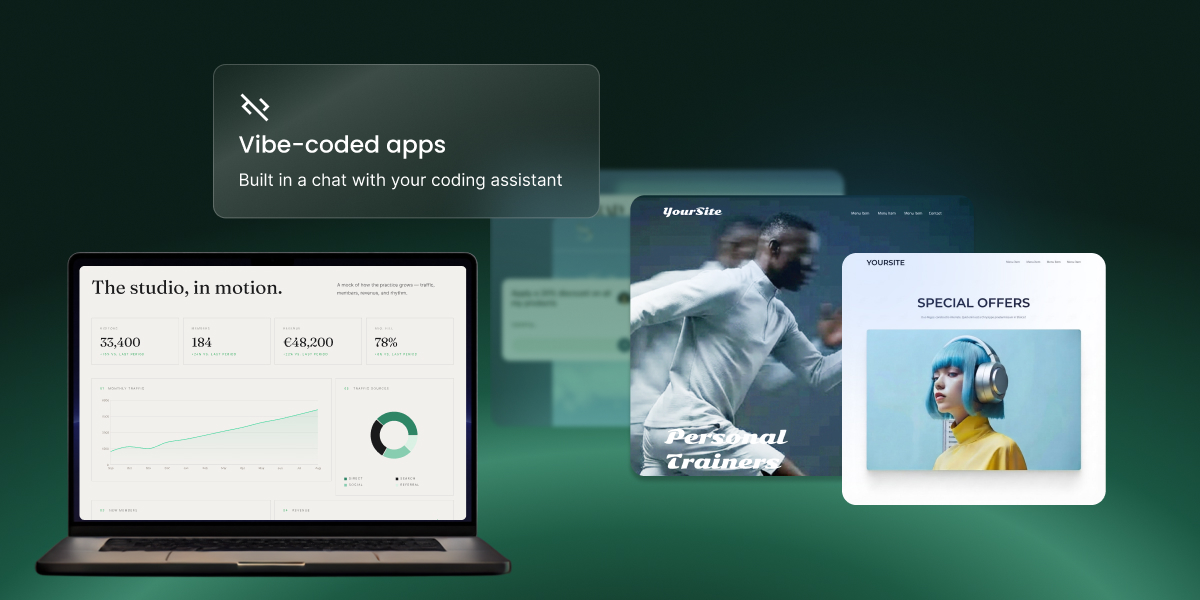
Many of the projects clients are already bringing over were built with AI. If you’ve been working in Claude Code, Cursor, Codex, Copilot or Windsurf, just connect the GitHub repository your assistant works in. Every fix it pushes redeploys automatically, and your vibe-coded prototype can go live on your own domain with a database behind it. Sites made in Lovable, Bolt, v0 or Replit work the same way: export them to GitHub or download a ZIP, then publish on a domain you own, with email on that domain included.
Others were built by hand. That might be the API behind your mobile app or your WordPress frontend, a webhook handler or integration that keeps your product running, or a full application on the frameworks you chose. They run on a standard Node.js runtime with a MySQL or PostgreSQL database, environment variables and a log for every build, and nothing proprietary sits between your code and the server.
Deploy your Node.js app from GitHub or upload it as a ZIP
The quickest route is GitHub. Connect a repository, pick a branch, and we handle the build and deployment. After that, every push to that branch triggers a new deployment, so your live app always matches your latest code. You can pause auto-deploy, switch repositories or disconnect whenever you like.
Prefer not to use GitHub? Upload a ZIP of your source code and we’ll take it from there. You can link a repository later if you want automatic updates.
Every new project starts on a free temporary domain, so you can test it straight away. When it’s ready for real traffic, point a domain you own to it from the Client Area.
What comes with every project
Because your app runs on your hosting plan, it gets the same essentials as your websites. You can create MySQL and PostgreSQL databases right from Site Tools, and once the project is on your own domain, you can set up email accounts like hello@yourapp.com at no extra cost. Free SSL with HTTPS enforcement, protected URLs and traffic blocking are included with every project.
You also decide how your app is built. We preselect the settings that suit it, and you can change any of them: framework preset, Node version, package manager, build command, output directory and environment variables. Every deployment is logged with its author, branch, commit and full build output, so if a build fails, you can see why in a click.
Get started
In your account, each app is a Node.js Project. GrowBig includes 5, GoGeek 10, and Cloud as many as you need. A Node.js Project isn’t an add-on: it appears in your Client Area next to your websites and gets its own Site Tools, adapted for Node.js. Apart from the project count, it works like any other website on your plan when it comes to resources and features.
To add one, go to Client Area > Websites > Node.js Projects, add a project and choose GitHub or manual upload. Once it’s live on the temporary domain, you manage the domain, label and server details from the Client Area, and deployments, databases, security, email and statistics from Site Tools.
GrowBig includes 5 projects, GoGeek 10, and Cloud as many as you need. There’s nothing extra to buy, and you can upgrade your plan any time if you need more projects.
Do I need a GitHub account?
No. Connecting GitHub gives you automatic deployments on every push, but you can also upload your source code as a ZIP and we’ll build and deploy it for you.
What happens when I push new code?
If your project is connected to a repository, we detect the push to the linked branch, then rebuild and redeploy automatically. You can pause auto-deploy at any time.
Can I use my own domain?
Yes. Every project starts on a free temporary domain, and you can point a domain you own to it from the Client Area whenever you’re ready.
Are databases included?
Yes. You can create and manage MySQL and PostgreSQL databases for your project directly from Site Tools.
Does email work with Node.js Projects?
Yes, once the project is on a registered domain. Email accounts aren’t available on the temporary domain.
Can I host websites and Node.js apps on the same plan?
Yes. Node.js Projects run next to your WordPress sites and email on the same plan, and you manage them all from the same Client Area.
Key takeaway: The SiteGround Website and Ecommerce Builder now includes a built-in blog functionality, available at no extra cost for existing customers. You can add a blog page, publish posts and embed store products directly in them, with no plugins or separate platform needed.
Your SiteGround Website Builder or Ecommerce site can now have a voice. You can add a blog to it the way you’d add any other page. No new platform to learn, no plugins to install, no need to call a developer. Start publishing right inside the builder you already know.
Why add a blog? Because it gets you found.
Search engines love fresh content. So do all the AI tools that customers now ask for recommendations. Every post you publish is another chance for someone to discover your business: a question answered, a tip shared, a new product introduced.
The hard part is setting it up. It’s either a complex platform that takes real time and technical know-how to run, or a stripped-down tool that’s too limiting in terms of look and feel. With the SiteGround Website Builder blog, you finally get a blog that fits right into your site, with the flexibility you’d expect from a dedicated blogging platform and the simplicity of a page you already know how to build.
Make it look like you
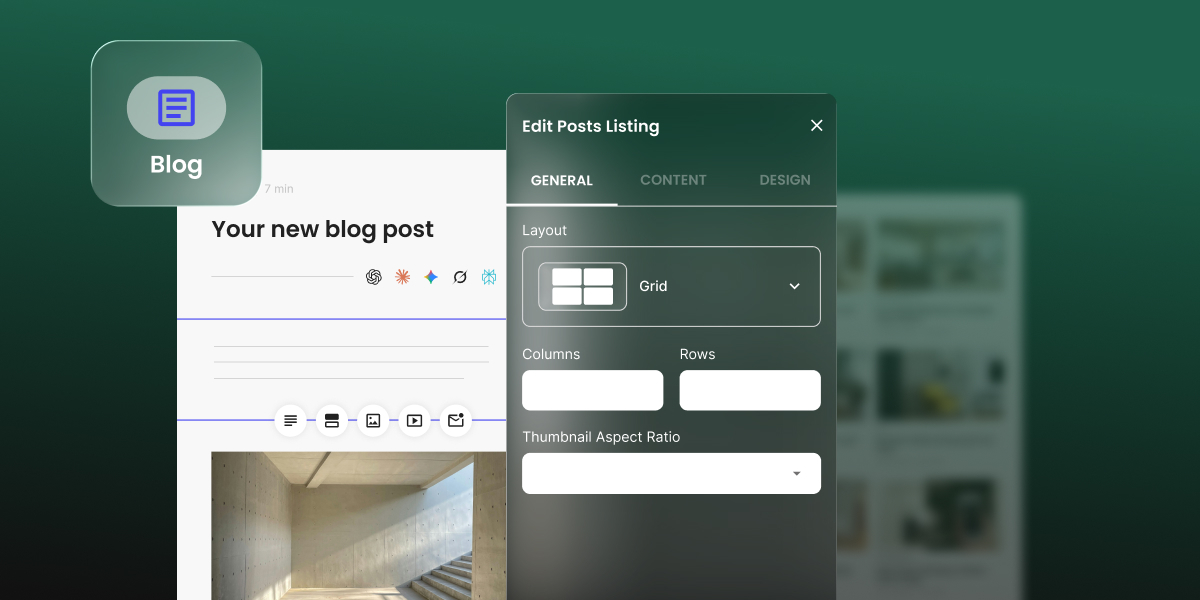
You can customize every part of your main blog page. Start with a template, then make it yours. Go grid or list. Pick your colors. Show three posts or thirty. Decide whether readers see images, categories, descriptions and reading time.
Want a showstopper at the top? Add a carousel and fill it with your newest posts, a favorite category or your personal hand-picked best.
Write your own way
Start from a blank page, or let the built-in AI writer draft your post for you. Either way, you’re in control. Edit the AI’s draft until it sounds like you, or write every word yourself.
Then bring your post to life with the tools you already use to build your website and ecommerce store pages. Text, images with captions, video, galleries, buttons, icons, contact forms, subscription forms and products from your site or store are all there, ready to drag in and style.
Turn every post into a sale
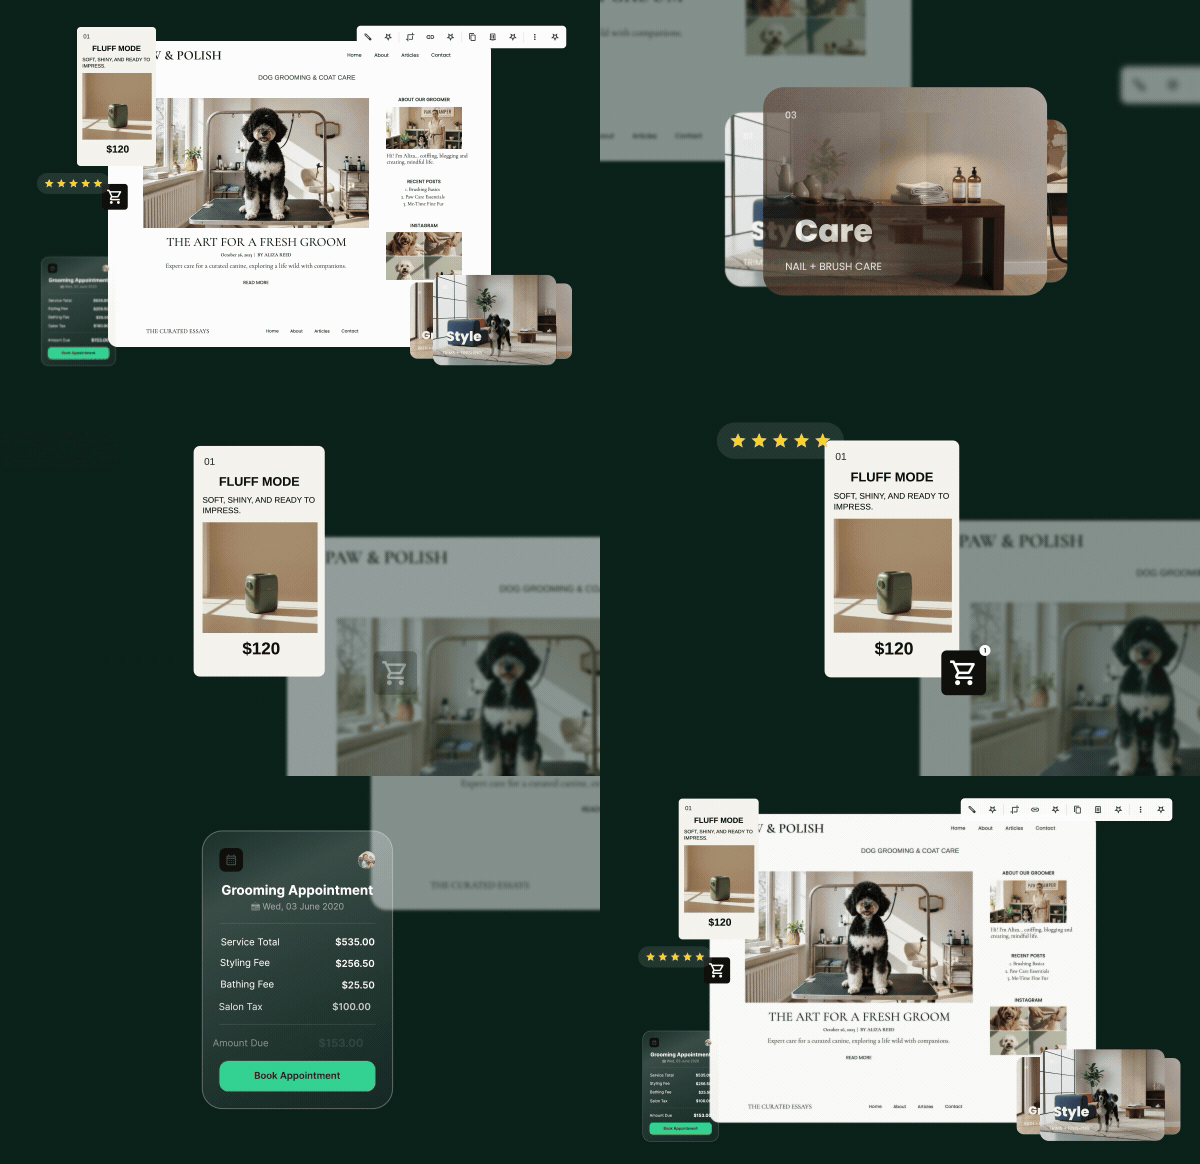
Yes, you can sell products directly from a blog post.Blog posts aren’t only for storytelling, they can be for selling. Writing about your new summer collection? Drop the actual products right into the post. Show one, a few or a full scrolling carousel. Choose the columns, the text and whether it autorotates.
Your readers go from “ooh, nice” to “add to basket” without leaving the page. Got a big launch or a seasonal sale? Pin that post to your blog’s carousel and put it front and center.
Built to be found and shared
A post is only as good as its odds of actually being found. That’s why each post comes with its own SEO title and description that you can edit directly, so you can tell search engines exactly what each post is about. You can also set a custom title, image, and description for social media, so your posts look sharp every time someone shares them.
Your first post is waiting
Open your SiteGround Website Builder or Ecommerce site, add a blog page and hit publish. Share your story. Show off a product. Post customers’ feedback, or answer the question your customers always ask. A blog brings readers back, brings new ones in and helps you turn them into customers.
If you’re already a SiteGround customer, you can add the blog feature to your existing Website Builder site, or start a new one completely free in an available slot in your hosting plan. If you’re new to SiteGround, you can try the SiteGround Website and Ecommerce Builder free for 14 days.
How to add a blog to your SiteGround Website Builder or Ecommerce site:
Open your site in SiteGround Website Builder or Ecommerce and choose Blog from the navigation menu.
Pick a template for your Post Listing page (your main blog page).
Customize the layout, colors, and post details.
Create your first post and click Publish.
Frequently asked questions
Does SiteGround Website Builder have a blog?
Yes. SiteGround Website Builder and SiteGround Ecommerce include a built-in blog as of September, 2026.
Can I sell products from a blog post?
Yes. You can embed a single product, several products or a product carousel from your SiteGround Ecommerce store directly in any post.
Do I need plugins or coding to add a blog?
No. You add the blog like any other page in the builder.
Is the blog available with any SiteGround hosting plan?
Yes. Every SiteGround hosting plan includes access to the SiteGround Website Builder, and the blog feature comes with it. If you’re running a WordPress site instead, you’ll use WordPress’s own blogging tools.
Can I edit SEO settings for each post?
Yes. Every post has its own editable SEO title and description, plus a separate title, image and description for social sharing.
You can now access and work with every code file behind a project built with Coderick AI. This sits alongside visual editing and chat prompts as another way to shape your project. We are rolling this out as a core capability inside Coderick AI, giving you more flexibility, control, and confidence in every project you create.
Edit your source code to shape any part of your project
Once Coderick has built your project, you can open the code and change anything you want. A small tweak in a component, an adjustment in layout, or a quick update after a review.
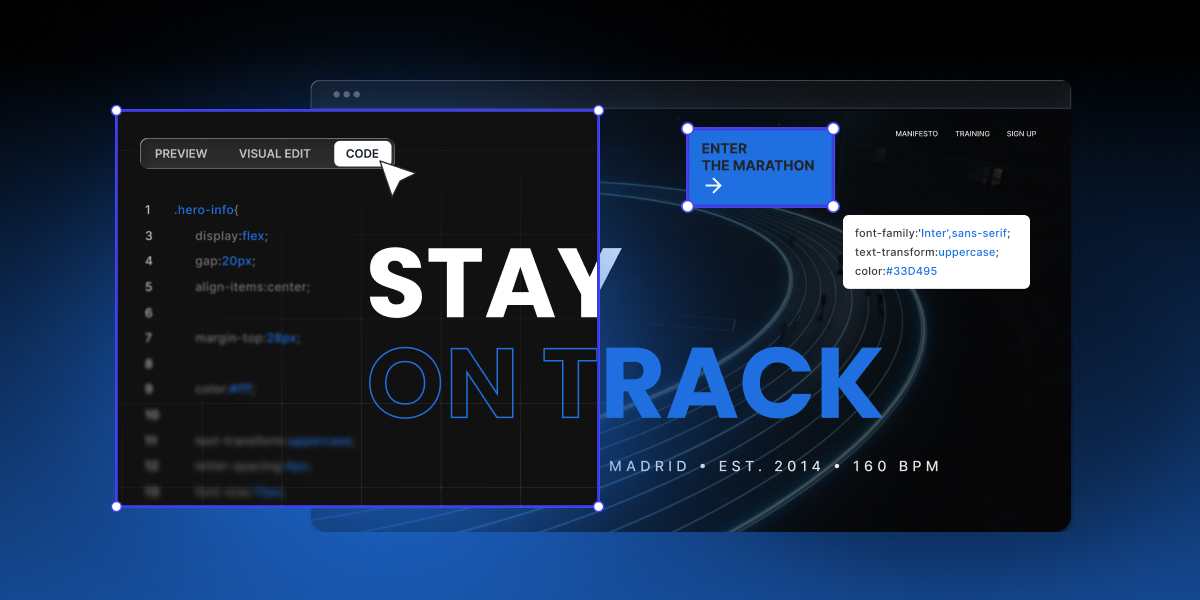
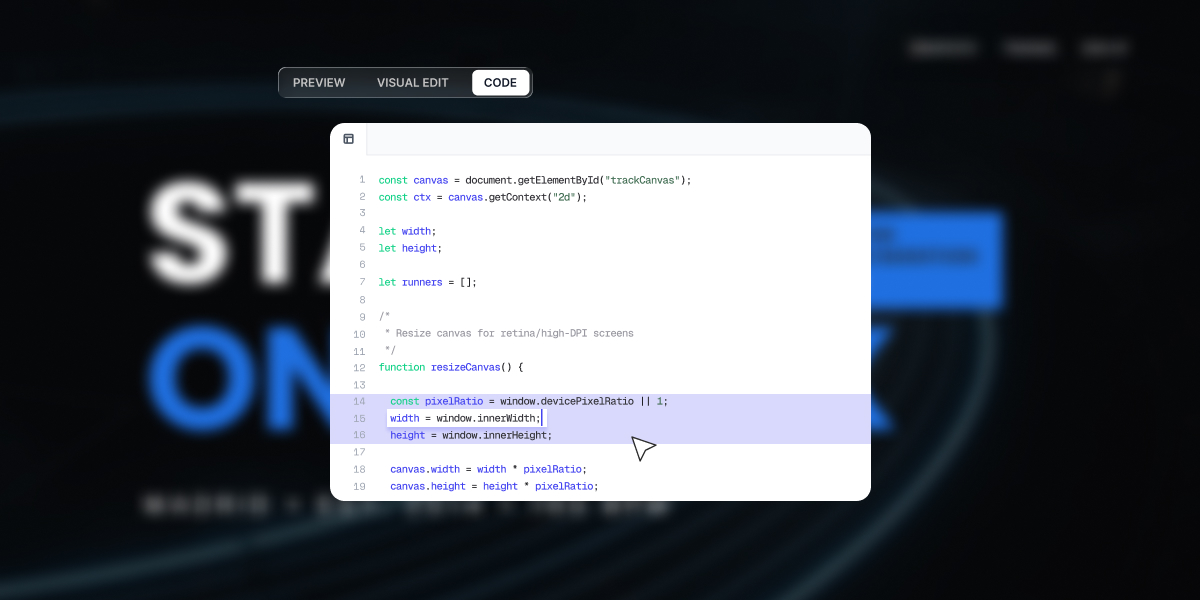
Now you can open the new Code tab on any Coderick project to read and edit the code, then save those changes back into your live version. Coderick AI still handles the heavy lifting, and you can use the Code tab to extend and customize the result as much as you like, from fine tuning details to adding your own components and adjusting how your project behaves.
Inside the Code tab you can:
Edit code manually in place, using the languages and structures Coderick already created for you.
Adjust layouts, styles, and logic, then click Save to apply your changes to the project once you are ready.
Discard the edits you made in your current session if you decide not to keep them.
Use familiar keyboard shortcuts like Control plus Z and Control plus Y for undo and redo, without adding extra buttons to the interface.
Edit code without using credits. Manual edits in the Code tab do not consume credits, which means small fixes can happen as quickly as you notice them, while you keep your prompts for other changes.
Point Coderick AI at one specific file
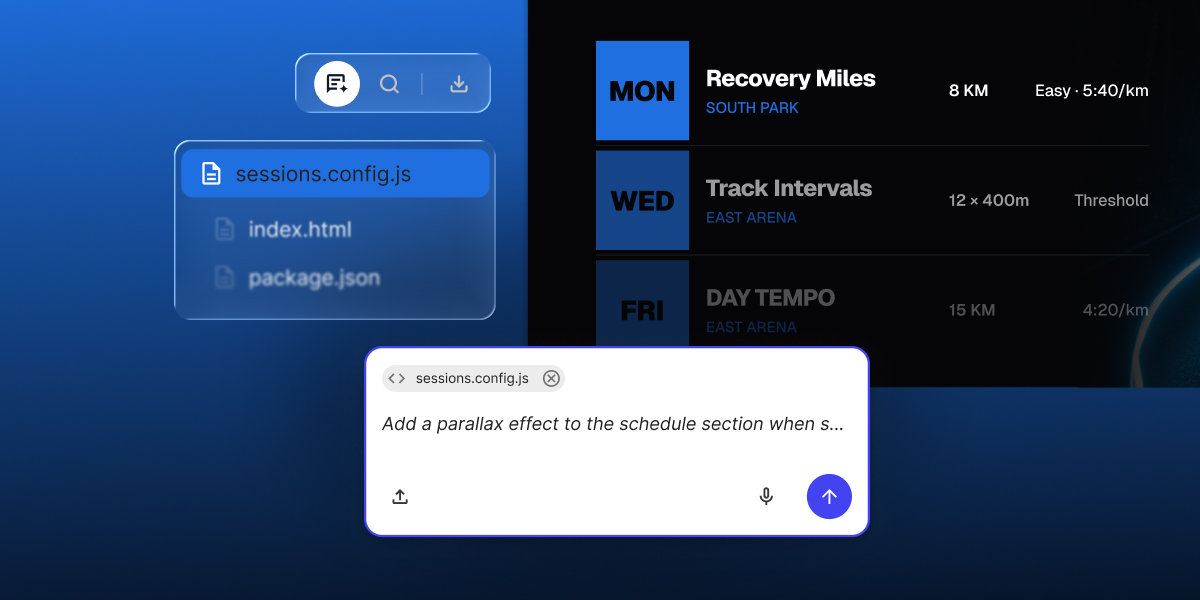
Sometimes you do not want a general change. Instead, you want Coderick AI to focus on one section. With this update you can reference any file directly from the code view in your chat, similar to how Visual Edit works today.
Pointing Coderick at a particular file does two important things:
It scopes the model to the context that matters, which improves the precision of edits and explanations.
It reduces the number of back and forth messages needed to get the change you want, which helps you use your credits more efficiently.
The result is a tighter loop. You mark the file, describe what you need, and Coderick responds with changes and reasoning that stay anchored in the right place.
Search project files across your whole build
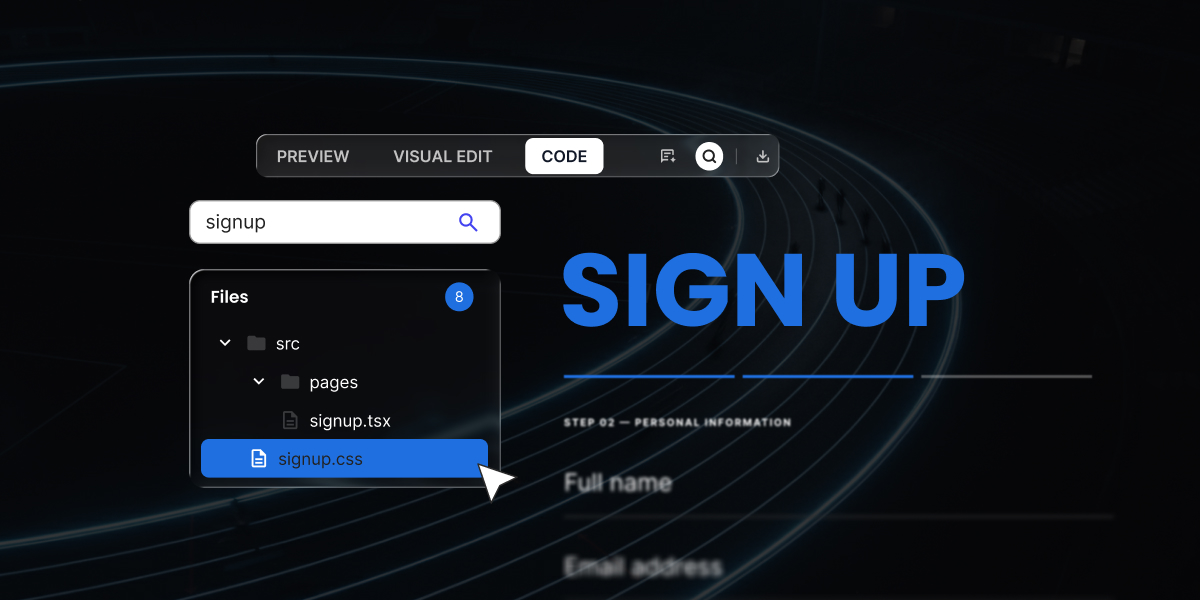
As your projects grow, the number of files grows with them. To keep things simple, the new view includes search that looks across your project tree and inside files at the same time.
You can:
Search project files by name and by the text inside them, in one step, using the search above the file tree.
Use a separate in-file search when you already know which file you need and want to jump to a specific snippet or selector.
This helps you navigate even large projects that Coderick has generated over multiple iterations. You get to the right place faster, without scrolling through every folder or scanning entire files by eye.
Download the source code of your whole project, or just one file
Sometimes you want to keep a copy of your work. With this new feature we give you a simple way to do that, whether you need the whole project or just one specific file.
Inside the Code tab you can:
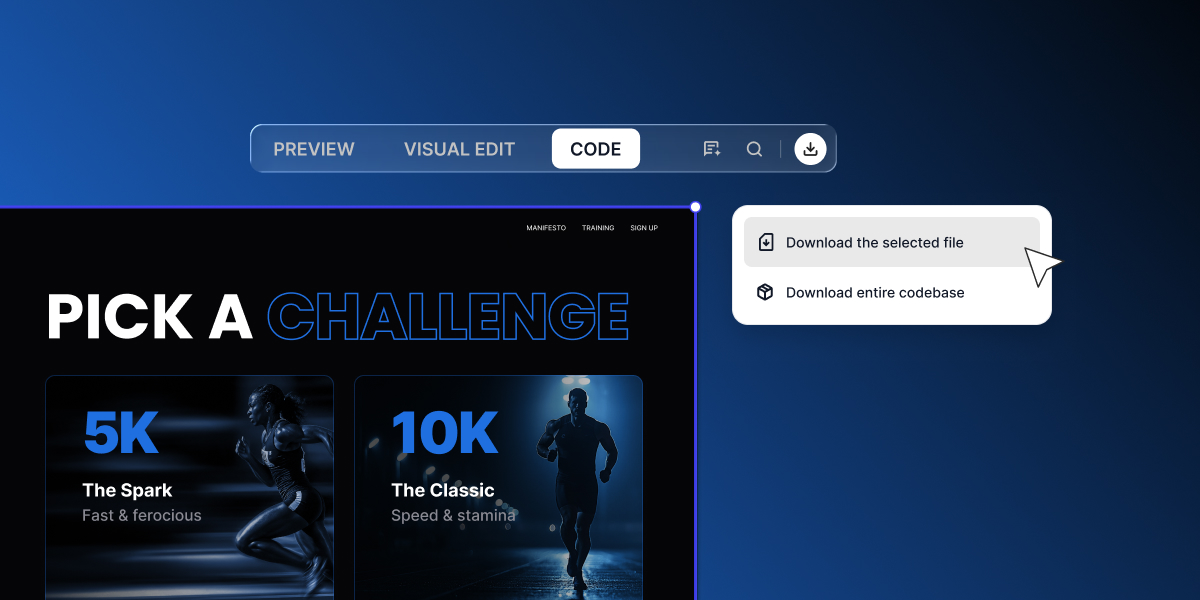
Download your source code for the entire project to review it locally, share it with teammates, or keep a snapshot of your progress.
Download a single file while you are viewing it, so you can quickly test, share, or reuse one specific piece of code without pulling down the whole project.
This gives you more flexibility in how you work with your projects day to day. Whether you are reviewing changes, collaborating with someone else, or keeping a local copy for reference, everything is just a few clicks away.
Your edits are safe to experiment with
Editing generated code can feel risky, so we’ve made it easy to explore without fear of breaking your project. Nothing is applied until you click Save, undo and redo are always one shortcut away, and you can Discard everything from the current session in a click.
Plus, you can always revert to a previous version with one click. The goal is simple: give you room to experiment, with a safety net underneath.
Build with prompts and code, together
You still describe what you want in plain language and watch your ideas become working projects. Now, if you like working on the code behind them, you have a place to do that too. If you are already building with Coderick, open your project and look for the Code tab.
If you have not tried Coderick yet, start a new project with a 14 day free trial and see how far a simple prompt takes you.
We will keep expanding the building experience so both non technical builders and experienced developers feel at home inside Coderick AI. If you have ideas or requests, we would love to hear them.
Frequently asked questions
What is source code access in Coderick AI?
Source code access lets you view and edit source code for any project you built in Coderick AI, right inside the new Code tab. You can adjust layouts, styles, and logic, download source code for the whole project or a single file, and make manual edits without touching prompts.
Can I edit my project’s code directly?
Yes. The Code tab gives you a built-in code editor where you can open any file, edit code in place, and save your changes back into the project. You can also point Coderick AI at one specific file so its next changes stay scoped to exactly the part you are working on.
Does editing the code cost credits?
No. You can edit code without using credits. Manual edits in the Code tab do not consume any, so small fixes happen as fast as you spot them, and your credits stay free for prompt-based changes.
Can I download my source code?
Yes. You can download source code for the entire project to keep a local copy, share it with a teammate, or hand it to a developer. You can also download a single file on its own while you are viewing it.
How do I find a specific file or line of code?
Use the search above the file tree to search project files by name and by the text inside them at the same time. There is also a separate in-file search for jumping straight to a snippet or selector once you know which file you need.
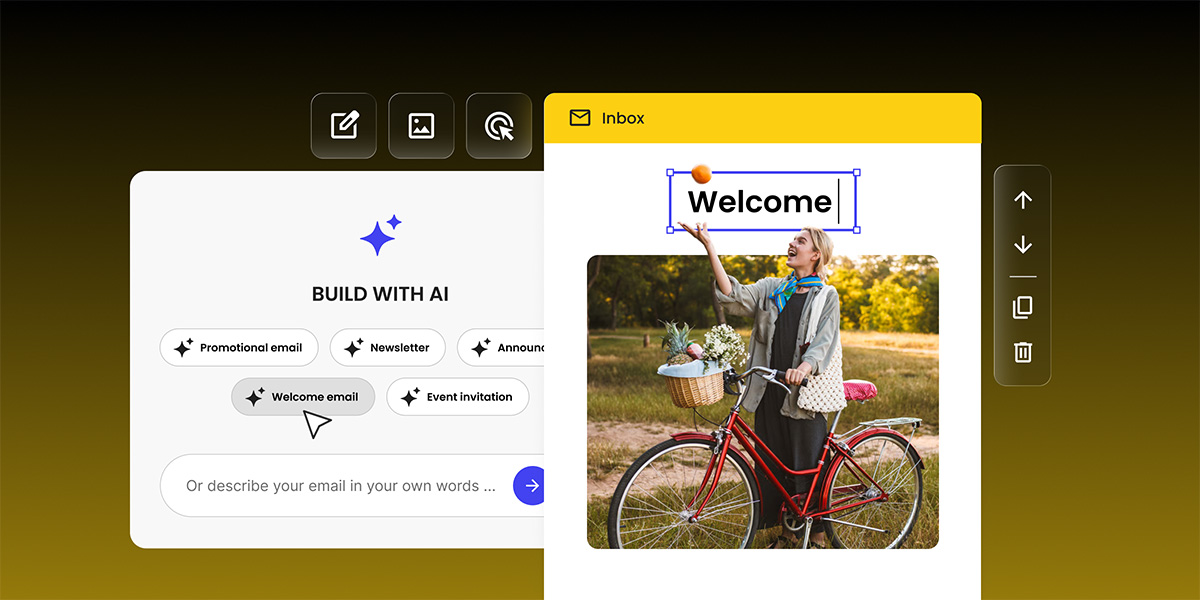
You can now generate a complete email with AI in SiteGround Email Marketing. With the new Generate with AI functionality you just describe your business and the email you want to send, and you get back a finished email, ready to edit in the email editor you already use.
The first draft is on the other side of a short conversation. Let’s see how.
What is an AI email generator?
An AI email generator creates a ready-to-send email from a short description of your business and your goal. Inside SiteGround Email Marketing, that means a draft with the subject line, preheader, and body already written and designed. It opens in the same email builder you use for every other campaign.
Getting AI to help with an email used to mean doing it in pieces. Add a section, ask the writer for a hand, generate an image, move to the next section, repeat. Every stop and start cost you time and pulled you out of your flow. Building the generator directly into Email Marketing puts writing and designing in one place, so a first draft takes minutes instead of an afternoon.
How does Generate with AI work?
Generate with AI turns a few answers into a finished email. You tell the AI assistant about your business and the message you want to send, or you start from a campaign type: Promotional, Newsletter, Announcement, Welcome, or Event invitation. It plays your answers back in a short summary first, and once you confirm, it opens a complete draft in the SiteGround email editor with the subject line, preheader, and body already in place.
How to use Generate with AI
When you create a new campaign or automation, you now see two ways to begin: Build with templates or Generate with AI.
Choose Generate with AI and a chat-style page opens. From there you have two ways in:
Start from a campaign type. Pick one of five presets, and the draft arrives shaped for that job.
Describe it in your own words. Tell the assistant what you want to send, in plain language, and it takes the lead from there.
Either way, the assistant may ask a few short follow-up questions to fill in the gaps. It works in whatever language you set for the campaign. Before it writes a single line, it plays your answers back in a short summary, so you always steer the direction.
Confirm the summary, click Generate, and you land in the familiar builder. From there you edit, design, segment, and schedule exactly as you always have.
Five campaign types to start from
The conversation starter you pick shapes both the structure and the tone of the draft, so it is worth choosing deliberately.
Promotional, for a sale, a discount, or a limited time offer.
Newsletter, for your regular update to a list that already knows you.
Announcement, for a new product, a new feature, or a change your customers need to hear about.
Welcome, for the first email a new subscriber gets from you.
Event invitation, for a webinar, a launch, or a workshop.
A promotional draft comes back with a clear offer and a direct CTA. A welcome draft comes back warmer, with an introduction to who you are. An event invitation puts the logistics near the top, because that is what people look for first.
Why this matters if you run a small business
Most small business owners have no shortage of email ideas. What they rarely have is the two hours it takes to turn one of those ideas into something that looks right in an inbox. The AI email generator gives that time back.
Describe your offer in everyday language, pick a starting point, and let the assistant build a complete email you only need to tweak. And because it asks about your business, your audience, your tone, and the look you want, the draft starts close to what you had in mind, which means the tweaking is quick.
It is just as useful when you want to explore. Run the flow again to try a different angle, test a new tone, or spin up a format you have not used before. You spend your energy on the message, the audience, and the results, not on the setup.
Where AI fits in your workflow
AI generated emails are most useful when you have a clear goal and a rough idea of what you want to say.
The AI email generator helps you structure those ideas, fill in missing details, and turn them into an on-brand email with subject line, preheader, and body.
For some campaigns you might still prefer to write everything by hand or start from a saved template. For others, especially recurring formats like newsletters or promotions, AI can help you produce a first version faster. You can also combine flows. Generate with AI for the first iteration, then refine the layout and copy manually in the builder.
How to create your first AI email
In SiteGround Email Marketing, go to Campaigns > New Campaign (or the Automation Builder).
Choose the Generate with AI card.
Add a campaign name, choose the language, and press Continue.
Start from a preset type or describe your email in your own words, then answer any follow-up questions.
Check the summary, edit anything off, and click Generate My Email.
Your draft opens in the Email Marketing Builder. Adjust, then Schedule.
If you already use SiteGround Email Marketing, there is nothing to install and nothing to set up. The next time you create a campaign or automation, choose Generate with AI and follow the conversation. Try it on your next newsletter or announcement and see how much time it saves.
New to SiteGround Email Marketing? Start for free and let your first campaign write itself.
It works as a short guided conversation. You describe your business, your audience, the goal of the email, and the tone you want, then pick one of five campaign types. The assistant summarizes your inputs, and once you confirm, it writes the subject line, preheader, and body into the email builder.
Can I edit an AI generated email?
Yes. The generated campaign opens in the standard SiteGround email builder, where every element is editable. Most people treat the output as a first draft and adjust the copy, the layout, and the images from there.
Does it write in languages other than English?
Yes. The assistant follows the language of the campaign or automation you set up, so the draft comes back in that language.
Do I need to install anything?
No. The Generate with AI option appears in the New campaign dialog and in the Automation Builder for existing SiteGround Email Marketing users, with no plugin, add-on, or change to your setup.
Does this replace the template builder?
No. Build with templates and the manual builder stay exactly as they are. Generate with AI is an additional starting point that you choose per campaign.
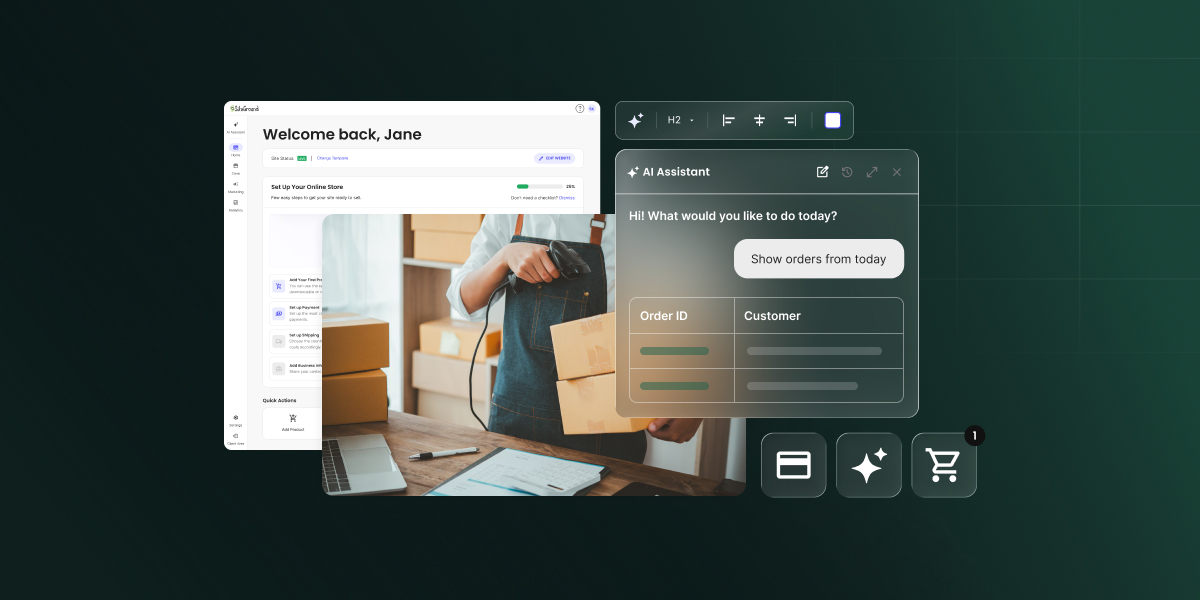
Your online store just got а new team member – the built-in AI Store Agent. It smartly analyzes your store data and answers any question about it in seconds. What is more, it can also execute real tasks for you – from creating coupons to bulk-editing your entire catalog on a single command. Learn what the AI store agent can do for you.
What is the AI Store Agent?
The AI Store Agent is an AI-powered analyst and store manager built into SiteGround Ecommerce. Ask it a direct business question, like which products deserve more promotion, whether your prices hold up within a category, or which customers keep coming back, and it digs through your orders, products, categories, customer accounts, reviews, coupons, brands, and attributes to give you an answer you can act on. Not a data dump or a link to a report. An answer, the way an analyst on your team would deliver it, so you can make the decision and move on.
And it doesn’t stop at analysis. The Agent executes too: it creates and manages products, coupons, and more, right from the same conversation where you made the call. Because it’s powered by AI rather than a fixed set of buttons, you’re not limited to a menu of preset commands. You describe what you need in plain language, and the Agent figures out how to get it done.
You’ll find the AI Store Agent in the Store section of your dashboard, which got upgraded so you can click less and do more, and keep your new assistant within a click’s reach. No setup, no configuration, no plugins. Open the chat and put it to work.
Get answers that drive decisions
Every store decision starts with a question. Should you reorder products? Is that promotion worth repeating? Are prices in that category too low? The answers were always in your store data, but getting to them meant reports, filters, and spreadsheet exports. Now you just ask, in plain language, the way you’d ask a colleague:
What’s my top performing product this month?
What’s the average price of products in the Accessories category?
How many orders came in last week compared to the week before?
Which coupon was used the most in the last 30 days?
Which of my products don’t have any reviews yet?
List the customers who placed more than one order this quarter.
Each answer feeds a real decision. Your top performer tells you what to restock and feature on your homepage. The category price average tells you whether a new product is priced to compete. The coupon comparison tells you which promotion to run again and which to retire. Products without reviews are your next follow-up email campaign. And because the answers take seconds instead of an evening, you make these calls while they still matter, not weeks later when the moment has passed.
Switch on ‘Power Mode’ and delegate the work
Insight is only half the job. With Power Mode enabled, the AI Store Agent goes from telling you what’s happening in your store to doing something about it. It can create and manage products, coupons, customer accounts, brands, and more, straight from the same chat:
Create a 15% off coupon for orders over $50, valid until the end of August.
Add a new product called “Linen Tote Bag” priced at $39 in the Bags category.
Create a brand called Aurora and assign it to my outdoor products.
The decision and the action happen in one place. You spot that a promotion worked, and in the next message you launch the follow-up. The coupon setup before every campaign, the product updates you keep postponing: they become one-line instructions.
Bulk edits: one instruction, your whole catalog
Where Power Mode really shines is the repetitive work. So much of running a store is the same small task multiplied across dozens of products: the same price change, the same description tweak, the same formatting, over and over. In a traditional dashboard, that’s an evening of clicking. With the Agent, it’s one sentence:
Reduce the price of all products in my winter collection by 10%.
Add “dishwasher safe” to the descriptions of all products in the Kitchen category.
Import these products to my store.
The Agent applies the change across every matching product, so a fifty-product update takes the same effort as a one-product update. That’s hours back every week to spend on the parts of the business only you can do.
Power Mode is off by default and you decide when to turn it on. To enable it, open your AI Store Agent Settings and switch on Power Mode. You can toggle it off again at any time, so you’re always in control of whether the Agent can make changes to your store or simply report on it.
Included with your plan, powered by AI Studio tokens
The AI Store Agent is available on the Sell, Grow, and Scale plans of SiteGround Ecommerce at no extra cost. It runs on the same AI Studio tokens you already have as a SiteGround customer, and every SiteGround customer gets 20,000 AI Studio tokens included with their account. Your new worker is already on the team. No hiring, no salary, no onboarding.
How to put it to work
Log in to your SiteGround Ecommerce dashboard and take a look around the new layout.
Go to the Store section and open the AI Store Agent.
Ask your first question, ideally one you already know the answer to, and put it to test.
When you’re ready to delegate, open AI Store Agent Settings and enable Power Mode.
Your store’s smartest hire
Every tool we add to SiteGround Ecommerce has to pass one test: does it give you back time to grow your business? The AI Store Agent passes it twice. It answers the questions that drive your decisions, and it carries out the work those decisions create, all from a chat inside your new dashboard. And since we keep teaching it new skills, the worker you meet today is the least capable it will ever be.
The new dashboard and the AI Store Agent are live now. Log in, ask your store a question, and see what it comes back with.
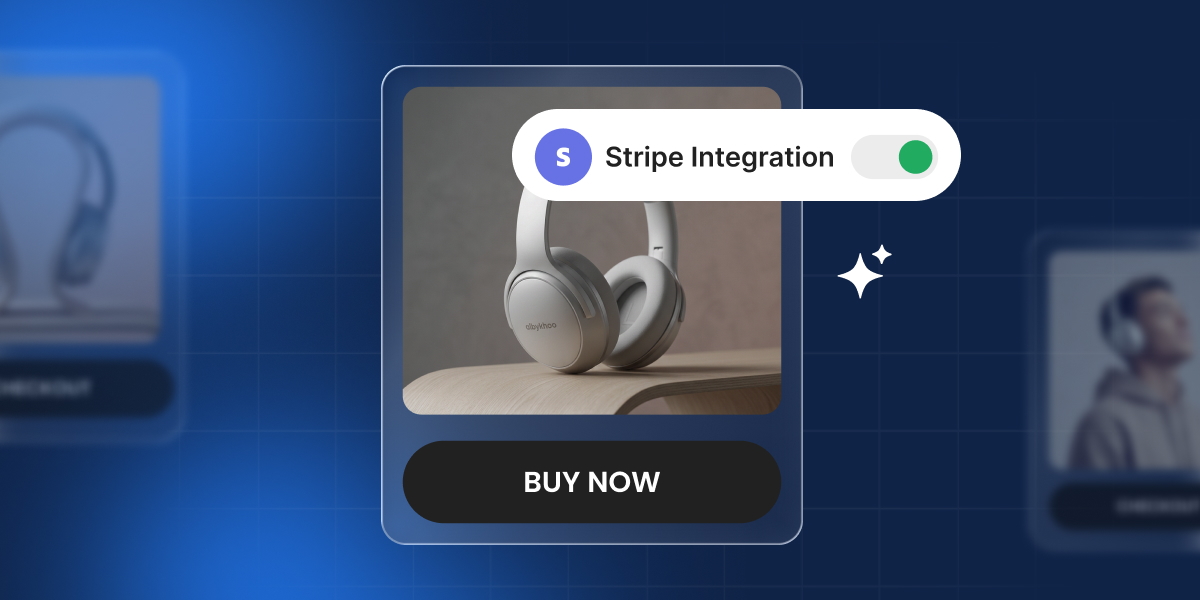
You can now add a Stripe checkout to anything you build with Coderick AI, easily and right in the chat. Your shop, your app, your booking page: they can all take online payments, through a checkout your customers already trust.
Tell Coderick what you want to charge for, connect your Stripe account, and you’re ready to start selling online.
What you get with Stripe in Coderick AI
Accept one-time or recurring payments
Connect your new or existing Stripe account, easily
Generate Stripe checkout flows and payment links from your Coderick’s workspace
Works with all Coderick AI paid plans
What is Stripe?
Stripe is one of the most trusted, versatile and widely used payment providers in the world, and it now works directly inside Coderick AI. It handles card payments, digital wallets, local bank methods, and subscriptions, and is used by millions of businesses to securely process payments every year.
In practice, Stripe takes care of the secure checkout, card data handling, and fraud checks, then the money from each sale lands in your Stripe account. That’s why it’s a natural fit for Coderick AI: Coderick builds the site, app and the sales flow, and Stripe is the trusted layer that actually collects the payment.
What you can sell with Coderick AI and Stripe
Sell your work – physical and digital products
Maybe you’re a ceramicist taking orders for a batch of mugs, or a photographer selling prints. You tell Coderick what you’re selling and what it costs, and it builds the online store and sets up the checkout through Stripe.
Get paid for the app you built
You built something: a planner, a habit tracker, a small CRM. Right now anyone can use it for free. Ask Coderick AI to add payments to the app you built: before someone can use the app (or unlock the full version), they go through a Stripe checkout and pay. Once they’ve paid, they get access. So the app you made on weekends starts bringing in money instead of just sitting there for free.
Charge for your services
Charge for work you already do: a consultation, a coaching call, a photo shoot, a freelance job. The same site that shows your work can now collect the payment for it, so you’re not sending a separate payment link by hand after every job.
Sell subscriptions and memberships
A single sale is nice, but a subscription is income you can count on every month. You can set up a membership, a yearly plan, or ongoing access, and Coderick AI builds it. Then ask Coderick to set up payment flow through your Stripe account.
One integration, many online payment methods
Whatever you’re building, getting paid is now part of the same conversation. Connect your Stripe account to your Coderick project, and your site or app can start taking online payments, one-time or recurring. That gives your customers a wide range of ways to pay, and the most widely used include:
Payment type
Examples
How it works for your customer
Credit and debit cards
Visa, Mastercard, American Express, and more.
The most common way to pay online, accepted in most countries.
Digital wallets
Apple Pay, Google Pay, Link, and more.
One-tap checkout using a card already saved on a phone or browser, with no card details to type.
Buy now, pay later
Klarna, Clearpay, and more.
The customer splits the cost into instalments, while you’re still paid in full upfront.
Local bank methods
iDEAL (Netherlands), Bancontact (Belgium), BLIK (Poland), and more.
The customer pays straight from their bank account using the option they know in their country.
Availability depends on your setup and your customer’s country. Apple Pay, for example, requires verifying your domain in your Stripe account first. Others, like Klarna, are only available in certain countries. Check Stripe’s documentation for the specifics on each.
Stripe decides which methods to show, based on the customer’s location, the currency, and what your account is set up to accept. The same checkout can offer different options to customers in different countries.
Secure checkout, handled by Stripe
If you’ve ever thought about selling online, you’ve probably had the worry: what actually happens to my customers’ card details? Could my website and I take such a responsibility and what are the security risks?
When enabling Stripe payments for your website or app, the payments don’t go through your web pages and full card details never touch your site . When a customer pays, they do it on Stripe’s own secure checkout page. Their full card details go straight to Stripe and never touch your site or the code behind it. Stripe is one of the most trusted names in payments, so the page your customers see is one they already recognise and feel safe using.
How to set up Stripe in Coderick AI?
Getting set up takes a few clicks:
Tell Coderick what you want to sell, in plain language (“let people book a paid consultation,” “sell access to my online course”).
Coderick builds your site or app, then shows a Stripe connection card in the chat. Click Connect. (You can also connect any time from the Integrations menu.)
Copy a key from your Stripe account’s dashboard and paste it into the connection dialog. (Here’s how to create your key. It only takes a couple of clicks.)
Coderick builds the full checkout for you: your products, payment links, and confirmation page, all from what you described.
That’s everything on your end. For the exact step-by-step, including how to create your key and go live, see the full guide: How to integrate Stripe in Coderick AI.
From here, it’s you and your customers
The building was never the hard part, getting paid was. Wiring up payments has always been the stark opposite of the free-flowing nature of vibe coding: weeks of setup, not minutes, before a single customer could pay you. So a lot of great work stayed as a side project: your app, your tool, something you built but never quite turned into a business.
That’s what changes here. You describe what you’re selling, Coderick AI builds the checkout in seconds, and what you made goes from idea to first paying customer in one conversation. The moment real people start paying for it — not a paycheck, not a client assignment, but strangers choosing to buy something you created — it stops being a prototype. It’s a real product.
It’s a feeling that’s genuinely hard to put into words. Whether you call yourself a non-technical founder or a vibe coder, this is the moment it was all for — your side hustle becoming your main hustle. From here, it’s just you and your customers.
Ready to start selling?
If you’ve already built something on Coderick AI, this is the piece that turns it into a business. Open your project, tell Coderick what you want to sell, and connect Stripe.
If you haven’t built anything yet, now’s a good time. Describe it, host it, and get paid for it, without leaving the chat.
Yes. You connect your own Stripe account If you don’t have one yet, you can create it directly on Stripe’s site, then connect it to your Coderick project.
Can I use Coderick AI and Stripe without writing code?
Yes. Payments are processed by Stripe, one of the most trusted payment providers in the world. Your customers’ full card details go straight to Stripe’s secure, certified checkout and never touch your site or your project’s code.
What can I sell?
Both one-time and recurring payments: physical products, digital downloads, services, bookings, and subscriptions.
Can I sell subscriptions?
Yes. You can set up recurring payments for things like a membership or ongoing access. One important step if you do: ask Coderick to build a subscription management area into your site, where customers can pause or cancel their plans. Without it, someone could subscribe with no way to cancel. You’ll find more on setting up the customer experience after purchase in our full guide.
Can I test it before taking real payments?
Yes. Connect your Restricted Key in test mode (it starts with rk_test) and run through the whole buying flow yourself, with no real charges. When everything looks right, swap in your live key (rk_live) from the Integrations menu and you’re ready to take real payments. Our full guide shows you how to create and connect your Restricted Key.
How are taxes handled?
You can enable Stripe Tax, a paid add-on in your Stripe account, to automatically calculate and collect the right tax rate at checkout. Setting it up and staying compliant is your responsibility as the seller.
How do refunds work?
You can ask Coderick to build an admin dashboard into your project and process refunds yourself, as long as your Restricted key has refund permissions enabled (they usually are by default). To confirm a refund went through and see the full record, check your Stripe dashboard.
Where do my customers pay?
On Stripe’s secure checkout. When a customer clicks to buy, they’re taken to Stripe to pay, then sent straight back to a confirmation page on your site.
Running a small business means wearing every hat: designer, marketer, accountant, shipping department. Website troubleshooter shouldn’t be one of them. So every time we update the SiteGround Website Builder, the question is the same: does this actually make your day easier? This latest batch does, across shipping, marketing, and everything in between.
Professional shipping, without the headache: introducing our Shippo integration
Shipping is one of those things that sounds simple until you’re actually doing it. Which carrier? What rate? Did you overcharge and lose a sale, or undercharge and eat the cost? It adds up fast.
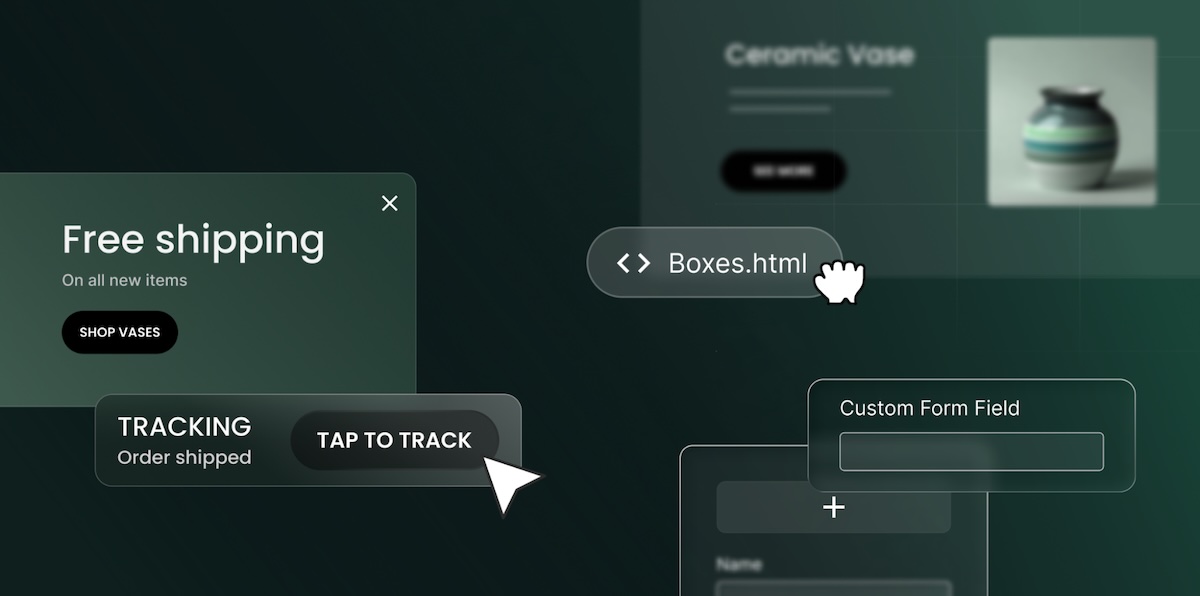
With our new Shippo integration, those decisions get a lot easier. Your customers see live shipping rates at checkout, calculated in real time based on package size, weight, and destination. Behind the scenes, you get access to discounted rates from 16 carriers, including FedEx, UPS, USPS, DHL, and Royal Mail, across 49 countries.
And when an order is ready to go, generating a label takes a few clicks. The tracking number goes to your customer automatically, and the order status updates itself. No copy-pasting, no chasing down confirmations.
For anyone shipping products regularly, this is the kind of update that quietly saves hours every week. Note that the Shippo integration is available on Grow and Scale plans.
Engage visitors when it counts with popups
Sometimes the most effective message is the one that shows up at exactly the right time. The new popups feature lets you build and display targeted messages directly on your storefront, no code needed.
You control who sees each popup and when: set time-based or scroll-based triggers, define reappearance frequency, and target specific pages, categories, or products. Toggle any popup between Active and Inactive at any time.
Creating and editing popups is available on all plans. Setting a popup to Active requires a Trial or Scale plan.
Pull your sales data whenever you need it
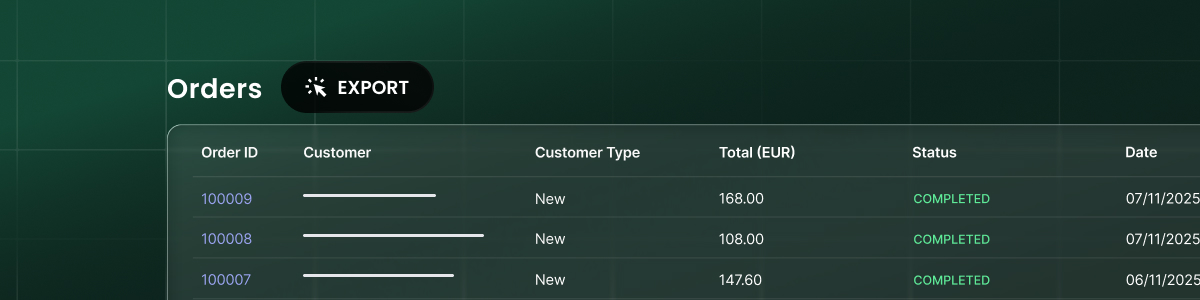
Tax season, a monthly reconciliation, a gut-check on last month’s numbers. Whatever’s prompting it, digging through orders one by one is nobody’s idea of a good time. Now you don’t have to. Export your orders as a CSV, filtered by date range and order status, and you’ll receive an email with a download link once it’s ready.
Make your site look exactly how you want it to
When you need something the builder doesn’t have out of the box (say, a booking calendar, a launch countdown, a specific embed) the new custom code component lets you drop in HTML, CSS, JavaScript, iframes, or Markdown directly onto any page. No developer needed, and nothing else on your site is affected.
Collect the right information
A generic contact form gets generic responses. But a form built for your business gets exactly the responses you need. With that goal in mind,custom form fields let you add short and long text, email, dropdowns, radio buttons, checkboxes, and dividers to any contact form. Whether it’s a client intake, a quote request, or a signup, your form works the way your business works.
Move elements faster
Reorganizing a layout used to mean moving elements one by one. Now, multi-component select lets you grab multiple elements at once and move them together. Small change, big difference when you’re deep in a redesign.
Built for you and with you
Every one of these updates came from listening to you: your feedback, your frustrations, and the things that were taking longer than they should. Building a professional website or running an online store should be something anyone can do, without needing a development team or a logistics department behind them. These updates make that happen, and there’s a lot more to come.
Building with Coderick AI is really amazing. You describe what you want, and Coderick AI builds it for you. That works beautifully when you’re starting from an idea. But sometimes you’re not. Sometimes you already have something done elsewhere that you wish to reference or use.
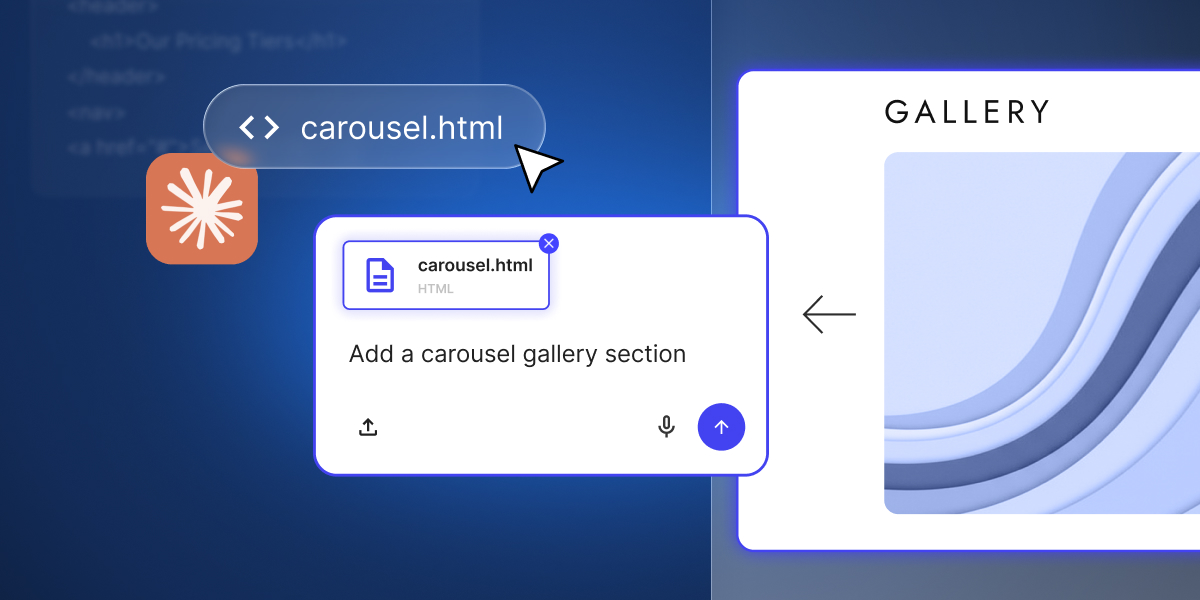
Maybe you prototyped a layout with Claude Design and you want it as your homepage. Maybe a Claude artifact got you close on a component and you just need it inside a live, hosted project. Maybe you found an HTML template that’s almost right, and you’d rather hand the file over and request a few changes, than describe it from scratch in three paragraphs.
That’s what file uploads in Coderick AI are for.
Build on top, not from scratch
Use the file upload functionality as a starting point and prompt Coderick to work with it. Add new sections to a homepage layout you’ve uploaded. Turn a single page into a multi-page site. Wire up functionality around a static design.
Coderick builds on top, adds new elements, improves your draft, and finalizes the project, instead of starting from scratch. You save time, credits, and enhance the value of the work already done.
Keep your own styles
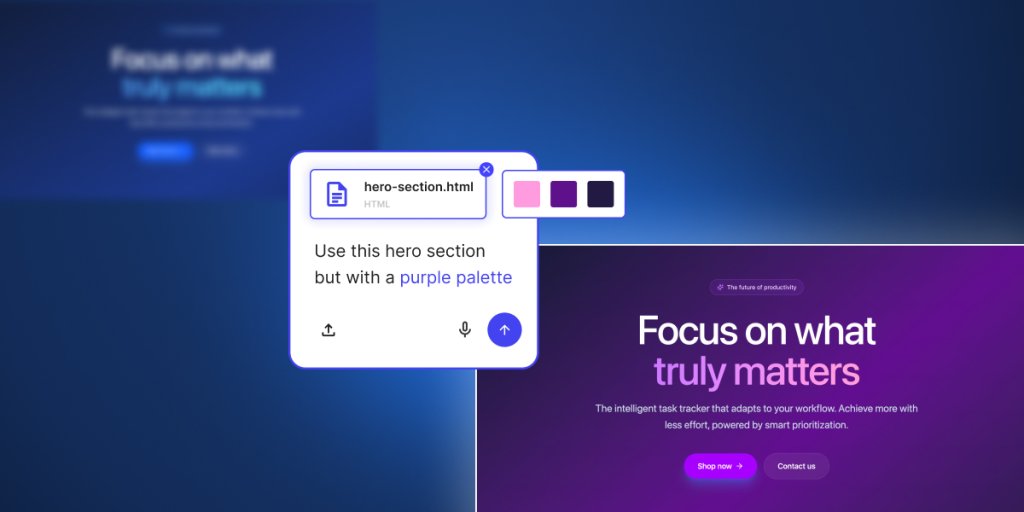
You can tell Coderick to apply a file directly. Your uploaded HTML becomes the basis for your homepage. The styles you uploaded get used across the project. Coderick reads the source and rebuilds it inside your project – your structure, your styles, your specific elements.
Before, you needed to describe any existing work you’ve done with words – the spacing, the columns, the hover effects, any visual element you care for. And anyone who’s tried to describe design specifics to AI knows how that usually goes: you get something that’s 80% of what you wanted, and the last 20% is a long fine-tuning through follow-up prompts.
Push your work live faster
Uploading your files to Coderick AI turns your work in progress into a live project faster. You save the time you’d spend re-prompting what you’ve already built, and put it into turning the design into a real, live site or web app.
What file types Coderick AI supports
Coderick AI accepts the text-based file types you’re most likely to already have:
You can upload up to 30 files at once, with a combined size of 500kB. Image uploads stay separate and support up to 10 images.
Getting the most out of file uploads
File uploads give Coderick more to work with, but how you use them shapes the result.
You still need to be specific: “Apply this design as the homepage” beats “use this file” every time – Coderick reads what you upload, but it still needs you to say where the file goes and what role it plays.
Upload all relevant files together: If your design is split across an HTML file and a CSS file, upload them together so Coderick gets the full picture.
Clean your files from unnecessary elements: A quick check on your source files before uploading is worth the time: unused styles, leftover comments, and wrapper code from other tools can all get mistaken for intent. Cleaner files in, cleaner work out.
One thing worth knowing – file uploads aren’t a way to import a full project (yet). They’re for the specific files you want Coderick to focus on: a page, a component, a stylesheet. Pick the parts that matter, and let Coderick start there.
Go to Coderick AI and drop in what you already have – a Claude export, a template, or a component you’ve been refining. Build from there.
If you’ve been building with Coderick AI, you know the drill: describe what you want, and Coderick AI builds it for you. It’s fast, it’s intuitive, and it works. But once your project starts taking shape, not every change needs a full prompt. Sometimes you just want to fix a typo, swap out an image, or adjust a button color – and you want to do it now, not through another round of back-and-forth with the AI.
That’s exactly why we built Visual Edit in Coderick AI.
Click, change, done – that’s Visual Edit
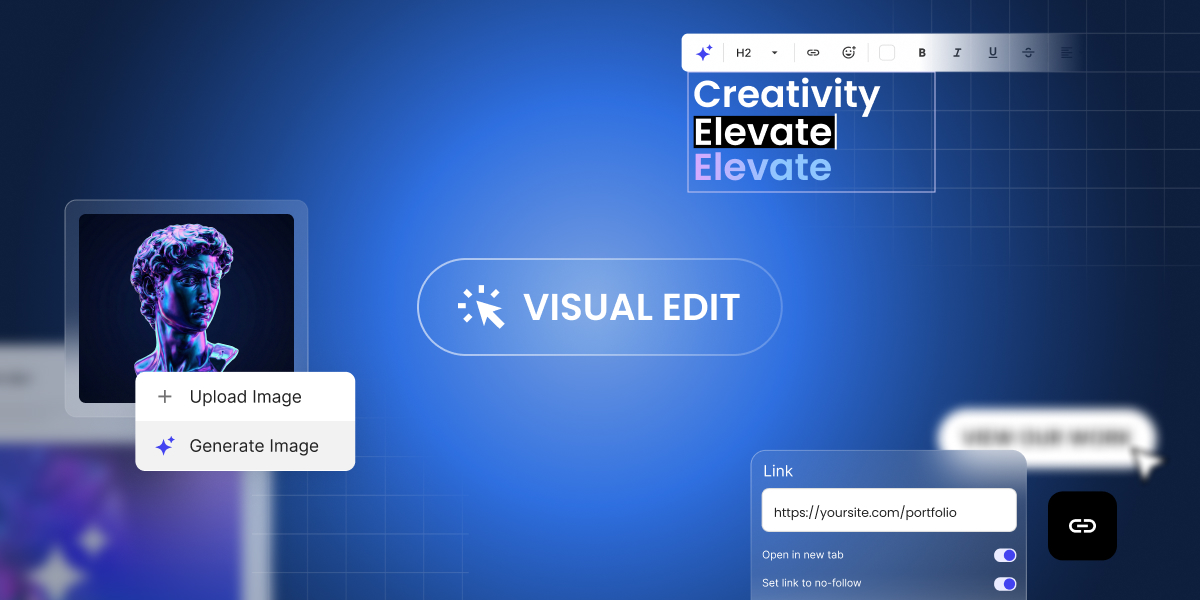
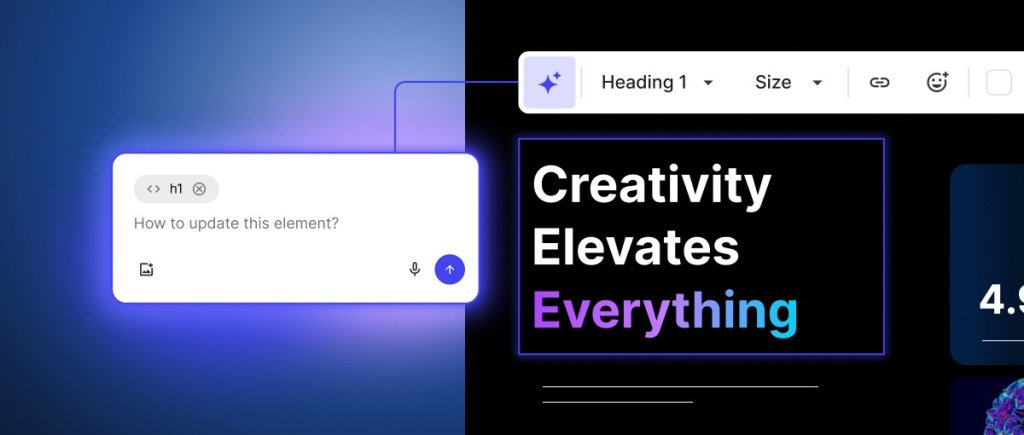
Visual Edit is a new way to make changes to your Coderick AI projects – directly in the preview, with a click. Instead of going to chat and writing a new prompt every time you want to tweak something small, you can now click on any text, button, image, link, or section and change it on the spot.
Update a headline. Fix a typo. Change a button label. Swap a link. Adjust a color. All of it happens right where you see it, with no prompt needed – and zero credits used.
It’s the kind of editing that feels obvious once you have it – and frustrating to live without once you’ve tried it.
Generate images with AI, right where you need them
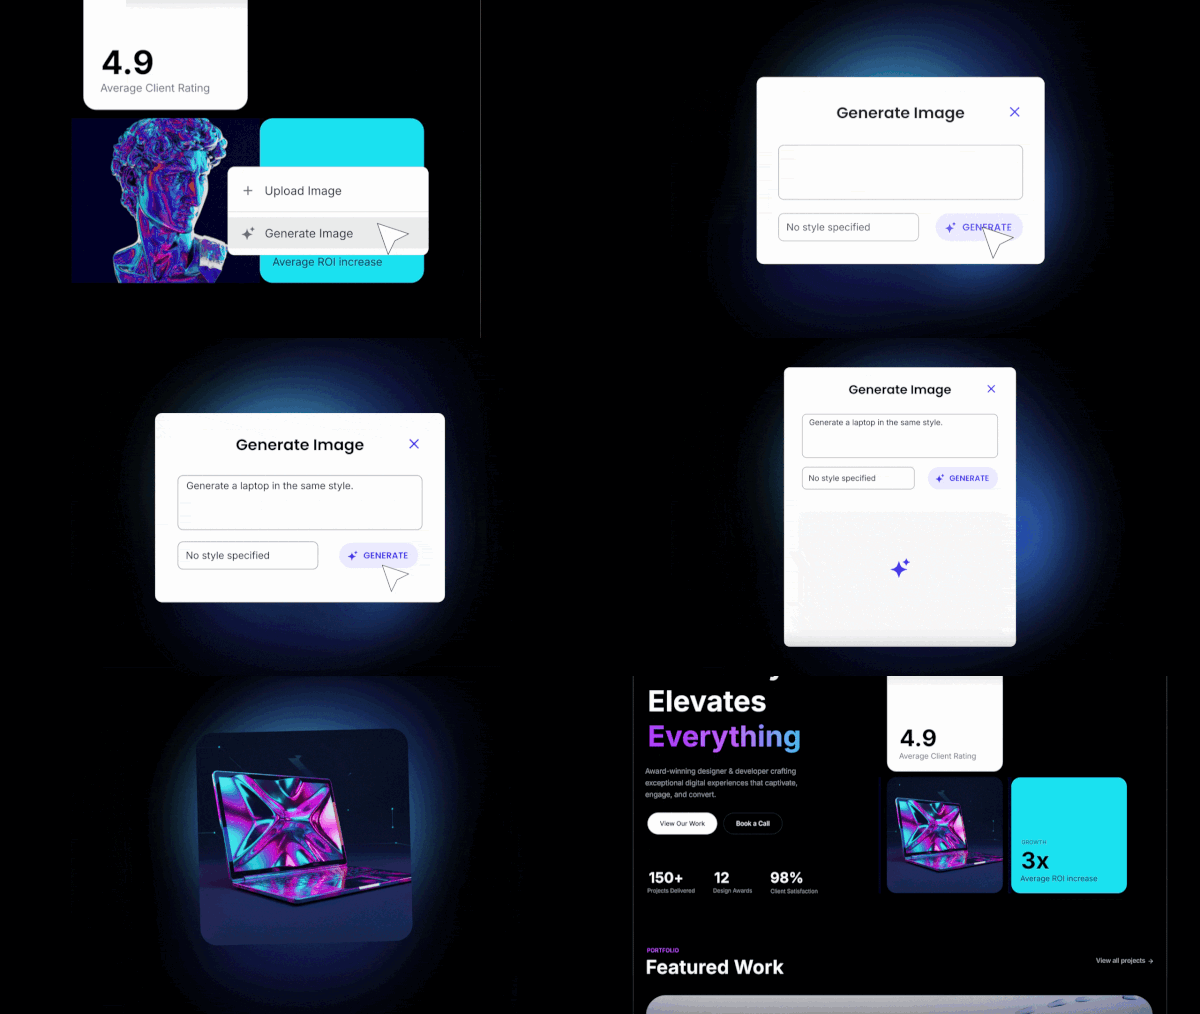
Building a project usually means you’ll need images – and until now, that meant leaving Coderick AI, finding or creating an image somewhere else, and uploading it back. With AI image generation in Coderick AI, you can now click on any image in your project, generate a new one with AI, and swap it in on the spot. Review it in context and move on – no extra tools, no context-switching, no manual uploads.
And if you already have the right image for the spot, upload and replace it directly. This action doesn’t need AI and costs you zero credits.
Transform sections or update elements at scale with focused AI edits
Some changes go beyond a quick text swap but don’t need a full project prompt either. Maybe your pricing section needs a completely different layout. Or the navigation bar of your site needs a different design direction. These aren’t small tweaks, but they’re not “build me a new page” territory either.
That’s what focused AI edits in the Visual Edit are for. From Visual Edit, select a section or an element, and click Edit with AI. The Coderick AI chat locks onto your selected element – describe what you want changed, and the AI reworks just that part. The rest of your project stays exactly as it is.
The difference from the main Coderick AI chat is simple: the chat is for full-project work like adding new pages or making structural changes. Focused AI edits are for when you already know what needs to change and you just need the AI to do it, precisely, in that one spot or section. Shorter prompts, no unintended side effects, better results.
Save credits for the work that matters
Not every edit needs AI, and now, not every edit costs credits. Quick edits through Visual Edit use zero credits. Your balance stays untouched for the work that actually needs AI – generating new sections, reworking layouts, or creating images. And when you do use Edit with AI, it targets only the section you select, so you get more precise results with fewer credits per edit.
Here’s how credits work:
What you’re doing
How
Credits
Edit text, buttons, links, colors
Visual Edit (direct click)
Zero
Swap or upload your own images
Visual Edit (direct click)
Zero
Generate an image with AI
AI image generation
Uses credits
Rework a specific section
Edit with AI
Uses credits (section-level, not full project)
Build something new from scratch
Chat prompt
Uses credits
How to use Visual Edit?
Getting started takes seconds:
Open any project in Coderick AI.
Click the Visual Edit button to switch from the chat-based builder to the visual editor (preview editing).
Click on any element in your project preview – text, buttons, images, links – and edit it directly.
To generate an image, click on an existing image and use the AI image generation option.
For bigger changes, select a section and choose Edit with AI to rework it with a targeted prompt.
When you’re done, click Save to keep your changes, or Exit to discard them.
Ready to try it?
Coderick AI was built to get your vibe coding from idea to live project as fast as possible. But speed isn’t just about the first build – it’s about everything that comes after. The tweaks, the refinements, the “can you just change that one thing” moments that add up.
Visual Edit makes those moments faster and cheaper. Quick edits cost zero credits. Bigger changes are more targeted. And AI image generation means one less reason to leave your project or your workflow.
Visual Edit and AI image generation are now available in all Coderick AI projects. Open a project, switch to Visual Edit, and see how it feels to click, change, and keep building.