Starting a website usually means one of two things: scrolling through templates hoping one feels right, or staring at a blank page trying to figure out where to even begin.
Skip both. SiteGround Website Builder now make creating a site just as smooth as running one. Describe what you’re building, and an AI Wizard turns it into a real website or online store, using the same Page Builder you’d use to build one yourself. And if you’d still rather pick a template yourself, that option isn’t going anywhere.
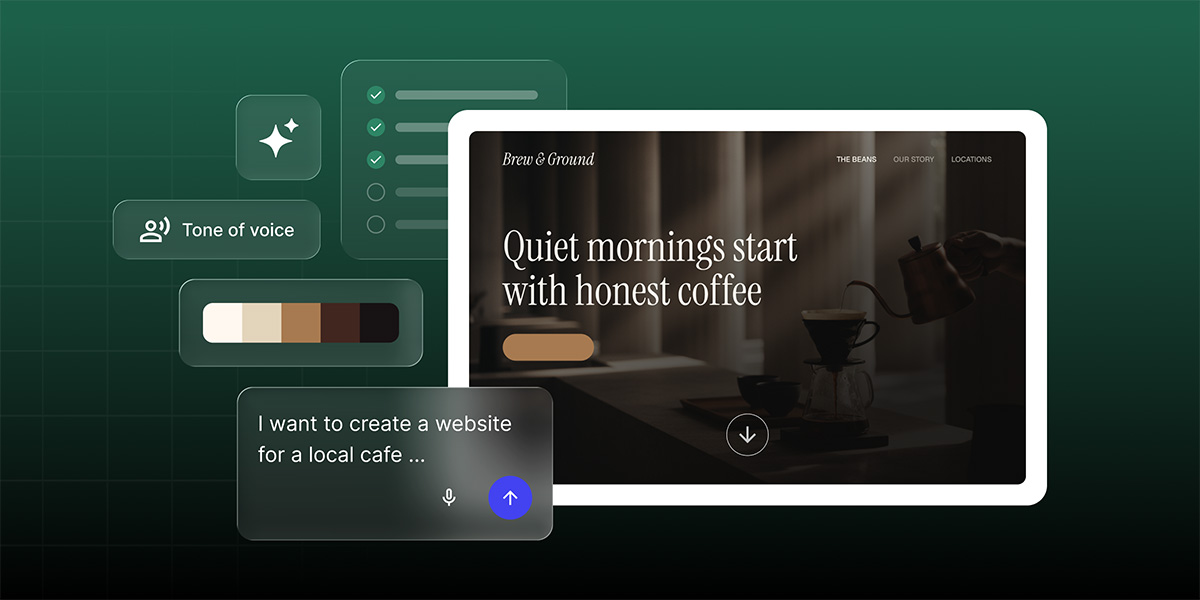
Describe your site in your own words
Type it out, or say it out loud, whichever’s easier. Simply describe what you have in mind, whether that’s a consulting business, a boutique, a photography portfolio, or otherwise. Pages and sections, tone, any color inspiration you have, all of it goes into the description.
Check the details before your site is generated
Once you’ve described your website needs, nothing gets built from a guess. You’ll see an editable summary based on what you described, including details such as your site name, the main goal (showcase your work, get bookings, sell products, and so on), the tone of voice, a color palette, plus a blank text field for anything else worth mentioning. When everything looks right to you, the site gets built. And while you wait, a short video walks you through the Page Builder itself, so by the time your site’s ready, you already know your way around it.
A starting point built around your description
What comes out is a real starting point: structure, layout, and sections built around your description. It fills in the gaps, choosing pages that fit if you didn’t spell them out, adding placeholder copy, and only including specifics like your address, hours, or contact info if you’ve described them. The more detail you give it, the less of that filling-in it has to do.
From there, everything is yours to edit directly in the Page Builder. Want a different starting point altogether? You can regenerate the whole site from a new description anytime.
Pick up where you left off, no matter what interrupts you
Setting up a website in one sitting isn’t always realistic. Maybe your laptop dies, maybe you get pulled into a call, maybe you just close the tab by mistake.
With SiteGround Website Builder’s AI Wizard, though, you can come back later and see a simple prompt to pick up exactly where you left off, whether that’s back at the review step or partway through generation. Your site sits marked as unpublished with editing paused until setup’s done, so there’s no confusion about what’s live and what isn’t.
If generation fails partway through, it retries on its own. Separately, if you refresh the page by accident, you land back on the right step, not a blank tab wondering what happened.
Same foundation, built around exactly what you need
Using the AI Wizard feature offers a faster way to get started inside SiteGround Ecommerce and Website Builder. And using it doesn’t draw from your AI tokens yet, so there’s no cost to try it now. Once your site or store is generated, you’re working in that same setup, running on the same solid infrastructure, backed by the same support behind every other SiteGround site or store, AI-built or not. Now you can just say it, and the rest follows.
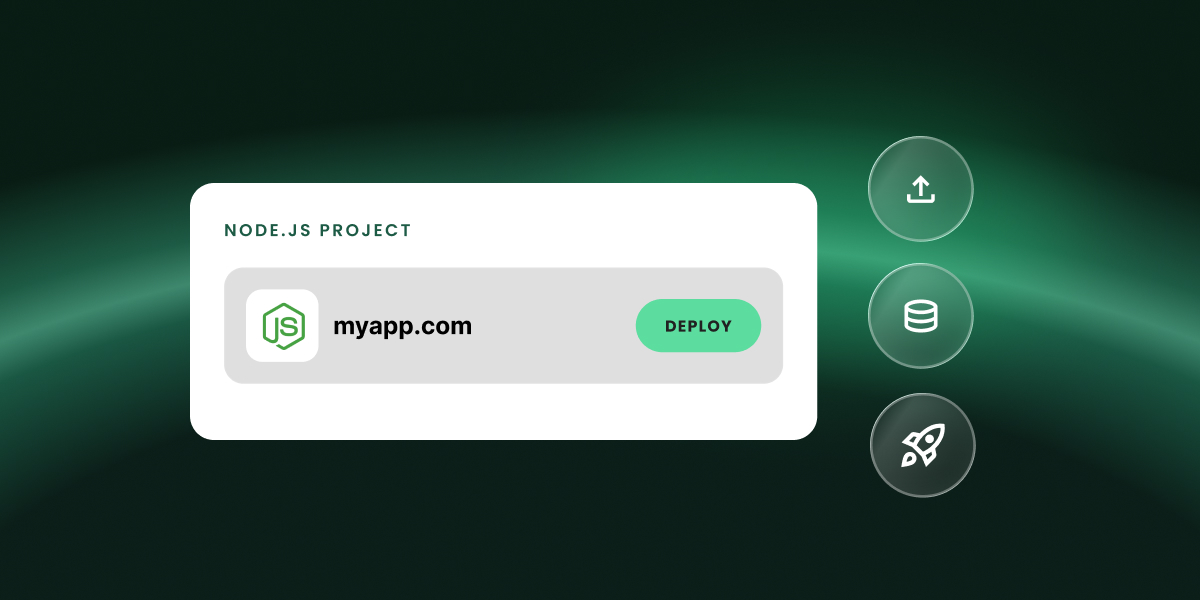
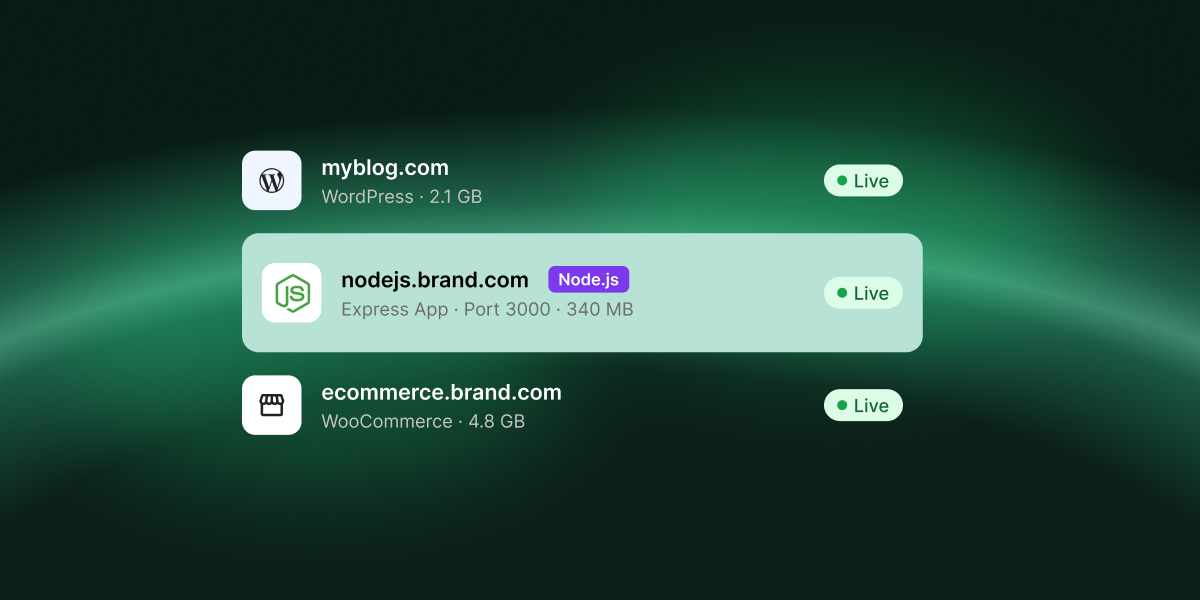
If you’re on a GrowBig, GoGeek or Cloud, you can now host Node.js apps in your existing plan. Connect a GitHub repository or upload your code, and we build, deploy and run it for you. Your apps are managed from the same Client Area as your sites, and they can use what your plan already includes: managed databases, free SSL, and email once the app is on your own domain.
What is Node.js?
Node.js is an open-source runtime that lets JavaScript run on a server, not just in the browser. That means one language can power both what people see on screen and the logic behind it: handling requests, reading and writing to a database, sending emails and connecting to other services.
It’s one of the most widely used technologies for building on the web. Popular frameworks like Next.js, Nuxt and Astro run on it, and many of the apps created with AI coding assistants and app builders are built on it too.
What types of Node.js projects can you host?
Anything that runs on Node.js. That includes apps built with Next.js, Express.js, NestJS, Nuxt, Remix, Astro, Fastify and Koa, as well as React, Vue.js, Angular, Svelte and Vite.
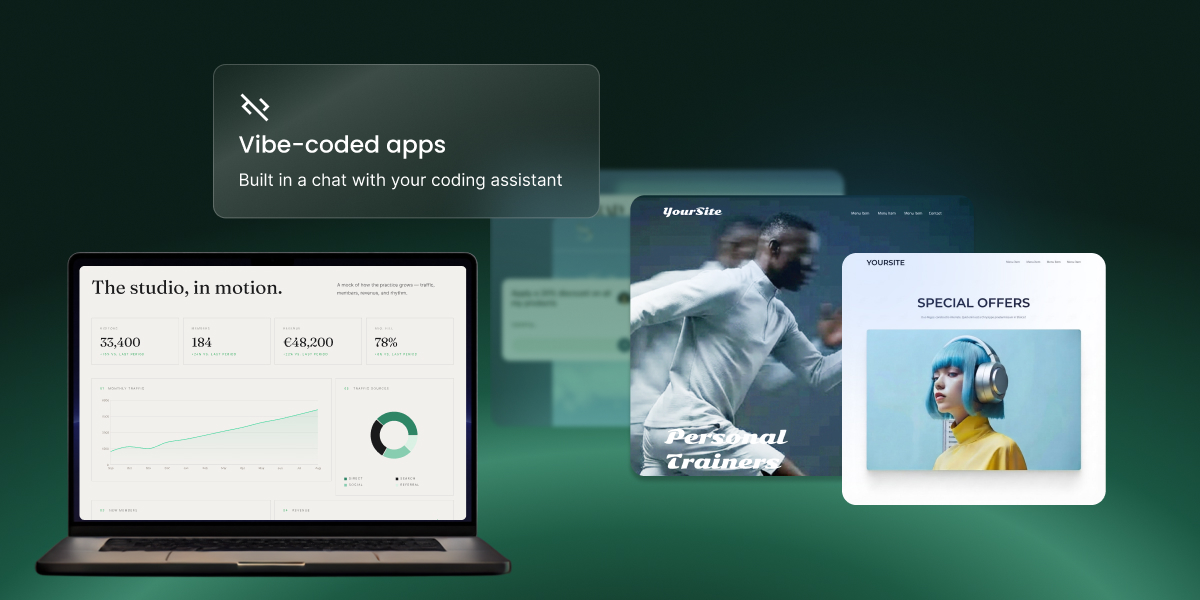
Many of the projects clients are already bringing over were built with AI. If you’ve been working in Claude Code, Cursor, Codex, Copilot or Windsurf, just connect the GitHub repository your assistant works in. Every fix it pushes redeploys automatically, and your vibe-coded prototype can go live on your own domain with a database behind it. Sites made in Lovable, Bolt, v0 or Replit work the same way: export them to GitHub or download a ZIP, then publish on a domain you own, with email on that domain included.
Others were built by hand. That might be the API behind your mobile app or your WordPress frontend, a webhook handler or integration that keeps your product running, or a full application on the frameworks you chose. They run on a standard Node.js runtime with a MySQL or PostgreSQL database, environment variables and a log for every build, and nothing proprietary sits between your code and the server.
Deploy your Node.js app from GitHub or upload it as a ZIP
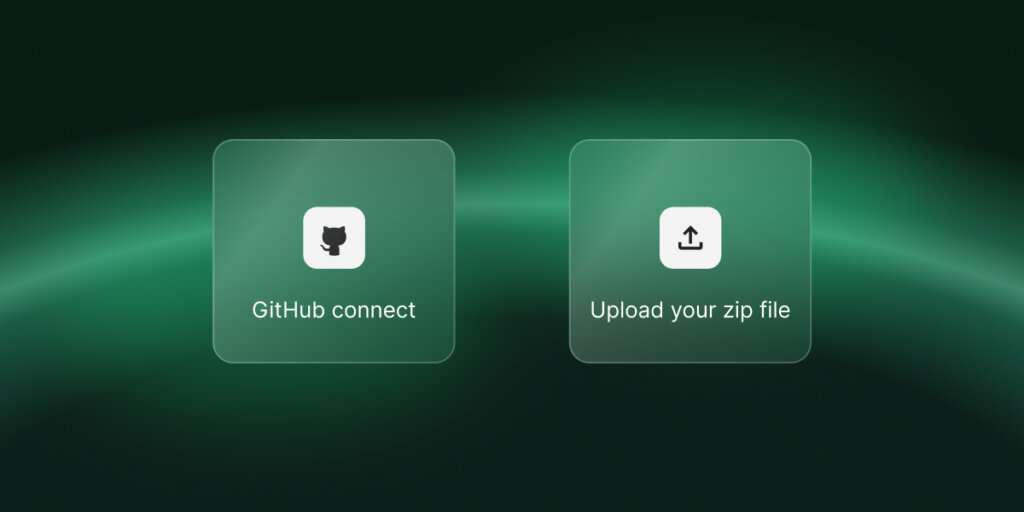
The quickest route is GitHub. Connect a repository, pick a branch, and we handle the build and deployment. After that, every push to that branch triggers a new deployment, so your live app always matches your latest code. You can pause auto-deploy, switch repositories or disconnect whenever you like.
Prefer not to use GitHub? Upload a ZIP of your source code and we’ll take it from there. You can link a repository later if you want automatic updates.
Every new project starts on a free temporary domain, so you can test it straight away. When it’s ready for real traffic, point a domain you own to it from the Client Area.
What comes with every project
Because your app runs on your hosting plan, it gets the same essentials as your websites. You can create MySQL and PostgreSQL databases right from Site Tools, and once the project is on your own domain, you can set up email accounts like hello@yourapp.com at no extra cost. Free SSL with HTTPS enforcement, protected URLs and traffic blocking are included with every project.
You also decide how your app is built. We preselect the settings that suit it, and you can change any of them: framework preset, Node version, package manager, build command, output directory and environment variables. Every deployment is logged with its author, branch, commit and full build output, so if a build fails, you can see why in a click.
Get started
In your account, each app is a Node.js Project. GrowBig includes 5, GoGeek 10, and Cloud as many as you need. A Node.js Project isn’t an add-on: it appears in your Client Area next to your websites and gets its own Site Tools, adapted for Node.js. Apart from the project count, it works like any other website on your plan when it comes to resources and features.
To add one, go to Client Area > Websites > Node.js Projects, add a project and choose GitHub or manual upload. Once it’s live on the temporary domain, you manage the domain, label and server details from the Client Area, and deployments, databases, security, email and statistics from Site Tools.
GrowBig includes 5 projects, GoGeek 10, and Cloud as many as you need. There’s nothing extra to buy, and you can upgrade your plan any time if you need more projects.
Do I need a GitHub account?
No. Connecting GitHub gives you automatic deployments on every push, but you can also upload your source code as a ZIP and we’ll build and deploy it for you.
What happens when I push new code?
If your project is connected to a repository, we detect the push to the linked branch, then rebuild and redeploy automatically. You can pause auto-deploy at any time.
Can I use my own domain?
Yes. Every project starts on a free temporary domain, and you can point a domain you own to it from the Client Area whenever you’re ready.
Are databases included?
Yes. You can create and manage MySQL and PostgreSQL databases for your project directly from Site Tools.
Does email work with Node.js Projects?
Yes, once the project is on a registered domain. Email accounts aren’t available on the temporary domain.
Can I host websites and Node.js apps on the same plan?
Yes. Node.js Projects run next to your WordPress sites and email on the same plan, and you manage them all from the same Client Area.
Key takeaway: The SiteGround Website and Ecommerce Builder now includes a built-in blog functionality, available at no extra cost for existing customers. You can add a blog page, publish posts and embed store products directly in them, with no plugins or separate platform needed.
Your SiteGround Website Builder or Ecommerce site can now have a voice. You can add a blog to it the way you’d add any other page. No new platform to learn, no plugins to install, no need to call a developer. Start publishing right inside the builder you already know.
Why add a blog? Because it gets you found.
Search engines love fresh content. So do all the AI tools that customers now ask for recommendations. Every post you publish is another chance for someone to discover your business: a question answered, a tip shared, a new product introduced.
The hard part is setting it up. It’s either a complex platform that takes real time and technical know-how to run, or a stripped-down tool that’s too limiting in terms of look and feel. With the SiteGround Website Builder blog, you finally get a blog that fits right into your site, with the flexibility you’d expect from a dedicated blogging platform and the simplicity of a page you already know how to build.
Make it look like you
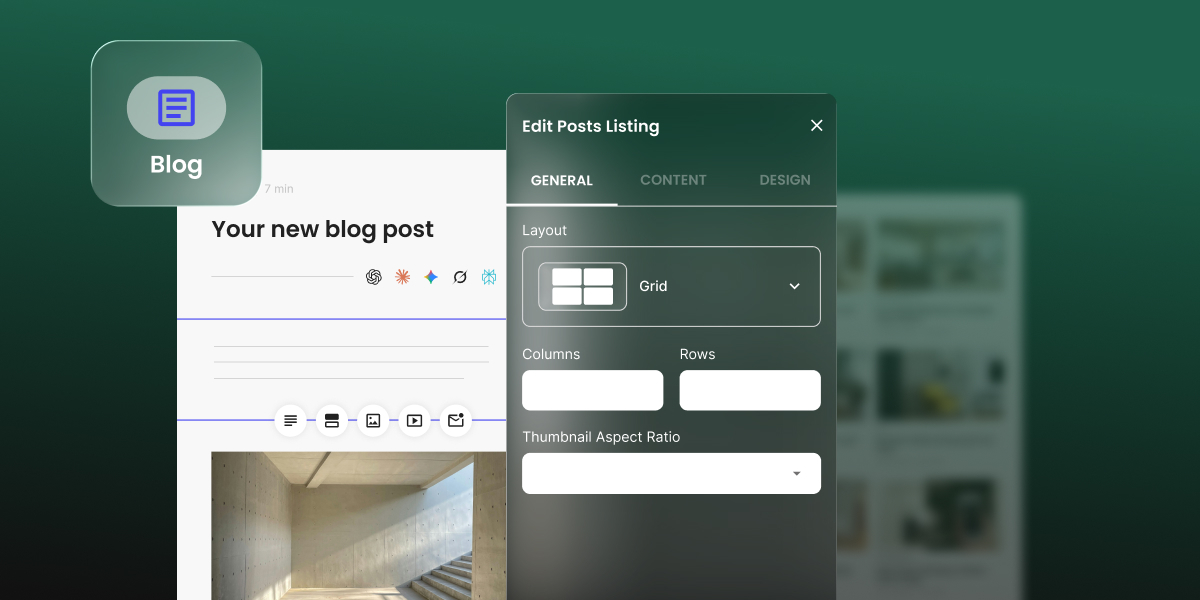
You can customize every part of your main blog page. Start with a template, then make it yours. Go grid or list. Pick your colors. Show three posts or thirty. Decide whether readers see images, categories, descriptions and reading time.
Want a showstopper at the top? Add a carousel and fill it with your newest posts, a favorite category or your personal hand-picked best.
Write your own way
Start from a blank page, or let the built-in AI writer draft your post for you. Either way, you’re in control. Edit the AI’s draft until it sounds like you, or write every word yourself.
Then bring your post to life with the tools you already use to build your website and ecommerce store pages. Text, images with captions, video, galleries, buttons, icons, contact forms, subscription forms and products from your site or store are all there, ready to drag in and style.
Turn every post into a sale
Yes, you can sell products directly from a blog post.Blog posts aren’t only for storytelling, they can be for selling. Writing about your new summer collection? Drop the actual products right into the post. Show one, a few or a full scrolling carousel. Choose the columns, the text and whether it autorotates.
Your readers go from “ooh, nice” to “add to basket” without leaving the page. Got a big launch or a seasonal sale? Pin that post to your blog’s carousel and put it front and center.
Built to be found and shared
A post is only as good as its odds of actually being found. That’s why each post comes with its own SEO title and description that you can edit directly, so you can tell search engines exactly what each post is about. You can also set a custom title, image, and description for social media, so your posts look sharp every time someone shares them.
Your first post is waiting
Open your SiteGround Website Builder or Ecommerce site, add a blog page and hit publish. Share your story. Show off a product. Post customers’ feedback, or answer the question your customers always ask. A blog brings readers back, brings new ones in and helps you turn them into customers.
If you’re already a SiteGround customer, you can add the blog feature to your existing Website Builder site, or start a new one completely free in an available slot in your hosting plan. If you’re new to SiteGround, you can try the SiteGround Website and Ecommerce Builder free for 14 days.
How to add a blog to your SiteGround Website Builder or Ecommerce site:
Open your site in SiteGround Website Builder or Ecommerce and choose Blog from the navigation menu.
Pick a template for your Post Listing page (your main blog page).
Customize the layout, colors, and post details.
Create your first post and click Publish.
Frequently asked questions
Does SiteGround Website Builder have a blog?
Yes. SiteGround Website Builder and SiteGround Ecommerce include a built-in blog as of September, 2026.
Can I sell products from a blog post?
Yes. You can embed a single product, several products or a product carousel from your SiteGround Ecommerce store directly in any post.
Do I need plugins or coding to add a blog?
No. You add the blog like any other page in the builder.
Is the blog available with any SiteGround hosting plan?
Yes. Every SiteGround hosting plan includes access to the SiteGround Website Builder, and the blog feature comes with it. If you’re running a WordPress site instead, you’ll use WordPress’s own blogging tools.
Can I edit SEO settings for each post?
Yes. Every post has its own editable SEO title and description, plus a separate title, image and description for social sharing.
If you’ve ever run a public survey and heard back from the same small group of people every time, the ones who already show up to meetings and already have an opinion ready, Florian Francken had that problem too. So he built something different: Swipocratie.
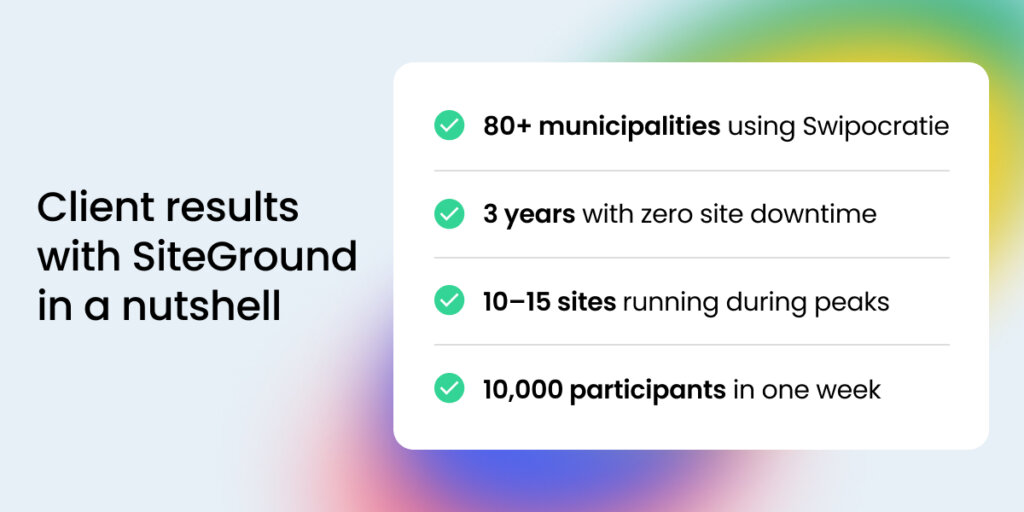
Florian is a digital designer who runs Swipocratie largely on his own. It’s a survey tool, built on WordPress, that turns public participation into something closer to Tinder than a town hall meeting. More than 80 Dutch municipalities now use it, along with five provinces and organizations including Rijkswaterstaat (the Dutch Ministry of Infrastructure and Water Management’s executive agency) and the FNV (the Federation of Dutch Trade Unions), to reach residents who never show up to the meetings where local decisions get made.
Three years ago, the VPS he ran with his previous hosting provider was putting all of that at risk. Here’s how he fixed it.
A survey tool built for the people who never fill out surveys
Anyone who has tried to get real feedback from a community knows the pattern: a small group of engaged people always show up, and everyone else stays quiet. Florian Francken calls that quiet majority the silent majority, and reaching them is what led him to build Swipocratie.
He studied political science, then trained as a graphic designer, and that evolved into UX design work. He spent 15 to 20 years as a freelancer before one of his last projects, for the province of Utrecht, sent him in a new direction: figuring out how to get more citizens involved in local policy decisions. That project became the seed for Swipocratie.
The format is simple:
A citizen sees an image, a short label, and a question with two possible answers, such as whether they’d rather have green space or parking outside their house
They swipe or tap to answer, then move to the next question
A full survey of about 30 questions takes roughly three minutes to complete
Beyond the 80-plus municipalities, Swipocratie’s reach extends past the Netherlands too, with projects for German municipalities and the state of Lower Saxony.
One project shows the range: WATT NOU!, a campaign for the Natuur en Milieufederatie Utrecht (the Nature and Environment Federation).
Ran across 12 Utrecht municipalities
Targeted residents aged 16 to 25, a group public surveys rarely reach
Focused on the energy transition, meeting them on the platforms they already use
Florian runs these surveys as paid campaigns targeted at specific communities or age groups, with a particular focus on what he calls the silent majority: residents who are affected by local decisions but rarely attend the meetings where those decisions get discussed.
“We call that the silent majority. Normally, they’re not involved, and with our tool, Swipocratie, they’re involved a little bit. Because it’s so simple to use, so easy, and it connects with social media behavior.”
From community input to a live WordPress survey
Turning a room full of ideas into a working site is a challenge anyone building on WordPress will recognize. Here’s the workflow Florian has refined over time to get there:
Design sessions on Miro, where he and community members co-create the questions
A short list of images and answer options for each question, the part he describes as hardest to get right: simple enough for a three-minute survey, nuanced enough to produce a useful answer
A WordPress build, using a template site structure he duplicates and imports for each new project
Florian handles most projects himself, bringing in freelancers, small companies, or advisors only when a project grows too large to manage alone.
“The problem can be that it’s too superficial, too quick, too black and white. But if you create the right questions, you can actually make a very nuanced survey.”
Swipocratie runs on WordPress, and Florian manages his sites on SiteGround.
Why a self-managed VPS couldn’t keep up
If you’ve ever managed your own server, you know the deal: you’re on the hook for every setting yourself. That’s exactly what Florian ran into before moving to SiteGround.
He was running a self-managed VPS in the Netherlands, more hands-on than he wanted to be. Once Swipocratie surveys started attracting genuine traffic, some campaigns brought in around 10,000 participants in a week, with every question triggering a database call, that setup started showing its limits:
Server settings, PHP configuration, and caching all needed constant attention
Sites went offline often, and adjusting the caching never fully resolved it
Florian had no clear way to diagnose or fix the problem himself, since server troubleshooting wasn’t his area of expertise
For a tool whose entire value depends on being live and responsive at the exact moment people are being invited to participate, repeated downtime was a direct threat to the work.
A developer Florian worked with pointed him toward SiteGround.
“The developer I always work with, he recommended it to me, because in the past I always had a lot of problems with finding a host for my particular case.”
Moving from a self-managed VPS to SiteGround
Florian has been running Swipocratie on SiteGround for three years. He settled into a workflow he now repeats for every new survey project:
Keep a template WordPress installation with the full site structure already built
Duplicate or create a new site and import it using the SiteGround importer for each new survey project
Upload the campaign’s images and fill in the question fields by hand
The caching, security, and migration plugins that come with SiteGround hosting match what a traffic-driven survey tool needs without any additional configuration on his end. He also uses the SiteGround AI Аgent on the marketing side of the Swipocratie website, the informational site where he explains the tool to prospective local government clients, to work on search and AI optimization.
“I have to say I’m really impressed already how easy it was to activate the plugin and interact with it. It’s a very cool feature, I think.”
He hasn’t yet applied the AI agent to the survey tool itself. Swipocratie’s interface is built with JavaScript and loads asynchronously, which makes it difficult for screen readers to interpret, and Florian has been thinking through how to balance that technical constraint against his broader goal of reaching as many people as simply as possible. When the idea of adding descriptive alt text to survey images came up, he agreed it was a straightforward next step.
“It’s accessibility versus reaching the big group in a simple way. This is my main goal.”
Three years, zero downtime, 10–15 sites at peak
Since moving to SiteGround three years ago:
Florian’s Swipocratie sites have had zero downtime on SiteGround, including during campaigns that draw 10,000 participants in a week
Florian hasn’t touched server configuration, caching, or PHP settings since switching to SiteGround
Florian runs 10 to 15 Swipocratie survey sites at once during peak periods
His one outstanding request isn’t about performance. Because he sometimes runs 10 to 15 survey sites at once, he’s reaching the inode limit on his current plan and would like the option to expand within his existing subscription rather than adding a second account or moving to a VPS. It’s a scaling question he raised for the first time during this conversation, and one he plans to bring directly to SiteGround support.
“I have to say I’m really, really satisfied in general with SiteGround.”
Can WordPress handle high-traffic public surveys without downtime?
Yes — Swipocratie, a WordPress-based survey tool, has run on SiteGround for three years with zero downtime, including campaigns that draw 10,000 participants in a week.
What hosting features matter most for traffic-spike campaigns?
Caching, security, and migration plugins configured to handle load without manual tuning — Florian hasn’t adjusted server, caching, or PHP settings since switching to SiteGround.
How can the SiteGround AI Agent help with WordPress SEO?
Florian uses it on Swipocratie’s marketing site to work on search and AI optimisation, calling it easy to activate and interact with.
Reliable hosting means the silent majority actually gets heard
Florian’s background is in design and citizen engagement, not servers, and that’s exactly why the old setup didn’t work for him. Every hour spent troubleshooting a database call or a caching rule was an hour not spent on the part of the job that actually mattered: writing better questions and getting more people to answer them.
That trade-off isn’t unique to civic tech. Anyone running a tool that depends on being reliably online during a defined window, whether that’s a survey campaign, a product launch, or a seasonal traffic spike, is making the same bet: that the infrastructure underneath will hold while attention is pointed at it. When it doesn’t, the cost isn’t abstract. It’s the campaign that goes quiet mid-flight, or the participant who taps a link and gets nothing back.
Make uptime one less thing to manage
Three years without a single outage changed what Florian’s job looks like day to day. He builds surveys, runs community sessions with 80-plus municipalities, and lets the hosting handle the rest.
If your work depends on being online at the exact moment people show up, a campaign launch, a traffic spike, a deadline you can’t move, that’s what hosting built for real load looks like in practice: one less thing to think about, so the actual work gets your full attention.
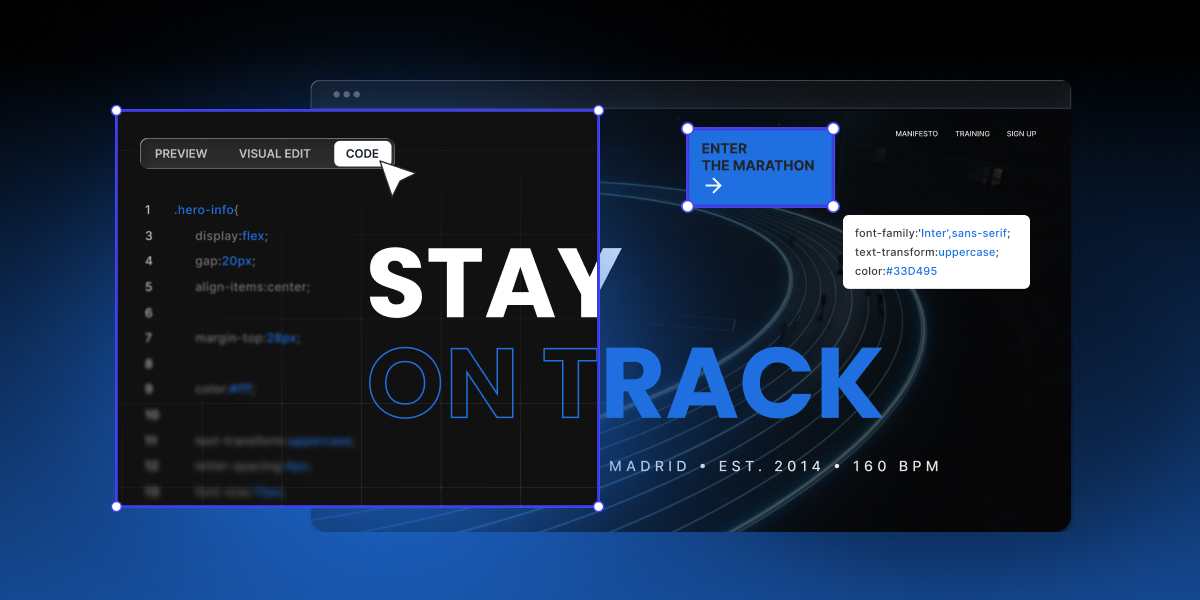
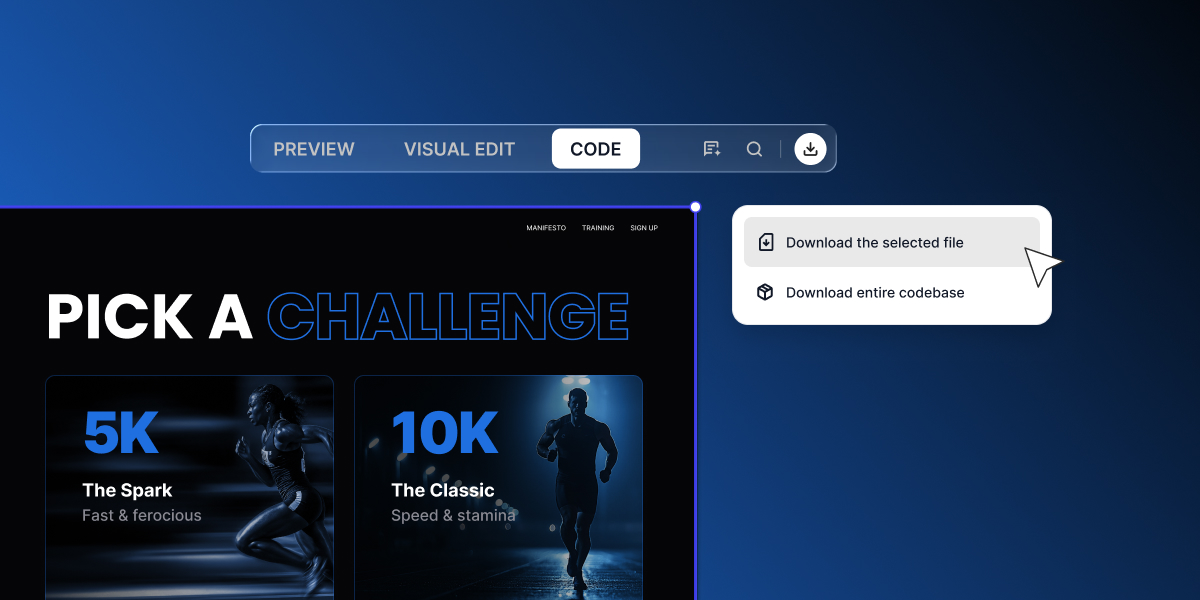
You can now access and work with every code file behind a project built with Coderick AI. This sits alongside visual editing and chat prompts as another way to shape your project. We are rolling this out as a core capability inside Coderick AI, giving you more flexibility, control, and confidence in every project you create.
Edit your source code to shape any part of your project
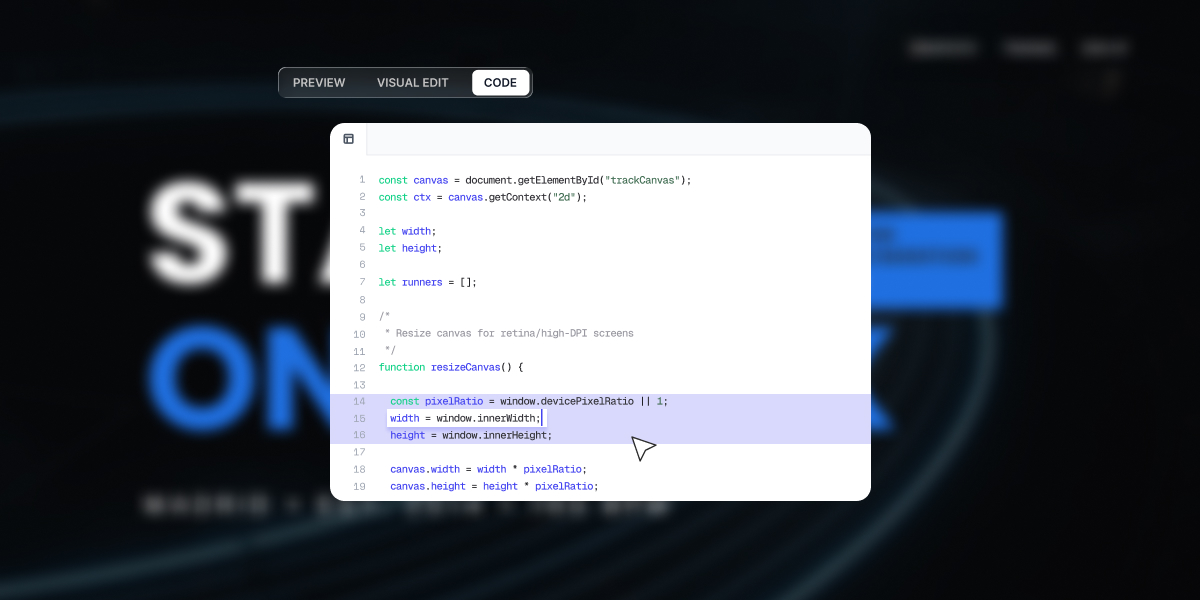
Once Coderick has built your project, you can open the code and change anything you want. A small tweak in a component, an adjustment in layout, or a quick update after a review.
Now you can open the new Code tab on any Coderick project to read and edit the code, then save those changes back into your live version. Coderick AI still handles the heavy lifting, and you can use the Code tab to extend and customize the result as much as you like, from fine tuning details to adding your own components and adjusting how your project behaves.
Inside the Code tab you can:
Edit code manually in place, using the languages and structures Coderick already created for you.
Adjust layouts, styles, and logic, then click Save to apply your changes to the project once you are ready.
Discard the edits you made in your current session if you decide not to keep them.
Use familiar keyboard shortcuts like Control plus Z and Control plus Y for undo and redo, without adding extra buttons to the interface.
Edit code without using credits. Manual edits in the Code tab do not consume credits, which means small fixes can happen as quickly as you notice them, while you keep your prompts for other changes.
Point Coderick AI at one specific file
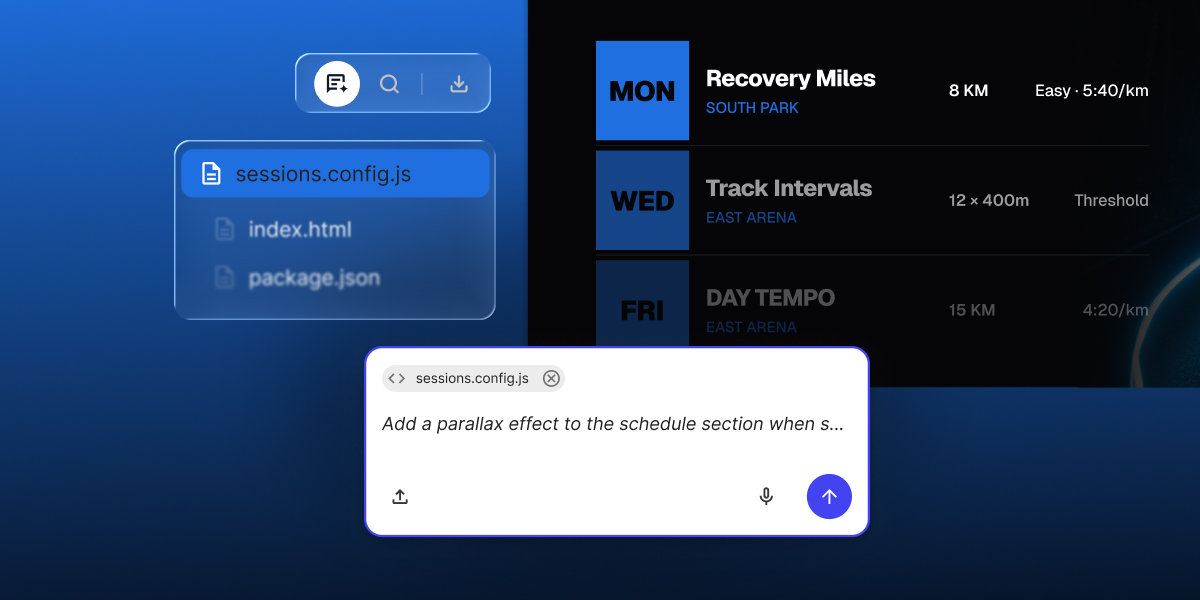
Sometimes you do not want a general change. Instead, you want Coderick AI to focus on one section. With this update you can reference any file directly from the code view in your chat, similar to how Visual Edit works today.
Pointing Coderick at a particular file does two important things:
It scopes the model to the context that matters, which improves the precision of edits and explanations.
It reduces the number of back and forth messages needed to get the change you want, which helps you use your credits more efficiently.
The result is a tighter loop. You mark the file, describe what you need, and Coderick responds with changes and reasoning that stay anchored in the right place.
Search project files across your whole build
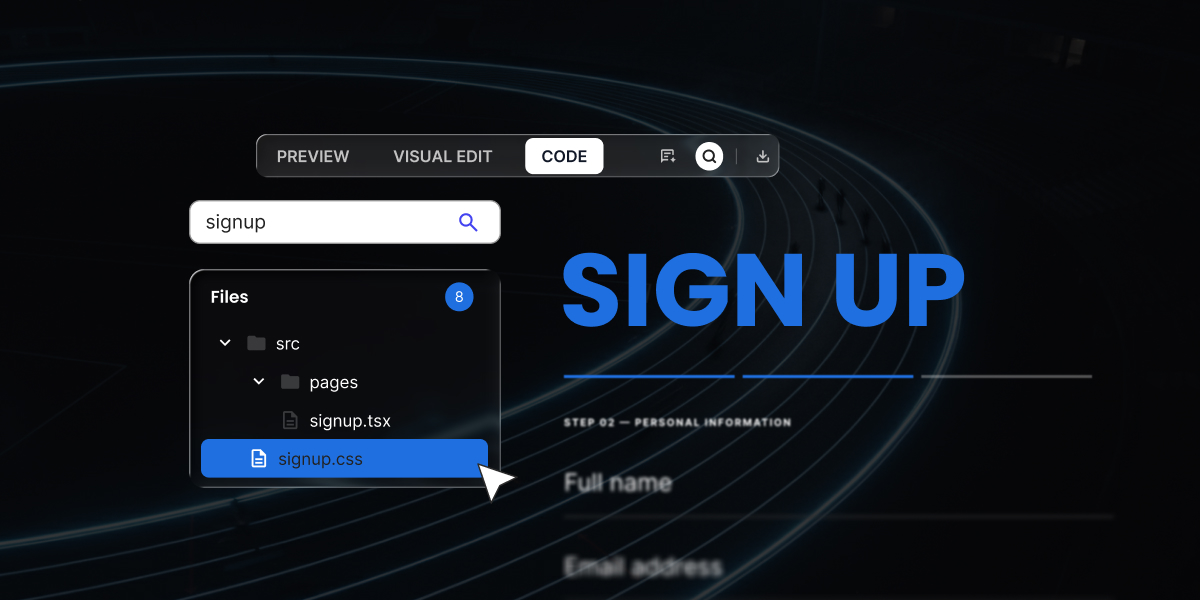
As your projects grow, the number of files grows with them. To keep things simple, the new view includes search that looks across your project tree and inside files at the same time.
You can:
Search project files by name and by the text inside them, in one step, using the search above the file tree.
Use a separate in-file search when you already know which file you need and want to jump to a specific snippet or selector.
This helps you navigate even large projects that Coderick has generated over multiple iterations. You get to the right place faster, without scrolling through every folder or scanning entire files by eye.
Download the source code of your whole project, or just one file
Sometimes you want to keep a copy of your work. With this new feature we give you a simple way to do that, whether you need the whole project or just one specific file.
Inside the Code tab you can:
Download your source code for the entire project to review it locally, share it with teammates, or keep a snapshot of your progress.
Download a single file while you are viewing it, so you can quickly test, share, or reuse one specific piece of code without pulling down the whole project.
This gives you more flexibility in how you work with your projects day to day. Whether you are reviewing changes, collaborating with someone else, or keeping a local copy for reference, everything is just a few clicks away.
Your edits are safe to experiment with
Editing generated code can feel risky, so we’ve made it easy to explore without fear of breaking your project. Nothing is applied until you click Save, undo and redo are always one shortcut away, and you can Discard everything from the current session in a click.
Plus, you can always revert to a previous version with one click. The goal is simple: give you room to experiment, with a safety net underneath.
Build with prompts and code, together
You still describe what you want in plain language and watch your ideas become working projects. Now, if you like working on the code behind them, you have a place to do that too. If you are already building with Coderick, open your project and look for the Code tab.
If you have not tried Coderick yet, start a new project with a 14 day free trial and see how far a simple prompt takes you.
We will keep expanding the building experience so both non technical builders and experienced developers feel at home inside Coderick AI. If you have ideas or requests, we would love to hear them.
Frequently asked questions
What is source code access in Coderick AI?
Source code access lets you view and edit source code for any project you built in Coderick AI, right inside the new Code tab. You can adjust layouts, styles, and logic, download source code for the whole project or a single file, and make manual edits without touching prompts.
Can I edit my project’s code directly?
Yes. The Code tab gives you a built-in code editor where you can open any file, edit code in place, and save your changes back into the project. You can also point Coderick AI at one specific file so its next changes stay scoped to exactly the part you are working on.
Does editing the code cost credits?
No. You can edit code without using credits. Manual edits in the Code tab do not consume any, so small fixes happen as fast as you spot them, and your credits stay free for prompt-based changes.
Can I download my source code?
Yes. You can download source code for the entire project to keep a local copy, share it with a teammate, or hand it to a developer. You can also download a single file on its own while you are viewing it.
How do I find a specific file or line of code?
Use the search above the file tree to search project files by name and by the text inside them at the same time. There is also a separate in-file search for jumping straight to a snippet or selector once you know which file you need.
WordPress 7.1 is the second major WordPress release of 2026, scheduled for August 19. It builds on version 7.0 with native responsive styling, a rebuilt client-side media processing, richer Notes, and two new blocks. WordPress 7.1 refines existing systems rather than laying new foundations, which makes it a lower-risk update than 7.0 for most sites.
Key takeaways:
WordPress 7.1 is scheduled for August 19, 2026. The date is marked “tentative,” so it could still move if a last-minute problem turns up.
The Classic block is staying. If you write posts using the older, simpler editor, nothing changes. A plan to hide it from the block inserter was reversed on July 7, 2026.
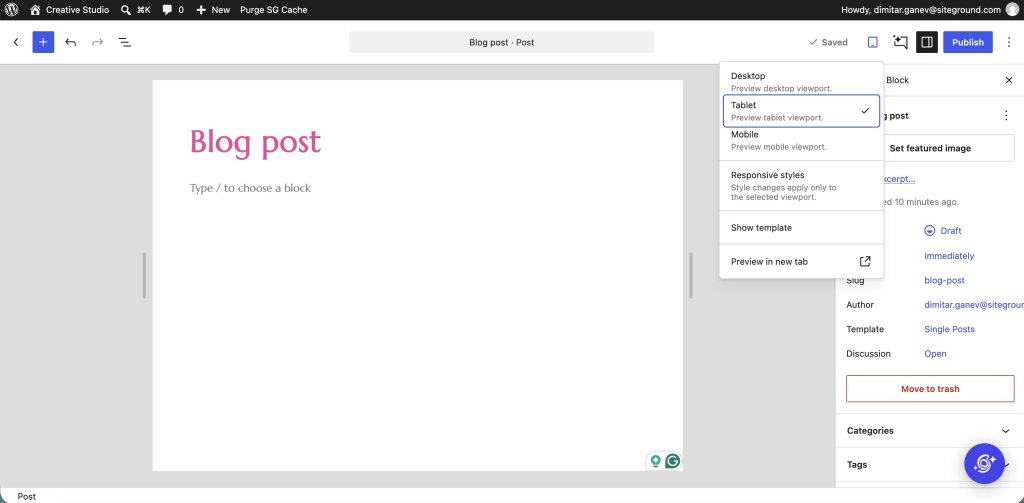
WordPress 7.1 adds easier responsive design controls. You can now style how your site looks on phones and tablets, and how buttons react when someone points at them, without touching any code.
Faster image uploads through WordPress 7.1 client-side media processing. Photos are prepared inside your visitor’s web browser instead of on your server, which lightens the load on your site.
A few talked-about WordPress 7.1 roadmap features did not make it. Real-time co-editing, a big behind-the-scenes code upgrade, and two smaller items were pushed to a later release.
Most sites can update with little to worry about. The only real risk is for sites with custom-built features or old plugins, and this guide shows you how to spot them.
When is WordPress 7.1 released, and is it safe to update yet?
WordPress 7.1 is scheduled for release on August 19, 2026, the final day of WordCamp US, WordPress’s big annual conference, held this year in Phoenix. Right now the release is in its last testing stage, called the Release Candidate phase, which started on August 5. At this stage, the features are locked, so nothing new will be added between now and release day.
The date is still marked tentative on the official release roadmap, and WordPress has moved a big release before: version 7.0 was pushed back from its original April date. So plan for August 19, but don’t build a product launch or a client deadline around it being set in stone.
Should you install the WordPress 7.1 update the moment it arrives? Not on your live site. The safe approach for any major WordPress update is always the same: make a copy of your site, apply the update to the copy, and check that everything still works before you touch the real thing. That copy is called a staging site, and we’ll cover how to make one later. First, take a full backup so you have a saved version to restore if something goes wrong. For a simple site, this is a five-minute check. For a site with lots of plugins or a custom design, it’s the difference between a calm update and a stressful one.
If your site is hosted on SiteGround, major WordPress releases install automatically 24 hours after they come out, and a full backup of your site is taken right before that happens. You can change the timing, delay it further, or skip a release from Site Tools > WordPress > Autoupdate.
Pro tip: Check your plugins before you even build a staging site. Every plugin in the official WordPress directory has a “Tested up to” line on its page, showing the newest WordPress version its developer has checked it against. Open the pages for your most important plugins. Any plugin that hasn’t been updated in over a year, or that only lists compatibility up to 7.0, is your first suspect if something breaks. You can also simply ask the AI Agent for WordPress to list your active plugins and review their WordPress 7.1 compatibility and update status for you.
What’s new in WordPress 7.1, and what is expanded from WordPress 7.0?
WordPress 7.1 is a polishing release rather than a reinvention. The two biggest items, responsive styling and client-side media processing, aren’t brand new: they started in WordPress 7.0 and are being expanded here. The things that are genuinely new in 7.1 are the interactive design controls, two new content blocks, a new way to add icons, and a behind-the-scenes change to how the editor loads. Here is what each one means for you.
Responsive styling in WordPress 7.1 without custom CSS
CSS is the code that controls how your site looks: fonts, colors, spacing, and how things rearrange on smaller screens. Traditionally, changing those details meant writing CSS or paying someone who could. WordPress 7.1 moves a lot of that into simple on-screen controls.
“Responsive” styling means controlling how your site looks on different screen sizes: a wide desktop monitor, a tablet, or a phone. WordPress 7.0 let you show or hide parts of a page depending on the screen. WordPress 7.1 goes further and lets you set different styles for each screen size, and for the first time it lets you style interactive states without code. An interactive state is simply how something looks when a visitor points at it, clicks into it, or presses it, such as a button changing color when you hover over it.
These interactive controls arrived for a limited set of blocks first rather than every block at once, so check the specific pieces of your design that depend on them. Site designers also get adjustable “breakpoints,” the screen widths where your layout switches from the desktop version to the tablet or phone version.
Here is where these controls appear: After you update, open any page in the editor and select a block, like a button or a heading. In the settings panel on the right, look for the small device icons: a desktop, a tablet, and a phone. Clicking those lets you set styles for each screen size, and the hover and click styles live in the same panel under that block’s styling options. If you’ve ever paid a developer to write “mobile CSS” for you, this is the feature that may save you that bill next time.
How WordPress 7.1 client-side media processing works
When you upload a photo to WordPress, it normally gets resized and compressed on the server where your website lives. “Client-side” media processing moves that work into the web browser of the person uploading, so it happens on their own computer before the image is even sent to your site. The payoff is less strain on your server and support for more modern image formats. WordPress 7.0 introduced this for basic resizing; 7.1 makes it the main way images are handled.
It works on Chrome and other Chrome-based browsers, and browsers that can’t do it, like Firefox and Safari, fall back to the old server-side method automatically, with no loss of quality. Nothing breaks for those visitors. The only people who need to test this carefully are those running plugins that do something special with images on upload.
If image credits or copyright info matter to you, test one upload. Photos often carry hidden data called metadata: the photographer’s name, copyright, or where a shot was taken. Because image handling now happens in the browser, it’s worth uploading one test image after you update and checking that this hidden information is still attached the way you expect. Photographers, stock-image users, and anyone with licensing rules will care about this.
Notes, the media editor, and the new blocks
WordPress 7.1 adds two new blocks and improves a collaboration tool called Notes.
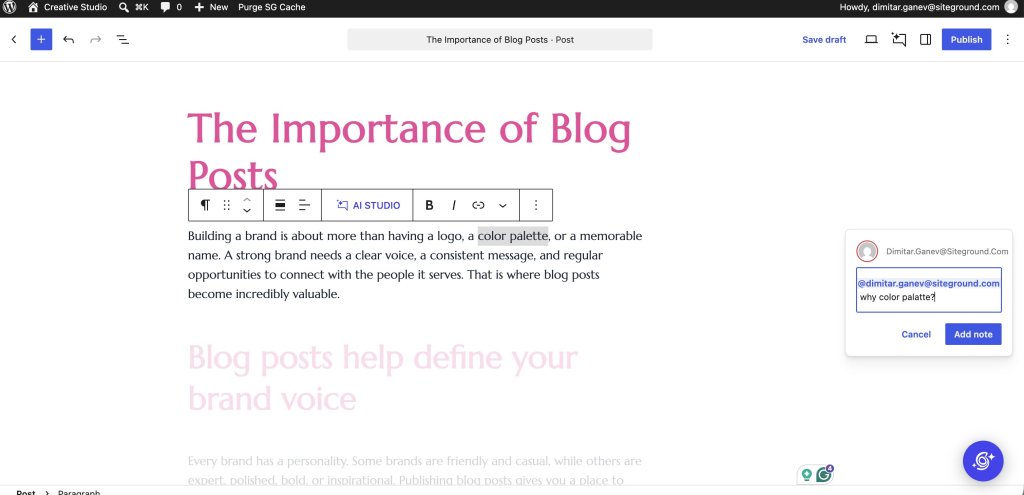
Notes are comments you can leave on a page while editing, handy when more than one person works on your content. In 7.1, you can tag a specific person with the @ symbol so they get pulled in, attach a note to an exact sentence rather than a whole section, run several separate discussion threads, and format your comments. There’s also a suggestion mode and emoji reactions. If you’re the only person who edits your site, you may never touch this. If you work with a team or a client, it’s the change you’ll feel most.
The first new block is Playlist, which gives you an audio player with a visual sound-wave display. If you publish podcasts, music, or audio versions of your posts, it replaces a job that used to need a separate plugin.
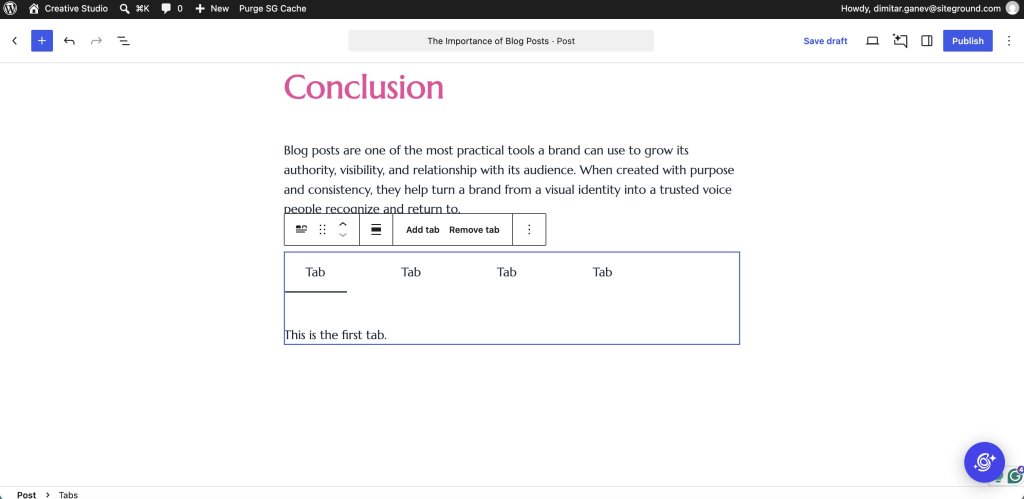
The second is Tabs, which lets you organize content into clickable tabs, so you can put something like FAQs, specs, and reviews behind separate tabs on one page without any extra tools.
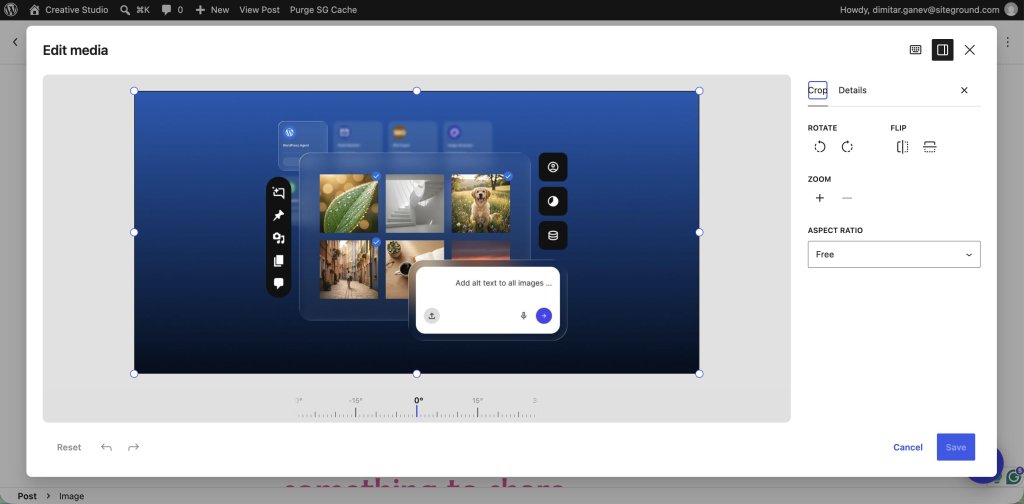
There’s also an improved image editor built right into the page editor. Clicking the Crop button on an image now opens a dedicated editing window over your page, replacing the older tool that worked inline. Inside it you can crop by dragging to any shape you like or snap to a preset such as square or widescreen, rotate in small steps with guides that help you straighten a crooked photo, flip the image, and edit its details, all in one place. Close the window, and you’re back on your page where you left off. The goal was to stop basic fixes from needing a separate photo app.
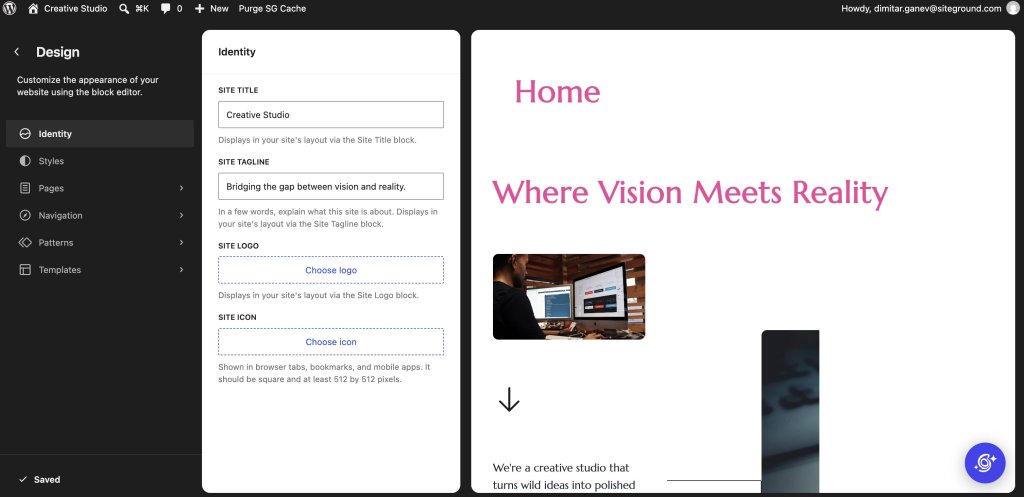
WordPress 7.1 also gives your site’s branding a home of its own. A new Identity screen, at Appearance > Editor > Identity, brings your site title, tagline, logo, and favicon (the small icon in a browser tab) together in one place, with editing right there on the screen. These settings used to be scattered, so this is a small change that saves a lot of hunting.
What is not in WordPress 7.1
There is a lot of outdated coverage, so if you came across it, let’s reassure you first: WordPress 7.1 does not remove the Classic block. The Classic block is the older, simpler way of writing posts that works like a basic word processor, and many long-running sites still rely on it. What was actually proposed was narrower: hiding it from the block inserter so it would not appear when you add a new block, while every existing Classic block kept working. Even that was reversed on July 7, 2026. Nothing changes.
Here’s what else people are asking about that is not in this release:
Real-time co-editing didn’t make it. Having two people edit the same page at the same time, the way Google Docs works, is still not ready. It’s on the wish list but has open questions, and the team put its effort into the improved Notes instead.
A big code upgrade was delayed. WordPress’s editor is built on a piece of software called React. An upgrade to the newest version, React 19, was expected but got pushed back. It’s available only as an experimental option for developers to try, not switched on by default. Most site owners will never notice this either way.
A house style tool for AI did not make it into core. Guidelines lets you write your editorial rules once, things like tone, preferred wording, and words to avoid, so WordPress can remember them instead of you repeating them to an AI tool every time. It has been available as a Gutenberg plugin experiment since March, but the proposal to build it into WordPress itself was declined in July, five days before the first beta, because it needs more real-world use first. You can try it, but it is not part of 7.1.
Two smaller features were pulled: support for email addresses that use non-English characters, and a “Table of Contents” block. Both were moved to a later release.
What about the AI features?
Worth clearing this up, since 7.1 was widely billed as an AI release. The AI you can actually see and use arrived in WordPress 7.0: the AI Client, which gives plugins one standard way to talk to services like ChatGPT or Gemini, and the Connectors screen where you connect a provider and paste in your key. Our guide to how AI works in WordPress 7.0 covers what that means in practice.
What 7.1 works on sits underneath all that, in something called the Abilities API. Think of it as a catalog of what your site can do, written so that software can read it: create a post, update a product, change a setting. It has been building over the last few releases, and it matters because an AI tool connected to your site is guessing until it can look up what actually exists there.
The 7.1 changes make that catalog easier and safer to work with. Tools can search it rather than read the whole thing. Entries can be marked as open to outside tools or kept private. The catalog describes itself in a standard format, so software can understand it without custom code. And there are checkpoints that run whenever an entry is used, which is where permissions and logging get attached. None of that is a button you press, but it decides how safely AI tools can work on your site later.
Two more additions work the same way. The AI code library bundled inside WordPress can now stream responses as they are generated, rather than waiting for a whole answer, and create embeddings, which is the technology behind search that understands meaning rather than matching exact words. Both are there for plugin developers to build on, and nothing in the editor uses them yet.
There is one change you might actually see. The Connectors screen now accepts a username and application password as well as an API key, which is a more familiar way to connect a service and means one less provider key to look after. WordPress also closed a gap where browsers could offer to autofill your saved passwords into the API key field. Beyond that, the parts of 7.1 you will click are about design, media, and teamwork.
WordPress 7.1 compatibility: what to test before upgrading
Here’s a table showing every change, who it affects, and what, if anything, you should check:
WordPress 7.1 change
Who it affects
What to test
Status
Responsive and interactive styling (per screen size; hover and click states; no code)
Designers, theme authors, agencies
How the site looks on phone and tablet, and whether hover and click styles behave
Confirmed
Client-side media processing
Image-heavy sites, image plugins, hosts
Custom image sizes, format conversion, and any image-upload plugin
Confirmed
Editor now loads in a sealed frame (block themes)
Sites with custom-built blocks
Custom blocks (need Block API v3), editor styling, add-on panels
Confirmed
Built-in image editor (crop, rotate, edit info)
Content and editorial teams
Cropping, rotating, and editing image details in the editor
Confirmed
Better Notes (@mentions, notes on specific text, threads, formatting)
Editorial and content teams
Mentions, threads, and comment permissions
Confirmed
Playlist and Tabs blocks
Anyone using plugins for these today
The audio player and the tabbed panels
Confirmed
Toolbar and color scheme that stay put across editors
All editor users
Toolbar and color scheme carrying into the Site Editor
Table of Contents block; non-English email addresses
n/a
Neither ships in 7.1
Not in 7.1
If you run a standard WordPress site (most people)
If your site runs on WordPress’s standard blocks and a regularly-updated theme (the design template that controls your site’s look), WordPress 7.1 is a low-risk update. The changes you’ll actually notice are the friendly ones: the better Notes, the new crop-and-rotate image tool, and the Tabs and Playlist blocks. Update a staging copy, run through your normal routine of writing and publishing a post, and check that any plugin you use for tabs or audio still plays nicely with the new built-in blocks.
If you design WordPress sites for others
If you build or heavily customize sites, test the new design controls against your existing work first. The adjustable breakpoints are a real improvement, but they can also change how your carefully-tuned mobile layouts appear. Open your main page templates and view them at desktop, tablet, and phone widths, confirm your buttons still look right when hovered or clicked, and compare the result against what you had before.
If your WordPress site has custom blocks or features
This is the section to forward to your developer if you have one, or to read slowly if you’ve had custom features built for your site. Two changes carry the main WordPress 7.1 compatibility risk of something breaking, and almost no other article mentions them.
The first is a change to how the editing screen loads. For modern “block” themes, the editor now loads inside a sealed frame, a bit like a window within a window (developers call this an “iframe”). Custom-built blocks made with an older set of building rules, known as Block API version 2, need updating to the newer version 3, or they may look broken after the update. This is the most common cause of an editor that suddenly looks wrong.
The second involves plugins that do something when you upload an image: resizing it a special way, adding a watermark, or creating custom sizes. Because image handling moved into the browser, the technical connection points those plugins rely on (developers call them “hooks”) may not fire the way they used to. Any plugin that touches image uploads needs a test upload after updating. This is the single most likely thing to trip up a customized site, and the easiest to miss, because it only shows up when someone actually uploads a file. One extra note for developers: the new Tabs block’s internal data store was removed during final clean-up, so don’t build anything against it yet.
Not sure whether the “block theme” changes even apply to you? Here’s a 10-second check. In your WordPress dashboard, open the “Appearance” menu. If you see an “Editor” option there (sometimes called the Site Editor), you’re using a block theme, and the editor-loading change applies to you. If you only see “Customize” and no “Editor,” you’re on a classic theme and can skip that particular worry entirely. This one check tells you whether half of this section is even relevant to your site.
How to test WordPress 7.1 safely
The golden rule before the WordPress 7.1 update: test on a staging site, never on your live one. A staging site is a private copy of your site where you can try updates, break things, and fix them, without any visitor ever seeing it.
On SiteGround, you can create a staging copy from your Site Tools dashboard, run the update there, and publish it to your live site only once you’re happy.
To get the pre-release version of WordPress 7.1 onto that copy, the simplest route is a free plugin called WordPress Beta Tester. Install it, choose the “Bleeding edge” option, and it will offer you the latest test build. If you just want a quick look at the new features without touching your own site at all, WordPress Playground runs a temporary, throwaway WordPress site right in your browser tab, with nothing to install and nothing you can break. Use Playground for a tour, and a real staging copy for a proper compatibility check before you update for real.
Conclusion
For most people, WordPress 7.1 is a safe and worthwhile update, and if you build or design WordPress sites, it’s a genuinely nice one: the new design controls take a real chunk of code out of everyday work. The only real caution is narrow. If your site has custom-built features, or plugins that handle images in a special way, test those on a staging copy before you update. For everyone else, a quick check that your site still works is enough.
The safe path is the one that has always worked: back up your site, test on a copy, then update for real. If managing all that yourself sounds like more than you signed up for, WordPress hosting with one-click staging and automatic updates that can roll back if anything goes wrong takes the pressure off update day, so you can try WordPress 7.1 properly and go live only when you’re ready.
WordPress 7.1 is scheduled for release on August 19, 2026, the final day of WordCamp US in Phoenix. The date is marked tentative on the official schedule, so it could shift if a release candidate uncovers a serious bug.
Should I update to WordPress 7.1 as soon as it is released?
You should not update your live site to WordPress 7.1 on release day. Test on a staging copy first, especially if you run custom-built blocks, a heavily customized theme, or plugins that process image uploads, and update the live site once that testing is clean. If your site is hosted on SiteGround, decide this before release day rather than after. By default, SiteGround’s WordPress Autoupdate tool installs major releases 24 hours after they come out, and it takes a full backup of your site immediately before the update runs. You can lengthen the delay, skip the release, or update sooner from Site Tools > WordPress > Autoupdate.
Will WordPress 7.1 break my plugins and themes?
WordPress 7.1 will not break most sites built on standard blocks and an up-to-date theme. The real risk is for custom-built blocks made with the older Block API version 2, which need updating to version 3, and for plugins that handle image uploads, because browser-based image processing changes when some of their connection points run.
Does WordPress 7.1 remove the Classic block?
No. WordPress 7.1 does not remove the Classic block, and removal was never proposed. A narrower plan to hide it from the block inserter was reversed on July 7, 2026, so the Classic block remains available and works as before.
Does WordPress 7.1 include real-time collaboration or React 19?
No, not as finished features. Real-time collaboration remains on the roadmap with open questions, and the React 19 upgrade was delayed, returning only as an experimental option for developers. The improved Notes received the collaboration work for this release.
How does WordPress 7.1 process images in the browser?
WordPress 7.1 client-side media processing prepares images inside the visitor’s web browser on Chrome-based browsers, handling compression, resizing, and format conversion before upload. Browsers without support fall back to the older server-based method automatically, so nothing breaks.
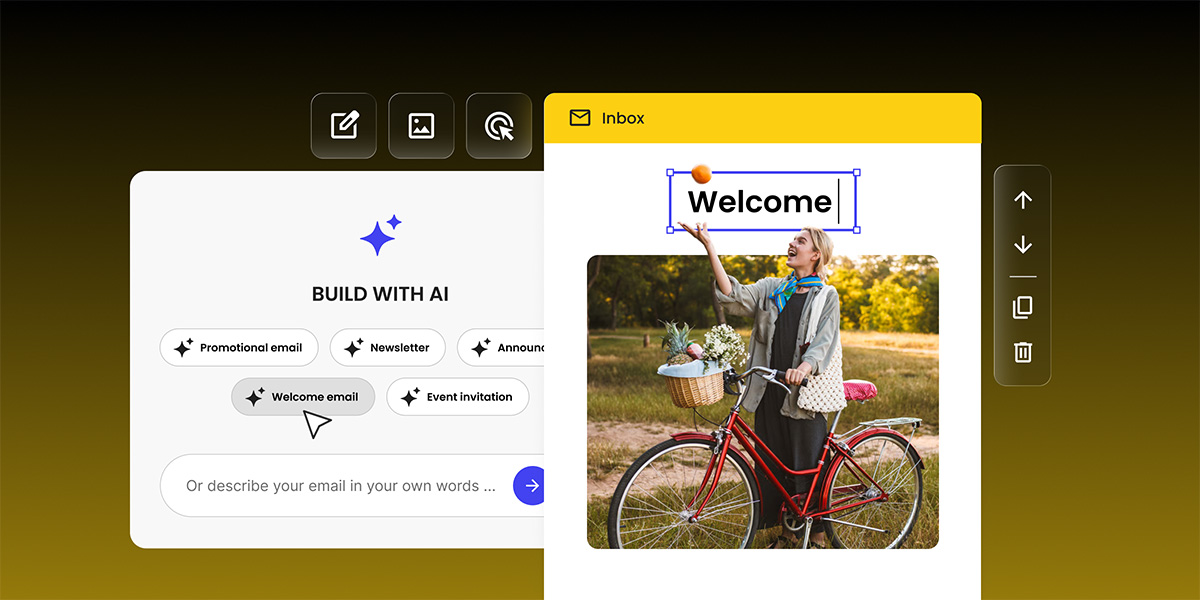
You can now generate a complete email with AI in SiteGround Email Marketing. With the new Generate with AI functionality you just describe your business and the email you want to send, and you get back a finished email, ready to edit in the email editor you already use.
The first draft is on the other side of a short conversation. Let’s see how.
What is an AI email generator?
An AI email generator creates a ready-to-send email from a short description of your business and your goal. Inside SiteGround Email Marketing, that means a draft with the subject line, preheader, and body already written and designed. It opens in the same email builder you use for every other campaign.
Getting AI to help with an email used to mean doing it in pieces. Add a section, ask the writer for a hand, generate an image, move to the next section, repeat. Every stop and start cost you time and pulled you out of your flow. Building the generator directly into Email Marketing puts writing and designing in one place, so a first draft takes minutes instead of an afternoon.
How does Generate with AI work?
Generate with AI turns a few answers into a finished email. You tell the AI assistant about your business and the message you want to send, or you start from a campaign type: Promotional, Newsletter, Announcement, Welcome, or Event invitation. It plays your answers back in a short summary first, and once you confirm, it opens a complete draft in the SiteGround email editor with the subject line, preheader, and body already in place.
How to use Generate with AI
When you create a new campaign or automation, you now see two ways to begin: Build with templates or Generate with AI.
Choose Generate with AI and a chat-style page opens. From there you have two ways in:
Start from a campaign type. Pick one of five presets, and the draft arrives shaped for that job.
Describe it in your own words. Tell the assistant what you want to send, in plain language, and it takes the lead from there.
Either way, the assistant may ask a few short follow-up questions to fill in the gaps. It works in whatever language you set for the campaign. Before it writes a single line, it plays your answers back in a short summary, so you always steer the direction.
Confirm the summary, click Generate, and you land in the familiar builder. From there you edit, design, segment, and schedule exactly as you always have.
Five campaign types to start from
The conversation starter you pick shapes both the structure and the tone of the draft, so it is worth choosing deliberately.
Promotional, for a sale, a discount, or a limited time offer.
Newsletter, for your regular update to a list that already knows you.
Announcement, for a new product, a new feature, or a change your customers need to hear about.
Welcome, for the first email a new subscriber gets from you.
Event invitation, for a webinar, a launch, or a workshop.
A promotional draft comes back with a clear offer and a direct CTA. A welcome draft comes back warmer, with an introduction to who you are. An event invitation puts the logistics near the top, because that is what people look for first.
Why this matters if you run a small business
Most small business owners have no shortage of email ideas. What they rarely have is the two hours it takes to turn one of those ideas into something that looks right in an inbox. The AI email generator gives that time back.
Describe your offer in everyday language, pick a starting point, and let the assistant build a complete email you only need to tweak. And because it asks about your business, your audience, your tone, and the look you want, the draft starts close to what you had in mind, which means the tweaking is quick.
It is just as useful when you want to explore. Run the flow again to try a different angle, test a new tone, or spin up a format you have not used before. You spend your energy on the message, the audience, and the results, not on the setup.
Where AI fits in your workflow
AI generated emails are most useful when you have a clear goal and a rough idea of what you want to say.
The AI email generator helps you structure those ideas, fill in missing details, and turn them into an on-brand email with subject line, preheader, and body.
For some campaigns you might still prefer to write everything by hand or start from a saved template. For others, especially recurring formats like newsletters or promotions, AI can help you produce a first version faster. You can also combine flows. Generate with AI for the first iteration, then refine the layout and copy manually in the builder.
How to create your first AI email
In SiteGround Email Marketing, go to Campaigns > New Campaign (or the Automation Builder).
Choose the Generate with AI card.
Add a campaign name, choose the language, and press Continue.
Start from a preset type or describe your email in your own words, then answer any follow-up questions.
Check the summary, edit anything off, and click Generate My Email.
Your draft opens in the Email Marketing Builder. Adjust, then Schedule.
If you already use SiteGround Email Marketing, there is nothing to install and nothing to set up. The next time you create a campaign or automation, choose Generate with AI and follow the conversation. Try it on your next newsletter or announcement and see how much time it saves.
New to SiteGround Email Marketing? Start for free and let your first campaign write itself.
It works as a short guided conversation. You describe your business, your audience, the goal of the email, and the tone you want, then pick one of five campaign types. The assistant summarizes your inputs, and once you confirm, it writes the subject line, preheader, and body into the email builder.
Can I edit an AI generated email?
Yes. The generated campaign opens in the standard SiteGround email builder, where every element is editable. Most people treat the output as a first draft and adjust the copy, the layout, and the images from there.
Does it write in languages other than English?
Yes. The assistant follows the language of the campaign or automation you set up, so the draft comes back in that language.
Do I need to install anything?
No. The Generate with AI option appears in the New campaign dialog and in the Automation Builder for existing SiteGround Email Marketing users, with no plugin, add-on, or change to your setup.
Does this replace the template builder?
No. Build with templates and the manual builder stay exactly as they are. Generate with AI is an additional starting point that you choose per campaign.
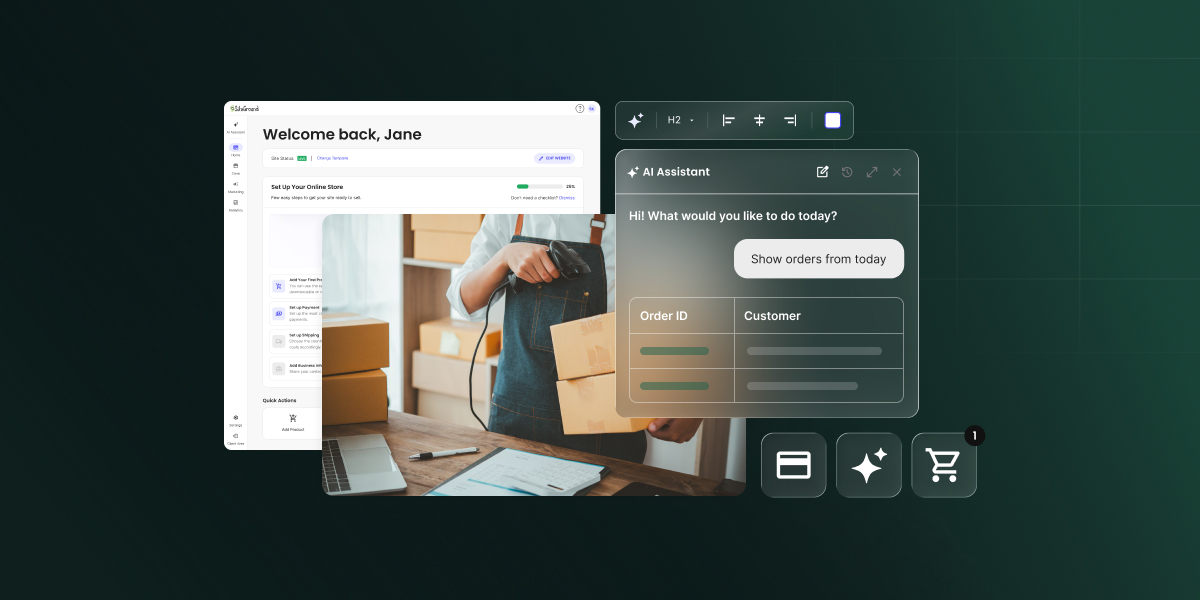
Your online store just got а new team member – the built-in AI Store Agent. It smartly analyzes your store data and answers any question about it in seconds. What is more, it can also execute real tasks for you – from creating coupons to bulk-editing your entire catalog on a single command. Learn what the AI store agent can do for you.
What is the AI Store Agent?
The AI Store Agent is an AI-powered analyst and store manager built into SiteGround Ecommerce. Ask it a direct business question, like which products deserve more promotion, whether your prices hold up within a category, or which customers keep coming back, and it digs through your orders, products, categories, customer accounts, reviews, coupons, brands, and attributes to give you an answer you can act on. Not a data dump or a link to a report. An answer, the way an analyst on your team would deliver it, so you can make the decision and move on.
And it doesn’t stop at analysis. The Agent executes too: it creates and manages products, coupons, and more, right from the same conversation where you made the call. Because it’s powered by AI rather than a fixed set of buttons, you’re not limited to a menu of preset commands. You describe what you need in plain language, and the Agent figures out how to get it done.
You’ll find the AI Store Agent in the Store section of your dashboard, which got upgraded so you can click less and do more, and keep your new assistant within a click’s reach. No setup, no configuration, no plugins. Open the chat and put it to work.
Get answers that drive decisions
Every store decision starts with a question. Should you reorder products? Is that promotion worth repeating? Are prices in that category too low? The answers were always in your store data, but getting to them meant reports, filters, and spreadsheet exports. Now you just ask, in plain language, the way you’d ask a colleague:
What’s my top performing product this month?
What’s the average price of products in the Accessories category?
How many orders came in last week compared to the week before?
Which coupon was used the most in the last 30 days?
Which of my products don’t have any reviews yet?
List the customers who placed more than one order this quarter.
Each answer feeds a real decision. Your top performer tells you what to restock and feature on your homepage. The category price average tells you whether a new product is priced to compete. The coupon comparison tells you which promotion to run again and which to retire. Products without reviews are your next follow-up email campaign. And because the answers take seconds instead of an evening, you make these calls while they still matter, not weeks later when the moment has passed.
Switch on ‘Power Mode’ and delegate the work
Insight is only half the job. With Power Mode enabled, the AI Store Agent goes from telling you what’s happening in your store to doing something about it. It can create and manage products, coupons, customer accounts, brands, and more, straight from the same chat:
Create a 15% off coupon for orders over $50, valid until the end of August.
Add a new product called “Linen Tote Bag” priced at $39 in the Bags category.
Create a brand called Aurora and assign it to my outdoor products.
The decision and the action happen in one place. You spot that a promotion worked, and in the next message you launch the follow-up. The coupon setup before every campaign, the product updates you keep postponing: they become one-line instructions.
Bulk edits: one instruction, your whole catalog
Where Power Mode really shines is the repetitive work. So much of running a store is the same small task multiplied across dozens of products: the same price change, the same description tweak, the same formatting, over and over. In a traditional dashboard, that’s an evening of clicking. With the Agent, it’s one sentence:
Reduce the price of all products in my winter collection by 10%.
Add “dishwasher safe” to the descriptions of all products in the Kitchen category.
Import these products to my store.
The Agent applies the change across every matching product, so a fifty-product update takes the same effort as a one-product update. That’s hours back every week to spend on the parts of the business only you can do.
Power Mode is off by default and you decide when to turn it on. To enable it, open your AI Store Agent Settings and switch on Power Mode. You can toggle it off again at any time, so you’re always in control of whether the Agent can make changes to your store or simply report on it.
Included with your plan, powered by AI Studio tokens
The AI Store Agent is available on the Sell, Grow, and Scale plans of SiteGround Ecommerce at no extra cost. It runs on the same AI Studio tokens you already have as a SiteGround customer, and every SiteGround customer gets 20,000 AI Studio tokens included with their account. Your new worker is already on the team. No hiring, no salary, no onboarding.
How to put it to work
Log in to your SiteGround Ecommerce dashboard and take a look around the new layout.
Go to the Store section and open the AI Store Agent.
Ask your first question, ideally one you already know the answer to, and put it to test.
When you’re ready to delegate, open AI Store Agent Settings and enable Power Mode.
Your store’s smartest hire
Every tool we add to SiteGround Ecommerce has to pass one test: does it give you back time to grow your business? The AI Store Agent passes it twice. It answers the questions that drive your decisions, and it carries out the work those decisions create, all from a chat inside your new dashboard. And since we keep teaching it new skills, the worker you meet today is the least capable it will ever be.
The new dashboard and the AI Store Agent are live now. Log in, ask your store a question, and see what it comes back with.
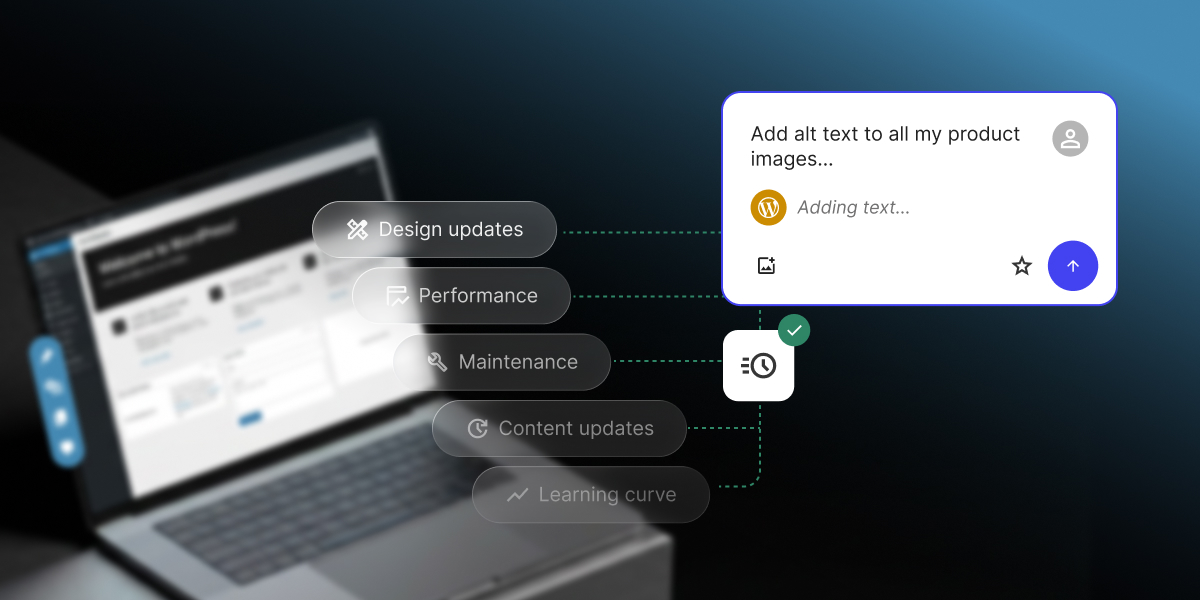
If keeping your WordPress site running has ever felt like more work than it should be, you’re in good company. Our 2026 report on AI in WordPress for small businesses found that most small business owners running their own sites hit the same walls: design and site updates, performance optimization, technical maintenance, content updates, and the steep learning curve of how the platform actually works.
This guide walks through the WordPress pain points that cost small businesses the most time, and how you can easily address them with a new kind of AI solution: an AI Agent for WordPress that connects directly to your site and executes real changes.
What are the most common WordPress pain points?
The most common WordPress pain points for small businesses are recurring WordPress site management challenges: design and site updates, performance optimization, technical maintenance, content updates, and the platform’s learning curve. They consume time because owners often manage the site themselves while running the rest of the business and trying to, you know, live their lives.
In our new research, which included a survey of more than 7,000 small businesses, managing design and performance optimization came out on top (respondents could pick more than one pain point, so the shares below add up to more than 100%):
WordPress pain point
Share of small business owners
Managing design and site updates
33.5%
Performance optimization
33.1%
Technical maintenance
29.5%
Managing content updates
28%
Steep learning curve
20.5%
But here’s what most users don’t know: you can now handle all these pain points quite easily with the help of specialized AI for WordPress site management.
And we’re not talking about a chatbot that can tell you where to click in the dashboard or a plugin that can spit out a blog post. We’re talking about an AI Agent for WordPress that connects directly to your site and executes real changes: not just suggestions or generated text, but actual site management. It transforms tasks that typically take hours of manual WordPress admin work into minutes of simple chat with AI, freeing you to focus on growth and productivity.
Managing design and site updates tops the list as the biggest pain point for small business owners, and the reason is that almost nothing about it is as quick and easy as it sounds. Swapping a hero image, nudging the spacing between two sections, or changing how your menu behaves on a phone can send you deep into settings panels and half-matching tutorials, and it’s common to lose an afternoon (or a weekend) to a single change that never quite works.
And the moment your site grows past a page or two, you’re adding pages, arranging them into parent and child sections, and building the navigation menus that tie it all together so visitors can actually find their way around. Done by hand, that can be hours of repetitive clicking through the same screens, and one wrong setting can leave you with broken links or a website menu that makes no sense.
How AI can simplify WordPress design and site structure updates
This is where the AI Agent for WordPress earns its keep, because it handles the whole job in a chat, not just the fiddly bits:
Set up or switch a theme. Ask it to search the WordPress repository, install and activate the theme you pick, or update and remove old ones, so managing the look of your site becomes a sentence instead of a trip through the Appearance menu.
Sort out your images. Have it pull up your media library, upload the new photos you want live, and clear out the old or oversized files that clutter your site and slow it down.
Structure at scale. Ask it to draft and publish a new landing page, edit one that exists, or remove a page you’ve outgrown, and it can even take a full page structure and create the pages for you in one go.
A full site structure in 40 minutes instead of 8 hours? One early adopter of the AI Agent for WordPress needed a multi-level site with more than 20 pages and three navigation systems, which is close to 8 hours of work by hand. The AI Agent did it in 40 minutes. Download our 2026 report on AI in WordPress for small businesses to see how they did it, along with more real-world results.
2. WordPress performance optimization (33.1%)
Performance optimization is a close second WordPress pain point at 33.1%, and for most small business owners, the trouble starts before any fixing: you can’t easily tell whether your site is as fast as it should be. And if you do sense it’s slow, the causes are the kind of thing you’d need to be fairly technical to chase down: oversized images, a plugin loading on every page, or caching that was never set up. So it lands in the “I should look into that” pile, while a slow site can cost you visitors and search rankings.
How AI can help diagnose WordPress performance problems
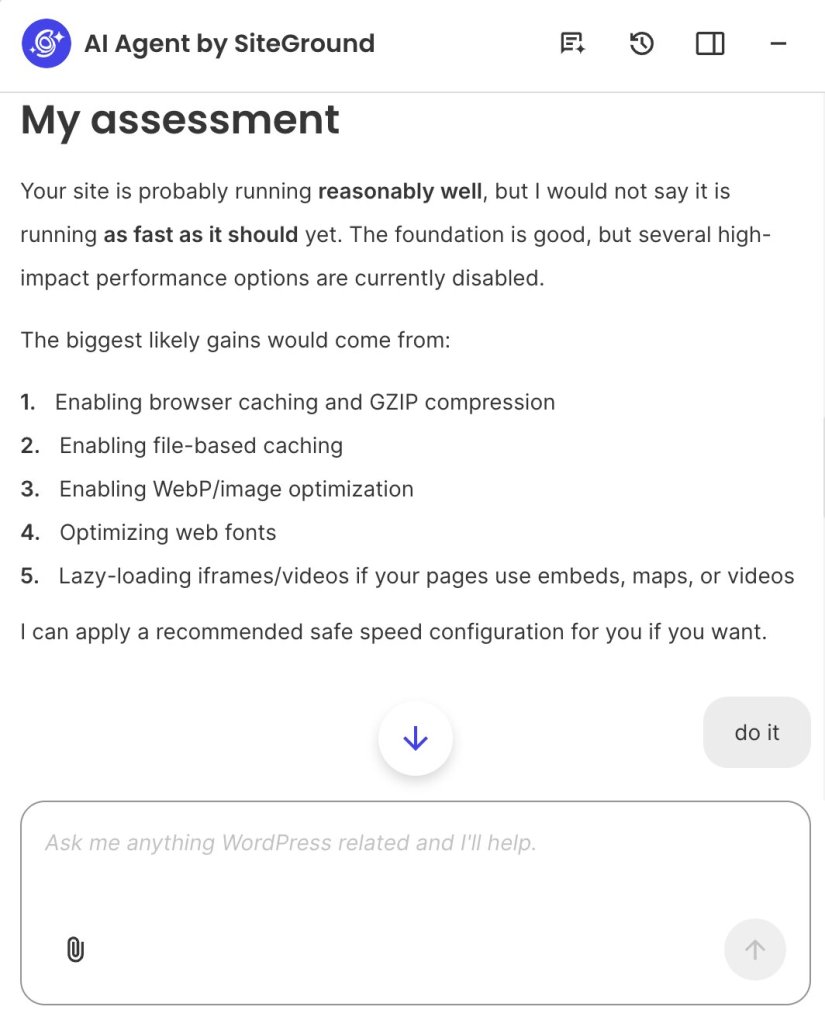
You can just ask the AI Agent for WordPress something very simple like “Is my website running as fast as it should?” And because the Agent is directly connected to your site, it goes and checks, then tells you what it found.
But instead of just giving you a diagnostic report and making you do the work, it acts as your hands-on technical administrator. You can use simple natural language commands to execute performance-enhancing updates directly in the chat:
Clear your caches instantly: You can simply instruct the Agent to clear your site’s cache, and it will automatically flush it to ensure your pages load quickly.
Update outdated software: Old core files, plugins, and themes can drag down speed and pose security risks. You can command the Agent to check your site health and instantly update your WordPress core, themes, and plugins to their latest, most optimized versions.
Remove site bloat: Unused software takes up valuable server resources. You can ask the agent to list all installed plugins and themes, and then instruct it to permanently delete the inactive ones.
Clean up the media library: To save storage space, you can have the agent retrieve your media library files and instruct it to delete specific old or unused images.
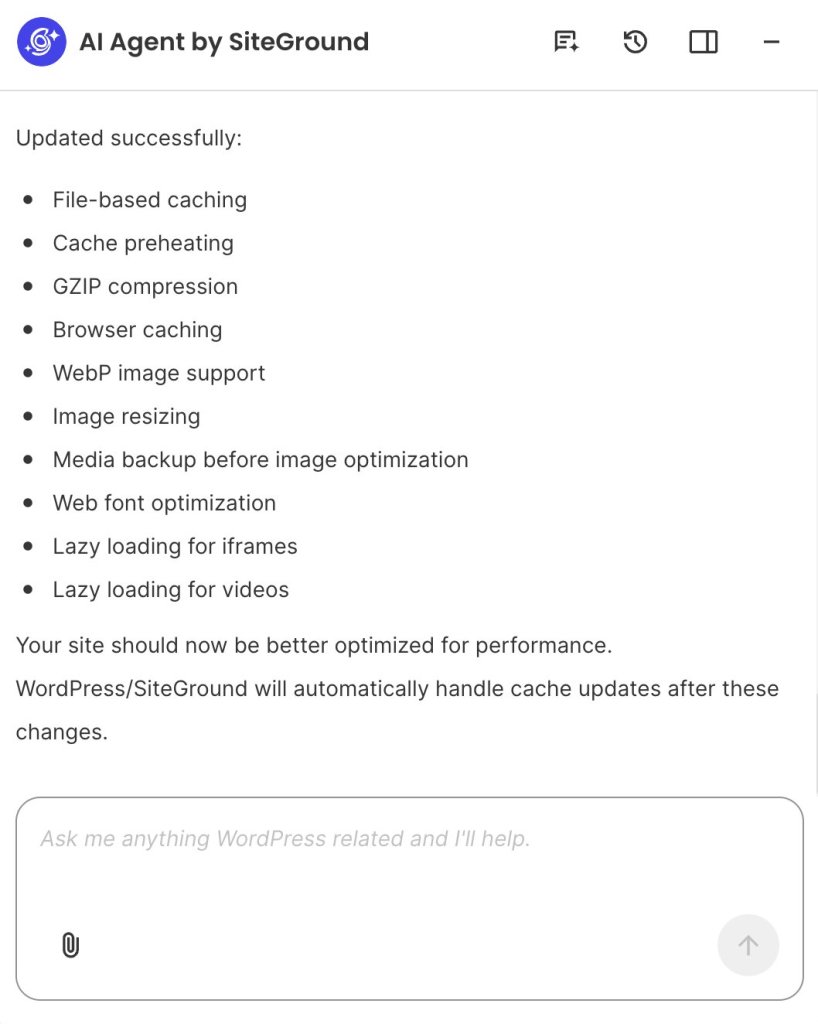
By the way, you don’t need to give the Agent elaborate instructions or even know what cache is. After asking simply “Is my website running as fast as it should?”, the AI Agent recommends what to change in order of impact, and then it offers to make those changes for you:
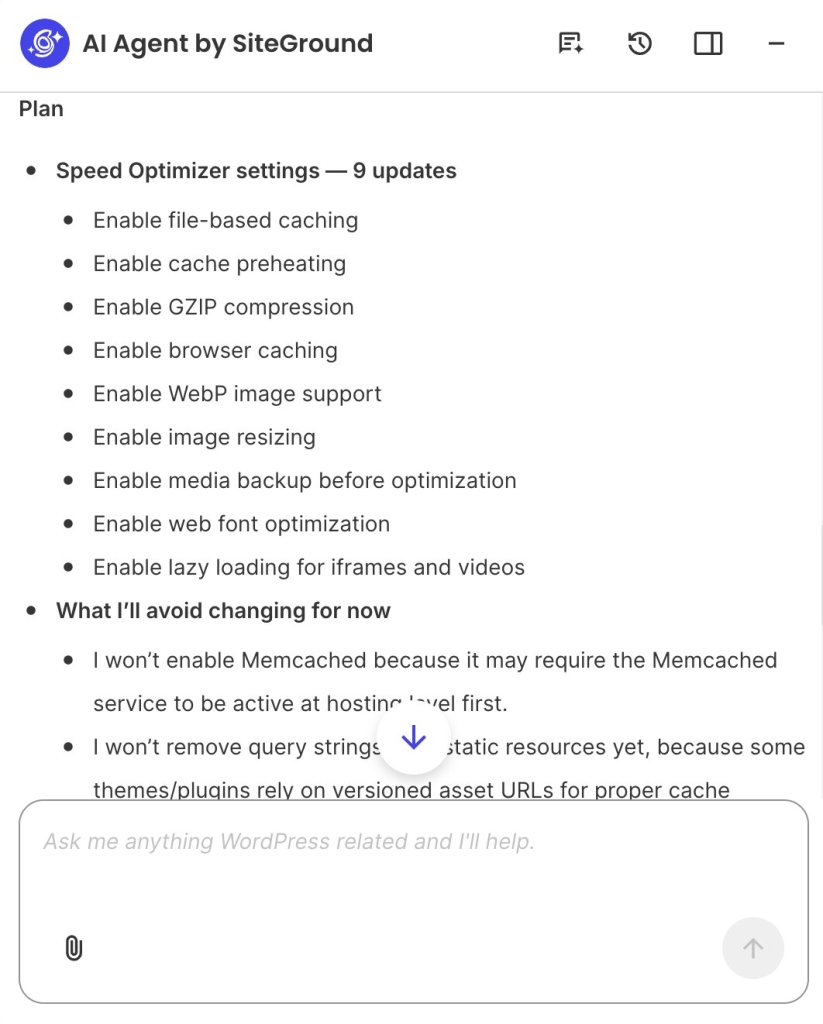
Tell the AI Agent to go ahead, and it first shows you a plan: the exact settings it intends to switch on, alongside a short note on what it’s choosing to leave alone for now and why, such as holding off on options that could depend on your hosting setup or break how certain themes behave. Then it asks whether you’re happy with that set before it applies anything.
Give it the go-ahead, and it makes the changes, then reports back on what it did. So what started as a question you couldn’t answer, “is my site running as fast as it should?”, ends a few messages later with a faster site and a record of what changed, and you never had to open a settings panel.
3. Technical maintenance (29.5%)
Technical maintenance is a pain point for 29.5% of small business owners, and since most of them aren’t developers, it’s a similar issue to performance optimization: you’re not sure what actually matters, and you’re nervous about doing it. WordPress flags some of it: for instance, there’s an update badge in your dashboard counting the plugins and core files that are behind. But a number on a menu doesn’t tell you whether an update is an urgent security fix or a trivial tweak, what might break if you run it, or what to do first.
It also doesn’t help that outdated core software (the base software that runs your site) and plugins are the most common way small WordPress sites get hacked, so the delay carries a real cost.
How AI can reduce recurring WordPress maintenance work
The AI Agent for WordPress works like a site administrator you can talk to, keeping the WordPress maintenance tasks that pile up under control. It does the essential upkeep without you opening a settings screen:
Run your updates. Ask it to update your WordPress core and language files along with your plugins and themes, so the security patches you keep putting off actually get applied.
Manage plugins and themes end to end. Have it install and activate something new, update what you already run, or list everything installed so you can audit it and permanently delete what you no longer need.
Change core settings without menu-hunting. Just tell it the setting you want changed, like your site title, timezone, or address, and it updates it, no digging through the Settings screens.
Tidy up who has access. Ask it to list your user accounts so you can spot the old freelancer or former employee who still has a login, then have it change roles or remove the accounts that shouldn’t be there.
Even now, when anyone can generate a blog post in seconds with AI, content updates still weigh on 28% of small business owners. That’s because publishing a single post in WordPress means drafting it, then formatting it block by block, sorting it into the right categories, adding tags, writing the metadata, uploading images, and adding alt text so it’s accessible and searchable. Try to publish regularly, keep a content calendar moving, go back and refresh old posts so they don’t fall out of date, fix broken links, and update internal links as your site grows, and it becomes a permanent part-time job.
And if you run a WooCommerce store, every product needs its own description, images, and metadata, and then the real grind starts: changing prices across a seasonal sale, updating stock and availability, adding a discount to a whole category, refreshing dozens of descriptions when a line changes, and translating it all if you sell in more than one language. All of it is repetitive, easy to postpone, and slow to catch back up on.
How AI can speed up WordPress content updates
The agent is happy to work at any scale, from one post to a whole WooCommerce catalog, and it makes the change directly rather than just handing you text to paste. You describe what you want, and it does it across the site:
Write and publish posts and pages. Ask it to draft a new blog post, publish a landing page, edit copy that’s already live, or clear out old posts, and it can run the same change across many items when you need a batch done.
Organize and optimize for search. Tell it to sort content into categories and tags and write the SEO metadata (the title and short description search engines show), so a growing library stays structured and nothing goes out with the gaps that cost you traffic.
Handle your comments. Ask it to pull up recent comments and then approve the good ones, hold the questionable, or trash and mark spam, instead of moderating them one by one.
Help with your store. Have it create and update WooCommerce products, categories, and coupons, change prices across your catalog, and check or update orders, all from the same chat.
Because it’s connected to your site, it works from real data: when it writes a product description, it’s describing your actual product at your actual price, not guessing from a prompt.
Updating 200 product images in no time. Another early adopter of the AI Agent for WordPress had more than 200 product images that all needed alt text, titles, descriptions, and keywords. Done by hand, that is about 58 hours of work. The AI Agent did it in 4.5. Download our 2026 report on AI in WordPress for small businesses to see how, plus more real results.
5. The steep learning curve (20.5%)
The learning curve is a pain point for 20.5% of the small business owners we surveyed, and it comes down to one thing: WordPress is powerful because it can do almost anything, and that same flexibility can make it hard to use.
Themes, widgets, permalinks, taxonomies, blocks: none of it means much until you have some real experience. Even simple-sounding changes can send you looking for a setting that’s three menus deep, or into a page builder you have to learn first, and anything more ambitious often runs into code.
How conversational AI can reduce the WordPress learning curve
This is the pain a conversational agent like the AI Agent for WordPress was built for, because it lets you skip learning the dashboard altogether:
You ask in plain English. Instead of hunting for the right setting, you just describe what you want, and the Agent does it for you.
It’s built for non-technical people. It’s made specifically for small business owners, solo founders, freelancers, bloggers, and small teams, so you can get real work done without knowing WordPress internals.
Help stays where you work. The agent sits in a chat box in the bottom-right corner of your WordPress admin, on every screen, so you’re never hunting through menus or tabbing out to a tutorial.
There’s nothing to figure out to get going.Setup is completely frictionless, making it incredibly easy to connect your site and start chatting, whether you host with SiteGround or somewhere else.
This all makes the AI Agent for WordPress the most practical WordPress site management approach you can pick up, and the shortest path to making the platform less of a headache.
WordPress pain point
How the AI Agent for WordPress helps
Managing design and site updates (33.5%)
Ask it to find, install, or switch a theme, upload images, and build or edit whole pages applied straight to your live site.
Performance optimization (33.1%)
Instruct it to execute performance optimizations directly in the chat, such as clearing your caches, updating software, or permanently deleting the specific inactive plugins and old images weighing you down.
Technical maintenance (29.5%)
Have it list your installed core files, plugins, themes, and user accounts so you can easily audit them. Then, command it to instantly run updates or remove unused extensions and lingering logins.
Managing content updates (28%)
Ask it to draft, publish, or edit posts and pages, write SEO metadata, moderate comments, and manage WooCommerce products, prices, and orders.
Steep learning curve (20.5%)
Built for non-technical small business owners, with minimal setup, so you don’t need to know how WordPress works.
What AI can’t (and shouldn’t) do for you
As capable as it is, the AI Agent for WordPress is built to do the work, not to decide what the work should be. It can suggest a layout, draft your copy, and roll a change across the whole site, and it’s genuinely good at all of it. But the judgment calls stay with you: the final word on your brand, big structural decisions, and a human review of anything your customers will see. As it’s often the case with AI, the best way to use it is to treat its output as a strong first draft you approve.
That’s the thinking behind its Power Mode feature. To prevent a simple typo from accidentally breaking your site’s layout or permanently erasing data, the agent pauses before high-impact actions (like deleting plugins, changing core settings, making bulk content edits, or managing WooCommerce orders). It reminds you that the action is irreversible and waits for you to explicitly click “ENABLE” to authorize it before proceeding. For ultimate control, you can also toggle Power Mode on or off directly from the plugin’s settings page inside your WordPress dashboard.
Where to start: pick the pain point costing you the most
If any of these WordPress pain points sound familiar, whether it’s one nagging thing or the whole list, the easiest way to see what AI can do for you is to give it something real to handle. Think of the task you’ve been putting off, and just ask the AI Agent for WordPress. If maintenance is the drain, have it audit your plugins and users. If it’s content, point it at a backlog of product descriptions. If it’s design, ask it to refresh a page that’s been bothering you. In all cases, you’ll be just describing what you need instead of clicking through it yourself.
The AI Agent for WordPress comes with the Essential AI Studio plan, free for every SiteGround customer, and includes 20,000 free AI tokens a month.
What are the most common WordPress pain points for small businesses?
The most common WordPress pain points for small businesses are managing design and site updates, performance, technical maintenance, content updates, and the learning curve. In SiteGround’s 2026 survey of more than 7,000 users, those five ranked highest among owners with live sites.
Why does WordPress take so much time to manage?
WordPress takes so much time to manage because most owners do it all themselves, and the platform tucks everyday tasks behind layers of menus and settings. About 67% of small business owners run their own site, so the small, recurring jobs stack up, and each one means another trip into the admin panel.
Can an AI agent help with WordPress design changes?
Yes. A site-connected AI agent can install or switch themes, manage images, and build or edit pages, applying the changes straight to your live site. Because it makes only the change you ask for, it does this without flattening your existing layout or formatting.
Can AI improve WordPress performance?
Yes. AI can clear your caches, tune your speed plugin, and remove unused plugins, themes, and oversized or orphaned images that slow a site down. On SiteGround-hosted sites it can also clear SiteGround CachePress. The best approach is to let it audit first, then approve what gets removed.
Which WordPress maintenance tasks can AI handle?
AI can handle WordPress maintenance tasks such as updating core, plugins, and themes, auditing and removing what you no longer use, changing core settings, and managing user accounts. Higher-risk changes, like removing users or deleting plugins, wait behind Power Mode for your approval, so routine upkeep gets done safely.
How does AI help with WordPress content updates?
It creates, edits, and publishes posts and pages, organizes categories and tags, moderates comments, and updates WooCommerce products, coupons, and orders, including bulk changes across many items at once, while leaving your existing formatting untouched.
Can beginners manage WordPress through an AI agent?
Yes. Beginners can manage routine WordPress tasks through an AI agent by describing the result in plain English through a chat box in your WordPress admin, and the agent carries it out, so you never have to learn where each setting lives. That’s how AI takes the WordPress learning curve off the table.
Which WordPress tasks still need a human?
The WordPress tasks that still need a human include creative strategy, brand decisions, and big structural choices, as well as reviewing anything customer-facing. The best way to work is to treat AI output as a first draft you approve, keeping human judgment on the high-impact calls.
You can now add a Stripe checkout to anything you build with Coderick AI, easily and right in the chat. Your shop, your app, your booking page: they can all take online payments, through a checkout your customers already trust.
Tell Coderick what you want to charge for, connect your Stripe account, and you’re ready to start selling online.
What you get with Stripe in Coderick AI
Accept one-time or recurring payments
Connect your new or existing Stripe account, easily
Generate Stripe checkout flows and payment links from your Coderick’s workspace
Works with all Coderick AI paid plans
What is Stripe?
Stripe is one of the most trusted, versatile and widely used payment providers in the world, and it now works directly inside Coderick AI. It handles card payments, digital wallets, local bank methods, and subscriptions, and is used by millions of businesses to securely process payments every year.
In practice, Stripe takes care of the secure checkout, card data handling, and fraud checks, then the money from each sale lands in your Stripe account. That’s why it’s a natural fit for Coderick AI: Coderick builds the site, app and the sales flow, and Stripe is the trusted layer that actually collects the payment.
What you can sell with Coderick AI and Stripe
Sell your work – physical and digital products
Maybe you’re a ceramicist taking orders for a batch of mugs, or a photographer selling prints. You tell Coderick what you’re selling and what it costs, and it builds the online store and sets up the checkout through Stripe.
Get paid for the app you built
You built something: a planner, a habit tracker, a small CRM. Right now anyone can use it for free. Ask Coderick AI to add payments to the app you built: before someone can use the app (or unlock the full version), they go through a Stripe checkout and pay. Once they’ve paid, they get access. So the app you made on weekends starts bringing in money instead of just sitting there for free.
Charge for your services
Charge for work you already do: a consultation, a coaching call, a photo shoot, a freelance job. The same site that shows your work can now collect the payment for it, so you’re not sending a separate payment link by hand after every job.
Sell subscriptions and memberships
A single sale is nice, but a subscription is income you can count on every month. You can set up a membership, a yearly plan, or ongoing access, and Coderick AI builds it. Then ask Coderick to set up payment flow through your Stripe account.
One integration, many online payment methods
Whatever you’re building, getting paid is now part of the same conversation. Connect your Stripe account to your Coderick project, and your site or app can start taking online payments, one-time or recurring. That gives your customers a wide range of ways to pay, and the most widely used include:
Payment type
Examples
How it works for your customer
Credit and debit cards
Visa, Mastercard, American Express, and more.
The most common way to pay online, accepted in most countries.
Digital wallets
Apple Pay, Google Pay, Link, and more.
One-tap checkout using a card already saved on a phone or browser, with no card details to type.
Buy now, pay later
Klarna, Clearpay, and more.
The customer splits the cost into instalments, while you’re still paid in full upfront.
Local bank methods
iDEAL (Netherlands), Bancontact (Belgium), BLIK (Poland), and more.
The customer pays straight from their bank account using the option they know in their country.
Availability depends on your setup and your customer’s country. Apple Pay, for example, requires verifying your domain in your Stripe account first. Others, like Klarna, are only available in certain countries. Check Stripe’s documentation for the specifics on each.
Stripe decides which methods to show, based on the customer’s location, the currency, and what your account is set up to accept. The same checkout can offer different options to customers in different countries.
Secure checkout, handled by Stripe
If you’ve ever thought about selling online, you’ve probably had the worry: what actually happens to my customers’ card details? Could my website and I take such a responsibility and what are the security risks?
When enabling Stripe payments for your website or app, the payments don’t go through your web pages and full card details never touch your site . When a customer pays, they do it on Stripe’s own secure checkout page. Their full card details go straight to Stripe and never touch your site or the code behind it. Stripe is one of the most trusted names in payments, so the page your customers see is one they already recognise and feel safe using.
How to set up Stripe in Coderick AI?
Getting set up takes a few clicks:
Tell Coderick what you want to sell, in plain language (“let people book a paid consultation,” “sell access to my online course”).
Coderick builds your site or app, then shows a Stripe connection card in the chat. Click Connect. (You can also connect any time from the Integrations menu.)
Copy a key from your Stripe account’s dashboard and paste it into the connection dialog. (Here’s how to create your key. It only takes a couple of clicks.)
Coderick builds the full checkout for you: your products, payment links, and confirmation page, all from what you described.
That’s everything on your end. For the exact step-by-step, including how to create your key and go live, see the full guide: How to integrate Stripe in Coderick AI.
From here, it’s you and your customers
The building was never the hard part, getting paid was. Wiring up payments has always been the stark opposite of the free-flowing nature of vibe coding: weeks of setup, not minutes, before a single customer could pay you. So a lot of great work stayed as a side project: your app, your tool, something you built but never quite turned into a business.
That’s what changes here. You describe what you’re selling, Coderick AI builds the checkout in seconds, and what you made goes from idea to first paying customer in one conversation. The moment real people start paying for it — not a paycheck, not a client assignment, but strangers choosing to buy something you created — it stops being a prototype. It’s a real product.
It’s a feeling that’s genuinely hard to put into words. Whether you call yourself a non-technical founder or a vibe coder, this is the moment it was all for — your side hustle becoming your main hustle. From here, it’s just you and your customers.
Ready to start selling?
If you’ve already built something on Coderick AI, this is the piece that turns it into a business. Open your project, tell Coderick what you want to sell, and connect Stripe.
If you haven’t built anything yet, now’s a good time. Describe it, host it, and get paid for it, without leaving the chat.
Yes. You connect your own Stripe account If you don’t have one yet, you can create it directly on Stripe’s site, then connect it to your Coderick project.
Can I use Coderick AI and Stripe without writing code?
Yes. Payments are processed by Stripe, one of the most trusted payment providers in the world. Your customers’ full card details go straight to Stripe’s secure, certified checkout and never touch your site or your project’s code.
What can I sell?
Both one-time and recurring payments: physical products, digital downloads, services, bookings, and subscriptions.
Can I sell subscriptions?
Yes. You can set up recurring payments for things like a membership or ongoing access. One important step if you do: ask Coderick to build a subscription management area into your site, where customers can pause or cancel their plans. Without it, someone could subscribe with no way to cancel. You’ll find more on setting up the customer experience after purchase in our full guide.
Can I test it before taking real payments?
Yes. Connect your Restricted Key in test mode (it starts with rk_test) and run through the whole buying flow yourself, with no real charges. When everything looks right, swap in your live key (rk_live) from the Integrations menu and you’re ready to take real payments. Our full guide shows you how to create and connect your Restricted Key.
How are taxes handled?
You can enable Stripe Tax, a paid add-on in your Stripe account, to automatically calculate and collect the right tax rate at checkout. Setting it up and staying compliant is your responsibility as the seller.
How do refunds work?
You can ask Coderick to build an admin dashboard into your project and process refunds yourself, as long as your Restricted key has refund permissions enabled (they usually are by default). To confirm a refund went through and see the full record, check your Stripe dashboard.
Where do my customers pay?
On Stripe’s secure checkout. When a customer clicks to buy, they’re taken to Stripe to pay, then sent straight back to a confirmation page on your site.