SiteGround Optimizer V6

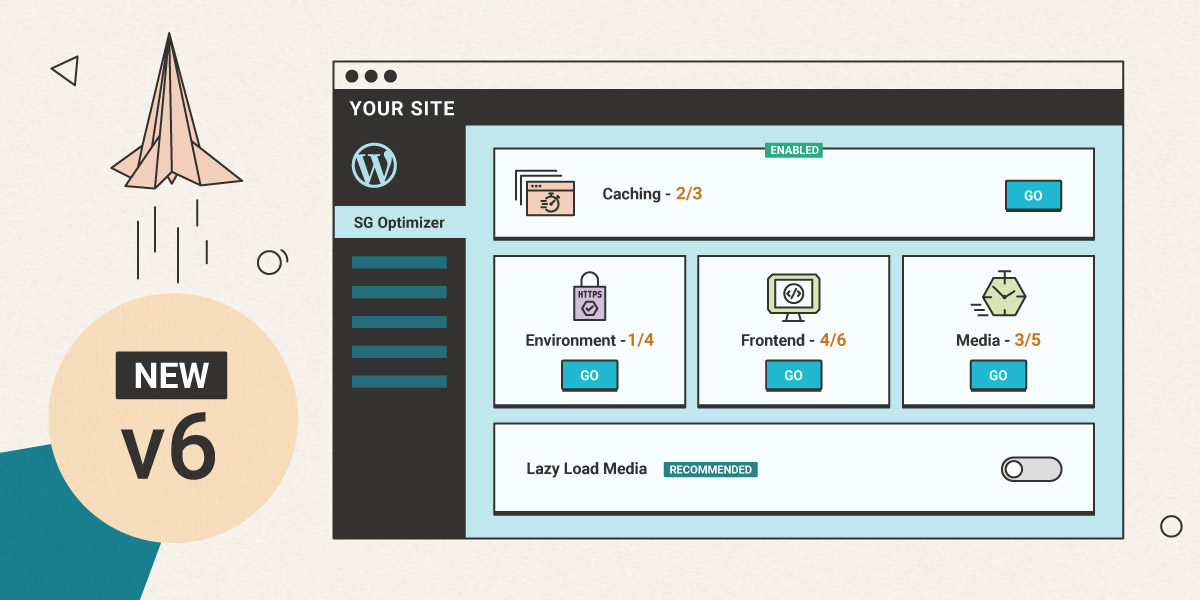
Since the launch of the SiteGround Optimizer plugin, we have been constantly working on adding new features, improving existing ones, and making sure that we use the best technology available to achieve a blazing fast loading speed for all of our users. That being said, we’re happy to introduce a major update to the SiteGround Optimizer plugin – v6. 

Brand New Design and Structure

One of the biggest changes you’ll notice is our brand new design with separate pages and a brand new dashboard. We have been adding more and more features to the plugin recently and we decided that the previous tab structure was not the best interface for the numerous improvements we have in mind. That’s why we have divided the interface into 5 pages, consisting of separate sets of carefully crafted tools, designed to optimize your website, improve loading speed and even decrease your resource usage. 

New Page – The Dashboard

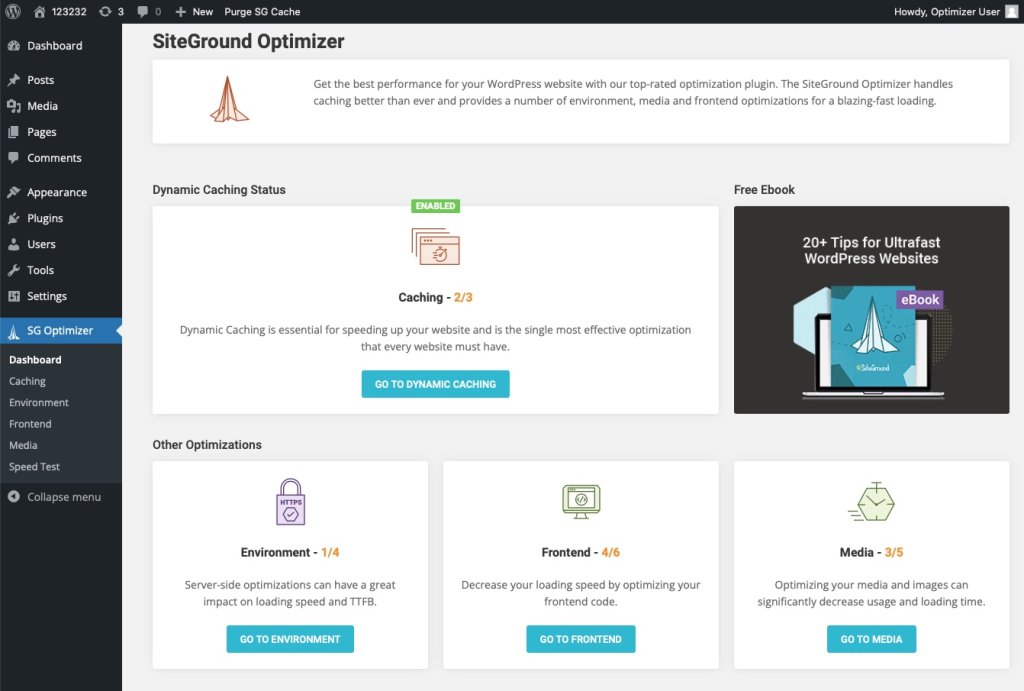
SiteGround Optimizer Dashboard

The entirely new Dashboard offers a quick look at the current optimization status of your website, along with shortcuts to the relevant pages where optimizations may be in order. Since keeping your WordPress application, plugins, and themes up to date is important for your website speed and security, we’ve made sure to add a notification in the Dashboard in case your WordPress and/or plugins need an update.

Recommended Features Tag

Recommended features tag

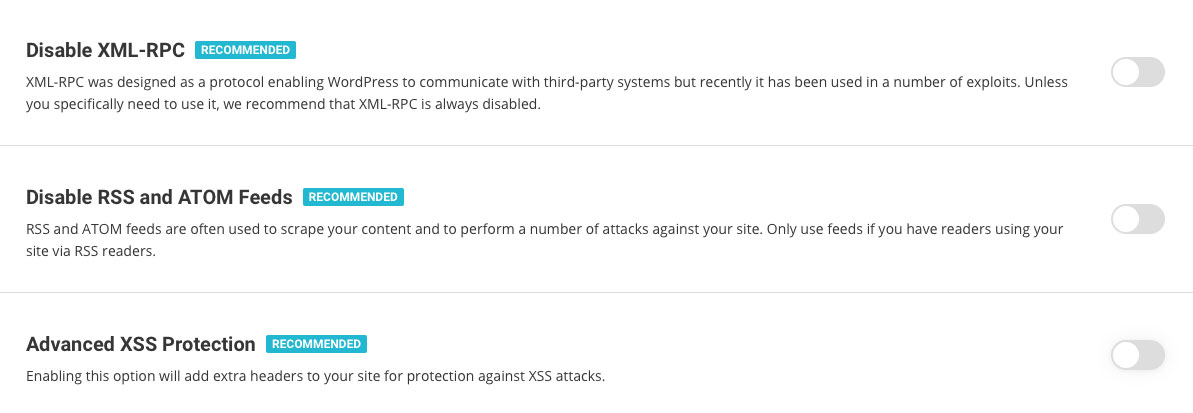
While we’ve always done our best to explain the different features you can find in the Optimizer, we realise that some of them may still sound complicated to the regular WordPress user and one can find themself struggling to figure out which of the features they need to use. To help you make the best choice for your website, we have added a “Recommended” tag to all SiteGround Optimizer features that we’re certain to speed up your website without breaking something or interfering with other settings.

Improved Image Compression and Image Features

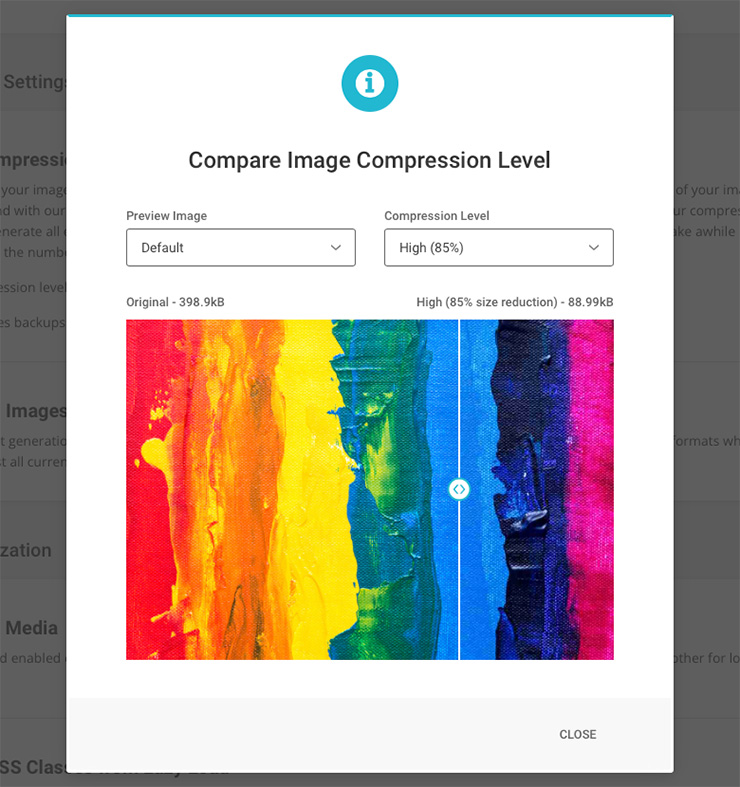
We have significantly improved our image compression technology to ensure that even at the highest compression and size savings, your images continue to look as good as ever. Additionally, we have added a “Preview” option so you can ensure that the compression level you have selected does not visibly affect the quality of your images. You can also choose to do a backup of your original images before you start the compression process – this is a great feature in case you plan to change the compression level in future or you just want to have a piece of mind.

WebP image generation has also been improved and a new option was added for larger images – automatic resizing for all images whose width is larger than 2560px, which is more than enough for most displays where websites appear. 

Code Refactoring

The plugins redesign and restructuring gave us an opportunity to refactor our code and make sure that everything is optimized and tested for the best possible performance. While the whole plugin has benefited from the refactoring, there are two tools where the change was noticeable – the WordPress Heartbeat Optimization (available in the Environment page) which precision and options were improved, and the Automatic Cache Purge (available in Caching) which now includes the option to purge the WordPress API Cache too. 

We have really enjoyed making this brand new version of the SiteGround Optimizer and we’re confident that the tools we have developed will help you serve the fastest and best version of your site. Drop us a comment to say which of the Optimizer features you like most and what would you like to see in future releases. 

[subscribe_cta]

21 Useful WooCommerce Plugins To Boost Your Woo Store Functionalities Out Of The Box

WooCommerce, built on top of WordPress, is one of the most popular eCommerce platforms on the web. By every metric available, it is the cheapest platform to get started with as it can be installed on any WordPress website and the basic functionality is free.

If the basic functionality is all you need then it is absolutely free. Beyond the basic functionality though, WordPress – like all of WordPress – is extendable via plugins. In all my years of working with WooCommerce I have never been able to just install it and launch. I’ve always had to install a series of WooCommerce plugins

Choosing a Plugin

Price and budget are always a consideration when setting up an eCommerce site but that shouldn’t be the only consideration when selecting plugins. Other things you need to consider when selecting a plugin are:

  • Feature set
  • Developer (or company’s) reputation
  • How current is the code

A plugin that does exactly what you want done but hasn’t been updated in three years or tested with a recent version of WordPress will usually end up costing you more time and money than it is worth. If you are a programmer and have time to spare, yes, you can bring the plugin up-to-date if it is open source. However that means that you are now on the hook to keep it current.

Paid vs. Free WooCommerce Plugins

All WooCommerce plugins fall into two basic categories:

  1. Free WooCommerce plugins
  2. Paid WooCommerce plugins

In all the plugins that we talk about here, I will note whether the plugin is free or commercial. Being the cheap person that I am, I always gravitate towards the free WooCommerce plugins wherever possible. That having been said, if you are going to be making money, you are going to have to spend a little to get the more useful functionality.

The plugins I list here are what I consider to be the top WooCommerce plugins, regardless of whether they are free or commercial. If they happen to be free then that’s a win for everyone.

The Most Useful WooCommerce Plugins

There are a lot of lists of WooCommerce plugins out there on the web. Some of them look like people just went through the plugin directory searching for the word WooCommerce and listed them for you. The plugins I’ve listed here may not be the shiniest or the ones that sparkle and get the most attention. They are however the ones that I have found the most useful in building my WooCommerce sites. I hope you find them useful as well. 

So let’s take a look at my favourite WooCommerce plugins.

A security plugin to keep WooCommerce safe

WordPress and WooCommerce go a long way to ensure your site stays safe and secure but it never hurts to add another layer or two of security. Of course the first layer of security is always making sure you have a hosting partner that is focused on the security of your site. Second though are a series of small steps you can take to make it more difficult for bad actors to get into your site. This plugin solves that problem.

Security Optimizer

Author: SiteGround

Price: Free

This has become only the second plugin I have ever put on my “must install” list. When I am setting up a new WordPress site for myself or for friends, family, or clients, Security Optimizer is always installed. I don’t always use all of the options, but that is one of the things I love about it, everything is optional. I can use one or two features, or I can use them all.

Make sure that your site is as secure as it possibly can be by installing the Security Optimizer plugin. Good news: If you are hosting with SiteGround, this is automatically installed and activated for you when you install WordPress.

If you are hosting with another hosting company, you can still use 100% of the features of the Security Optimizer plugin. It does not require SiteGround hosted sites.

WooCommerce payment plugins

WooCommerce Payments

Author: WooCommerce

Price: Free

WooCommerce is the latest of the payment processors. It’s powered by Stripe as the payment processor, but you do not need to have the Stripe extension on your site nor an existing Stripe account prior to installing and using WooCommerce Payments. This plugin is more tightly integrated into WooCommerce than any of the other payment gateway plugins and it’s a fully integrated solution, meaning that merchants can manage everything to do with payments from one central place – their own site’s WooCommerce dashboard.

It should be noted that one of the biggest selling points of this plugin is that eligible merchants can get almost immediate access to their funds.

WooCommerce Payments also enables Apple Pay and Google Pay.

Stripe Gateway

Author: WooCommerce

Price: Free

If you don’t want to process your money through WooCommerce and then through Stripe, you can use the Stripe plugin. As with WooCommerce Payments, you will need to set up a Stripe account to be able to use this plugin. 

Stripe is a well documented system and a safe bet for anyone who isn’t sure which payment gateway to use.

Paypal Payment

Author: WooCommerce

Price: Free

Paypal is probably the oldest of all the online credit card gateways. Their interface is kind of clunky but it still gets the job done. Because it’s been around so long, it is accepted in a lot of different countries where some of the newer gateways may not yet be available.

If Stripe isn’t available in your area, PayPal is a solid second choice.

Amazon Pay

Author: WooCommerce

Price: Free

A newcomer to WooCommerce, Amazon Pay has been rolling out over the past few years. The upside is that if your customers have an Amazon account, they can pay for your goods and services with that account. Since most customers trust Amazon to keep their information private, this trust is transmitted down to you if you offer Amazon Pay.

Amazon Pay does support subscriptions.

Square for WooCommerce

Author: WooCommerce

Price: Free

If you work in the real world and in cyberspace, Square is a great choice for a payment processor. As far as a normal eCommerce payment gateway goes, Square is as good as any of the rest but they are the only one that also integrate your real-life payments in the same account.

WooCommerce shipping plugins

These days shipping isn’t something that every store owner has to deal with. If you are selling virtual products or information then you probably aren’t shipping anything./ For everyone else there are a few plugins that you are going to have to consider installing.

JetPack

Author: Automattic

Price: Free with commercial options

JetPack has some core functionality that helps with the shipping and tax collection plugins, so, even though it is not technically a shipping plugin, you’ll need it for that purpose. The good news is that as of this writing, you don’t need any of the paid options to get shipping and tax functionality working.

WooCommerce Shipping

Author: WooCommerce

Price: Free

If you are shipping via United States Postal Service or DHL, install this plugin. It gives you the ability to print out labels for your packages for both of those services. 

UPS Shipping Method

Author: WooCommerce

Price: $99/year

This plugin will calculate UPS shipping for you by talking with UPS’s API. It will calculate both domestic (United States) and International shipping for you.

Please note that this plugin requires that you have the PHP extension SimpleXML installed. This extension is installed by default on SiteGround. If you are using another hosting parter, you will need to contact them to make sure it is installed before you can install this plugin.

This plugin calculates shipping rates but does not print labels.

FedEx Shipping Method

Author: WooCommerce

Price: $99/year

Like the UPS plugin, the WooCommerce FedEx Shipping Method plugin allows you to talk to the FedEx API and accurately estimate shipping costs for your customers

Like the UPS plugin, the FedEx plugin requires that you have a PHP extension installed. This one requires the SOAP extension. As with the SimpleXML plugin, this is installed standard on all SiteGround plans. If you are not hosting with SiteGround, make sure and consult your host to make sure this extension is installed before you install the FedEX Shipping Method plugin.

This plugin calculates shipping rates but does not print labels.

Canada Post Shipping Method

Author: WooCommerce

Price: $99/year

If you live in Canada or you ship a product to Canada then you will want the Canada Post Shipping plugin. This calculates shipping costs for your orders using the Canada Post API.

This plugin calculates shipping rates but does not print labels.

Royal Mail Shipping Method

Author: WooCommerce

Price: $99/year

For those in the United Kingdom, you will want the Royal Mail Shipping plugin. This calculates shipping for your orders based on the 2021 posted price guidelines. This plugin does not talk to an API therefore will not affect the speed of your cart pages. (Some API can slow down the display of pages)

Shipment Tracking Plugin

Author: WooCommerce

Price: $59/year

Regardless of what shipping service you use to ship your product to your eager buyers, you want to give them a way to track those orders to their doorstep. The WooCommerce Shipment Tracking Plugin does just that. It supports all of the shipping method plugins we have discussed here plus many others.

WooCommerce plugins to sell different kinds of products 

Since selling things is the actual point of an eCommerce website, let’s look at a few plugins that will help you actually sell subscriptions, event tickets, custom printed items and arrange bookings.

WooCommerce Subscriptions

Author: WooCommerce

Price: $239/year

There are a lot of subscription plugins out there for WordPress. However, if you are using WooCommerce for selling other products, consider the WooCommerce Subscriptions plugin before you look at the others. This plugin is going to be better integrated into your overall solution than anything else out there. 

The WooCommerce Subscriptions plugin will work with all the payment plugins to handle recurring payments, the trickiest part of selling any subscriptions.

WooCommerce Subscriptions will allow you to sell subscriptions to both physical or virtual products. It is good whether you are selling coffee by the month or your monthly newsletter about coffee.

FooEvents

Author: FooEvents

Price: Starting at $139/year

If you are selling tickets to events, using WooCommerce you have several options. I’ve tried most of them at one point or another and off all of them, I like FooEvents the best. FooEvents makes it easy to sell tickets and manage your events. If you are selling tickets to a physical event, you even have the option of a seating chart to sell individual seats.

Event management and ticket sales are not trivial endeavors so I encourage you to look at all your options before making a decision. Make sure though that you include FooEvents in your list of potential solutions.

Printful Integration for WooCommerce

Author: Printful

Price: Free

If you’ve ever wanted to have a store selling custom printed T-Shirts, water bottles, beach towels, etc. Printful is a good place to start. I looked at five different vendors before I selected Printful for my project and have never regretted the decision. Their products are top-notch and their integration with WooCommerce is seamless.

WooCommerce Accommodation Bookings

Author: WooCommerce

Price: Free

The accommodations industry is not one you traditionally think of when you think of setting up a WooCommerce/WordPress eCommerce site. That doesn’t however mean that WooCommerce has left them out. In the category of WooCommerce booking plugins, the standout is WooCommerce Accommodation Bookings. 

You can set things like check-in and check-out times and it allows you to sell by the quantity of nights stayed.

Given the money to be made in this industry, I find it very interesting that WooCommerce currently offers this plugin for free.

Product and cart plugins to help you sell more stuff

Once you have a customer lined up and ready to buy, wouldn’t it be nice to be able to sell them a little more stuff while they are here? These product plugins will help you do just that.

Product Add-Ons

Author: WooCommerce

Price: $59/year

Whether you want to sell personalization or gift-wrapping, this plugin will help you add options to make your sale even more valuable. This is one of the most popular WooCommerce product plugins available for WooCommerce. 

AutomateWoo

Author: WooCommerce

Price: $119/year

If you’ve ever wanted to hire an assistant to help you run your WooCommerce store, you are in luck. AutomateWoo is almost like having an assistant.

AutomateWoo is all about getting things done. 

  • Follow-up Emails
  • Personalized Coupons
  • Text Messaging
  • …and so much more

AutomateWoo allows you to define triggers. These are events that kick off a series of events that you define, called a workflow. A workflow has rules to make sure that the events triggered are the ones you want done, and if they are, then the action you define takes place.

A simple example would be:

TRIGGER: The date changes. (every morning at midnight) 

RULE: Find all the customers whose birthday is today. 

ACTION: Send an email wishing the customer a happy birthday

That’s a very simple one and yours can be much more complex. The thing is, once you define a workflow, it runs until you turn it off. You don’t have to remember to do things, AutomateWoo remembers what you want done and takes care of it for you.

Check out this great plugin and see how easy it is to get an assistant to help you with your store for only $99/year.

WooCommerce Cart Abandonment Recovery

Author: Addify

Price: $79/year

Abandoned carts don’t do anybody any good. Most good merchants will chase after them. After all, if someone took the time to visit your site and show interest in a product, why just let them walk away?

This plugin allows you to configure and automatically send recovery emails. You can add incentives and relevant coupons as well.

Don’t let your customers just walk away, take a look at the Card Abandonment Recovery Plugin for WooCommerce.

WooCommerce coupon plugin to create great deals

Smart Coupons

Author: StoreApps

Price: $129/year

WooCommerce comes with a pretty good system for creating coupons for your store. It is built into the basic core. However, if you need something a little more, check out Smart Coupons by StoreApps, the most popular of WooCommerce coupon plugins available.

It builds on the basic functionality of WooCommerce’s coupon system and allows you to do things like:

  • Offer free shipping
  • Store Credit
  • Gift Certificates

And several other things that make this plugin nice to have.

*Disclaimer: Prices mentioned in this blog post are subject to change. For accurate and up-to-date information on pricing, we strongly recommend checking the official page of the respective plugin.

Wrap Up

WordPress and WooCommerce are a powerful and extendable platform for eCommerce. There are hundreds of plugins out there that will help you sell, track, market, and report. I’ve only scratched the surface here. I’ve tried to narrow my list of plugins presented to you to the ones that will be most useful to you right out of the box. Once you get some experience, you will undoubtedly start to experiment with many of the more complex plugins and systems available to you. 

Good luck and I can’t wait to see what you build!

[subscribe_cta]

A Critical WooCommerce Vulnerability Promptly Addressed

Last week, the Woo team announced a critical vulnerability in the most popular eCommerce plugin for WordPress – WooCommerce. As described in their post, security updates were pushed to all Woo branches for users who have not disabled such updates. This was done in a very fast and efficient way. Furthermore, the Woo team has been extremely cooperative with providing all the needed information that allowed us to proactively add security rules to our WAF (Web Application Firewall) for an additional layer of protection. Read below to learn more about all actions taken and their results.

Branched updates pushed by Woo

Due to the severity of the vulnerabilities discovered, the WooCommerce team has worked more than 36 hours around the clock to patch every major release branch. This means that you don’t have to switch from WooCommerce 4 to 5 to protect yourself. Those updates were pushed and if not explicitly disabled, most probably your Woo has been already patched. However, we strongly recommend that you check this! All WooCommerce versions prior to the latest patch are vulnerable. You can check your version and compare it to the WooCommerce Releases (https://developer.woocommerce.com/releases/) page. For example, if you have WooCommerce 5.5.1 you should simply update to 5.5.2. That will fix the security problem without breaking any functionality.

Proactive WAF protection set by SiteGround

In regards to security, we’ve always believed that being proactive is the best approach. This particular vulnerability was no exception. As soon as we were informed about it by the Woo team, we acted immediately and added a new security rule to our Web Application Firewall (WAF) – an elaborate system for exploit prevention, running on all of our servers. You can think of the firewall as a set of rules that address exploit attempts. We are constantly on the watch out for information about common security issues and we are quick to act by adding security rules so that our system can block attempts to exploit such issues. WAF will not patch a security hole of a particular website, which can be only done through updating with the security release, but prevents attackers from using it to gain unauthorised access to your site.

You may wonder why you need a WAF rule when the Woo team is fast to release a new security version. We do it to ensure that clients have more time to react, during which their sites are safe from the exploit. While the majority of the WooCommerce users are automatically updated by Woo, some sites are not updated for various reasons – auto-updated failed, disabled, or postponed too far in the future. Some webmasters prefer to manage the updates themselves, mainly as they want to be sure that the update does not mess with any of their website functionality. After all, we are usually talking about online stores, relying on many additional plugins for shipping, payments, tracking, taxation, and many more. For these people, the WAF rules provide time to make sure all their critical functionality will work with the new Woo version.

As a whole, the handling of this Woo vulnerability shows how the combined efforts of responsible plugin developers and your hosting company pay off – even in emergency situations your clients are safe and business continues as usual!

[subscribe_cta]

Enhanced Protection Against WordPress Vulnerabilities with SiteGround Security Plugin Preinstalled

We have recently launched our own WordPress security plugin — SiteGround Security (now named Security Optimizer), which aims to protect WordPress users against the most common vulnerabilities plaguing the sites. It is available for anyone to download and use for free, regardless which hosting platform they use. To make sure that our WordPress sites are well protected on application level, however, we have started preinstalling SiteGround Security on all new installations on our platform with some of the features enabled by default. 

Default SiteGround Security Settings Against Common WordPress Vulnerabilities 

Having your site set up with security in mind from the start can easily protect you against some of the most popular vulnerabilities out there. To help you achieve that goal, when we preinstall the SiteGround Security plugin we enable the following settings:

WordPress Version is Hidden by default

Hackers often crawl websites scooping information about software versions used. That way, when they get to discover a vulnerability in any of those versions, they are able to reach to and quickly hack many sites in bulk using that information. For WordPress application this data is openly available in 2 places – in an HTML tag and in the readme.html file. 

By default, our plugin removes the HTML tag with the WordPress version and we strongly recommend that you also remove the readme.html file via the option in the SiteGround Security plugin.

Advanced XSS Vulnerability Protection enabled

The cross-site script vulnerability, known as XSS, allows different apps and plugins to access information in your WordPress that they shouldn’t. Such attacks are often used to gather sensitive user data for example. By default, the SiteGround Security plugin enables protection against XSS by adding headers instructing browsers not to accept JS or other code injections.

Disabled XML-RPC protocol to prevent many vulnerabilities and attacks

The XML-RPC is an old protocol used by WordPress to talk to other systems. It is getting less and less used since the appearance of the REST API. However, it is available in the application and many are using it for exploiting vulnerabilities, starting DDOS attacks and other troubles. That is why our SiteGround Security plugin disables this open access line to your WordPress application by default.

NOTE:

Jetpack plugin and mobile apps are valid users of the XML-RPC protocol. If you download Jetpack at some point, we will automatically enable the protocol back. You can also enable it yourself through the plugin interface.

Option to Disable RSS and ATOM Feeds 

Similar to XML-RPC, feeds are rarely used nowadays, but they are often used by attackers and bad bots to scrape your site content. So the SiteGround Security plugin allows you to disable them easily. Unless you really need them, we recommend using this option and disable them as soon as possible.

Lock and Protect System Folders by default

Usually, when an exploit happens, attackers try inserting and executing PHP files in public folders to add backdoors and further compromise your account. By design, those publicly accessible WordPress folders are used for uploading media content (images for example). Via the SiteGround Security plugin, we do not forbid the upload of files, but we stop PHP files and malicious scripts from being executed and causing problems for your sites.  This feature protects those system folders and prevents potentially malicious scripts from being executed from them.  

Disabled “Admin” Username 

The default username and one most widely used on all applications by their owners is “Admin.” Hackers know that and when they wish to bruteforce a login form, they will definitely try it. That is why we disable this username by default. 

Disabled Themes & Plugins Editor

Editing code through the plugins and themes editor poses direct security risks both from potential elevation of privileges attacks and errors made by a regular site administrator. If you want to edit your files, it is strongly recommended that you use the File Manager tool in Site Tools, or your preferred editor through FTP or SSH (ideally on a staging copy of your site). To help you avoid bad practices and attacks, we disable the themes & plugins editor by default.

There are a few settings, which you can control from the SiteGround Security plugin, which we have not enabled by default because they need your permission or they pose a risk on the way you use your app. Yet, we wish to encourage you to enable them consciously as they are quite powerful protection tools as well.

Two-Factor Authentication is a MUST

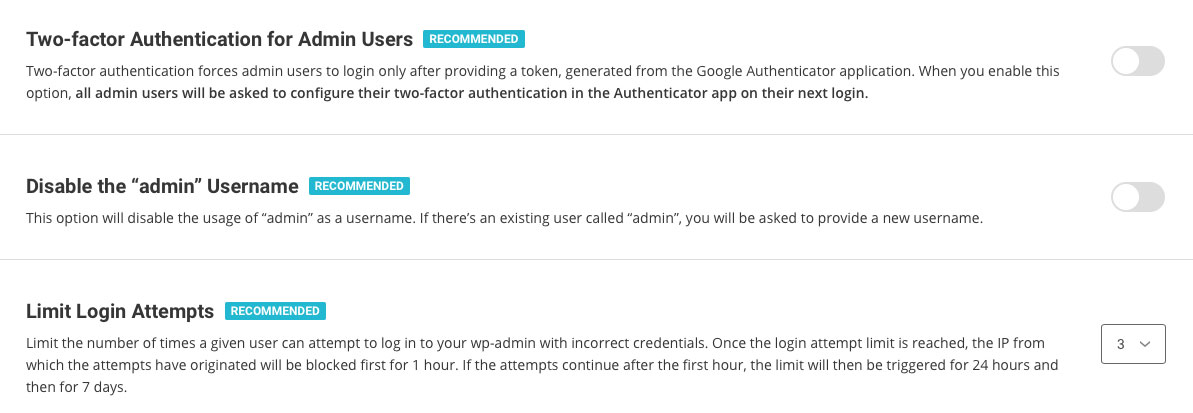
You already know that 2FA protects your login from brute force attacks and hijacking of login credentials. You can read more on the topic here and you can enable it easily using the SiteGround Security plugin.

Limit Login Attempts 

When someone tries to log in several times with wrong credentials, they are most likely trying to guess your logins. That is why it is strongly recommended to block such attempts after the first few – 3 or 5. You can set that in the SiteGround Security plugin interface and after that many times of wrong logins, the user gets blocked for 1hour the first time, then 24hours on the second trial, and finally for 7 days on their third trial. Again, since if you don’t know about this functionality, you may lock yourself out of the WordPress admin area, we are not enabling it by default for you, but you can do it easily in a click!

More Tools Against WordPress Vulnerabilities Coming Up

We’re continuing the development of the plugin and will add a lot of new functionality soon. Monitor the change log for new features added with the upcoming updates. There isn’t a strict roadmap that we can share at this point but some of the features coming next are custom login URLs, Strict Transport Security headers and X Frame options that will prevent page hijacking. As usual, we want to bring what’s usually difficult to implement technologies to everyone and with an interface easily accessible without having to spend hours researching the exact syntax of the necessary headers or other code.

[subscribe_cta]
Security Optimizer (formerly SiteGround Security) – our new must-have WordPress plugin

The security of our clients’ websites has always been an extremely important part of our web hosting services. Some of the brightest technical minds in our team have been continuously dedicated to crafting unique security solutions and keep the safety level of our hosting infrastructure on an unmatched high level. We have been an industry pioneer in developing server level protections like account isolation, server health monitoring, anti-bot traffic prevention, etc. We also know that on top of the server level solutions, the security of each individual website should be strengthened on application level too. That is why we provide services like auto updates, backups and WAF protection to our clients. 

Today we are happy to introduce another tool that can greatly enhance any WordPress site security – our brand new plugin – Security Optimizer (formerly SiteGround Security). The Security Optimizer plugin is available for free download for anyone and it comes preinstalled with all new WordPress installations hosted at SiteGround and provides its users an easy way to protect a WordPress site from malicious attacks. It also includes valuable tools that can help a website owner react in case there is a suspicion that the site might have been compromised. Read below to learn how to make your site safer with our new plugin.

Protect your WordPress against common attacks

In the Site Security section of our plugin you will be able to easily switch on several rules that will harden your website security and prevent common malware, bruteforce and other security issues. Some of these rules, like hiding your WordPress version or deleting your default readme.txt, will make it harder for crawlers to detect you’re even using WordPress. Thus your website will not be easily identified as a possible attack victim when a vulnerability appears. Other rules in this section will add advanced XSS protection and protect your system folders from being injected with malicious files. 

Strengthen your login security 

In the Login Security section of our plugin you will be able to apply several methods that protect your login from unauthorised access. One of the most recommended methods to protect your login is the 2-factor authentication and with the Security Optimizer plugin, you can easily switch it on for your WordPress administrative area. Some simple, yet very effective protection measures like changing your login URL and not allowing “admin” to be used as a username can be also easily set here. You can also limit the number of login attempts from one and the same IP, which will block attackers trying to guess your password through brute force. And if you want to go even deeper in protecting your WordPress login, there are two more advanced options available. You can specify the IPs from which your login page can be accessed. The option should be used with caution if you use dynamic IP, so that you do not block yourself out.

Monitor your admin area activity log

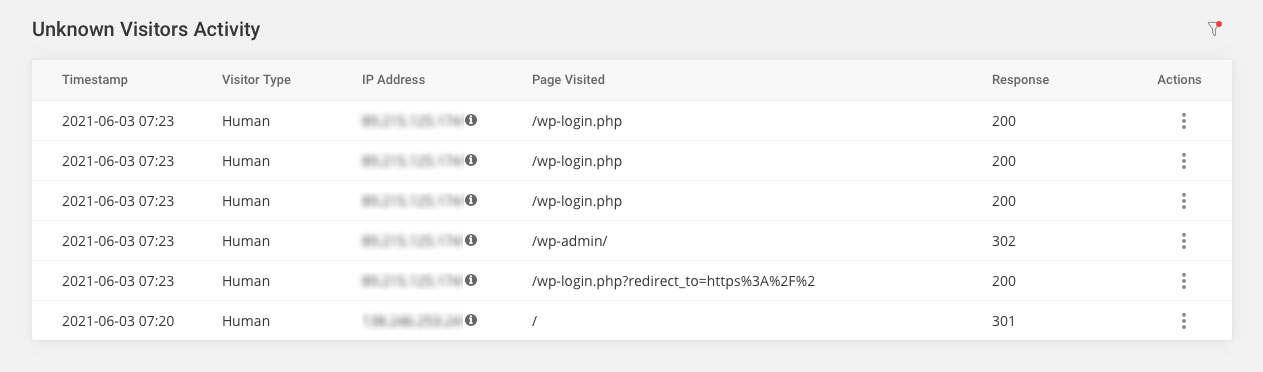
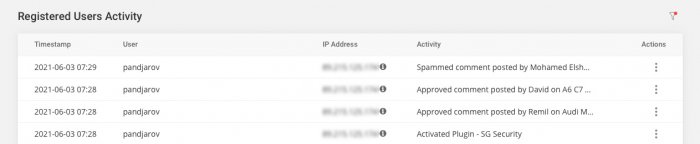
One of the best plugin features is the detailed Activity log. It allows you to pinpoint things like bad IP addresses that try to access your website as well as registered users that are performing tasks they are not supposed to. For example, you can block with one click IPs that have numerous incorrect logins and at the same time find out which user has deleted that post you are missing. For the initial version, we keep the log 16 days back so it’s worth giving it a look every now and then especially if you have a busy site and number of users with the capabilities to edit content.

React if you suspect your site might have been compromised.

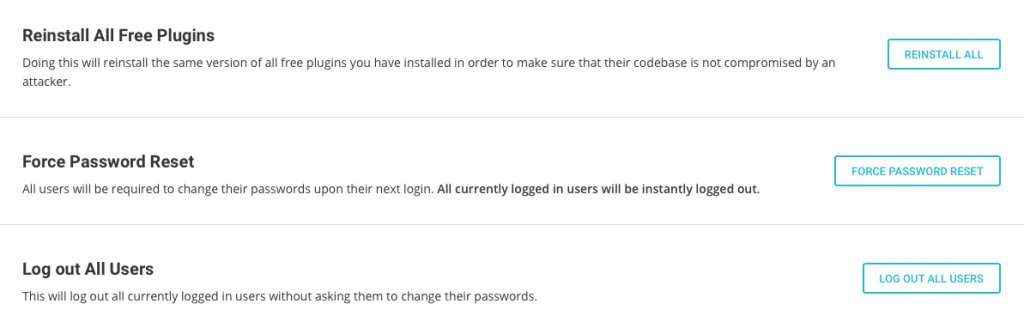
In the Post-hack section of the plugin you will find a set of actions that are useful, if you believe your site security has been compromised. Here you will be able to automatically log out all users and force them to change passwords. This way if any user was compromised, you may stop the malicious access through its account. You will also be able to reinstall all your current plugins. This will make sure you are using a clean copy of each plugin instead of a possible compromised one. Please bear in mind that although these post-hack actions are handy, they are not a substitute to a thorough site clean up that might need to be done by a WordPress security expert, if there are signs that your website might have been hacked.

How to get Security Optimizer?

Security Optimizer is available as any other free WordPress plugin. You can find it in the official WordPress plugin repository (https://wordpress.org/plugins/sg-security/) or install it directly through your WordPress admin area. If you host your next WordPress website at SiteGround, using the plugin comes right out-of-the-box, since all new WordPress installations now come with the plugin preinstalled with some of its features enabled by default.

This is the first plugin we are releasing whose full functionality can be used by anyone, even people that are not hosted by SiteGround. This said, we haven’t done excessive testing on every other company so issues caused by their particular setup may occur. If that’s the case, don’t hesitate to post a thread in the plugin forum in the WordPress repository, we will do our best to make sure it works great on all platforms.

[subscribe_cta]
Piping Email with PHP and SiteGround

One of the fun things to do with computers is to think outside the box, to use tools for things they aren’t exactly designed for. Email is one of my favorite toys with which to play with. Email is universal, and everyone has it. So when you create a new user for it, everyone can now do that.

What can we make email do that it doesn’t do already? Well, email is a delivery system, so we can use it to not only deliver data of some kind, but also to trigger an event that causes a computer somewhere to do something. If necessary, email can also respond back to you.

In the early days of the web, there were email addresses you could send an email to with a URL in the body. It would retrieve the URL and send you back the copy. Email pre-dated the web on the Internet, so there was a time when people had email but not web browser. This was a great way to get to the web before you got a web browser. The downside was that most email at that time didn’t support images, but this was okay because most webpages at this time didn’t HAVE images. 🙂

I’ve also used email to deliver data and trigger processing. Last year for Mother’s day, I built my mother and mother-in-law digital picture frames based on Raspberry Pis. The front-end media management for these frames is a WordPress site. This gave me a convenient API already built to deliver images to. The problem is that my siblings are not programmers, so I needed an easy way for them to send images to these frames. Email was that easy way.

I created a system that allows them to send a picture via email. Each digital picture frame has an email address, and they can send pictures to it. While WordPress handles all the user management and image processing, SiteGround’s email system allows me to make all of this happen.

The way to do this is called a “pipe” because you are “piping” the contents of an email to a program of your choosing.

I’ll stop here and tell you upfront that if you are not a programmer or at least a very technical user, this is not for you. Programmers can write programs (like I did) to take the input and process it. Technical users may also be able to install programs on their server that will accept the input and do something with it. If you are not in one of these two groups, I suggest you go find a programmer you trust and hire them to help you do this.

In SiteGround, the process is pretty simple. You first create an email address, then you create a filter for that email address. In my case, I created momspictureframe@example.com (not the real email address) in my Site Tools.

Then I went to filters and created a filter for momspictureframe@calevansxample.com.

  • I gave it a name that I could recognize, “Pipe Pictures to Mom’s Frame”.
  • I set the proper condition. I want this filter to trigger any time any email comes to momspictureframe@example.com. So I set it to:
    • IF ANY
      And then, I set it to trigger on the TO email address.
    • TO EQUALS momspictureframe@example.com
  • Finally, I set it to perform actions. In this case, I perform 2 actions.
    • First, “Pipe to a program”
      This is where you need to be a programmer. I wrote the program necessary to process the emails and uploaded it to my SiteGround site. I have to know the exact path and program name for this to work. Even a good programmer is going to have to experiment a little to get this right. Still, once they get it right once, it’s easy to do it again for other pipes.
    • Second, I set a “Discard Message” action.
      Remember that the first thing I did was create an actual email address? This means that unless I do something, emails will actually be stored for this address. Since I never plan to log into the email server to view them, I want it to toss each and every email coming to momspictureframe@example.com after I’ve handed it off to my script for processing. If I wanted to archive the email for future use, I would drop this action.

That’s it. Assuming you have a program handy that will accept the contents of an email and do something, you can now trigger it using a SiteGround email pipe.

Once you understand the power of piping emails to programs, the possibilities are endless. The example I gave you was a simple one but by no means the only one I’ve written. Again, since email is ubiquitous and available on just about any platform, you can open up a whole new world of processing and interactions for your users.

One word of caution, be aware that email is designed to be mostly insecure. You need to build security into your applications to make sure that only the users you want to, can interact with your system. The easy way to do this is to check the sender of the email, but that’s also insecure. If you do this, it should just be one of the checks you do.

[subscribe_cta]
SuperCacher and Up to 5 Times Faster Sites for All!

It was in the ancient 2012 when we announced our SuperCacher – the feature that allowed our clients to enable static cache, dynamic cache, and Memcached for their accounts. Since then, we have heavily enhanced the technology and fine-tuned its behavior and we believe it is one of the most powerful speed tools we have created for our clients. Currently, the most massively used part of our SuperCacher is the Static cache (NGINX direct delivery), as it is switched on by default on all our plans. Today we take a major step that will result in much more massive adoption of the other two SuperCacher layers and will significantly increase the speed of the sites we host. We now make Dynamic Cache and Memcached available at no additional cost on our StartUp plans too. Additionally, the dynamic cache will be activated on our servers by default. 

Dynamic caching ON for everybody!

Between 50% and 500% faster page loading

To briefly recap, dynamic caching is a technology that caches the HTML output of your PHP code. The PHP language is used so that the content of that same HTML is changed dynamically and upon a set of conditions predefined by the web creator. When using cache, next time that a page is requested, the pure HTML will be displayed from the Cache which is in the server’s RAM, as opposed to wasting CPU and I/O resources to read the PHP file from the disk. Thanks to that mechanism the web page loads significantly faster. And by “faster”, we mean like 50-500% faster based on our internal statistics for sites that have it turned on. The bigger the impact we see on heavier sites – those with more products and queries. Once you enable the cache, the pages start loading as fast as your Internet allows it, literally, since the page response is returned instantaneously from the memory of the server.

WordPress cached out-of-the-box, other applications can also be configured

Until now, the dynamic cache has been available on our GrowBig and higher plans and had to be activated by the users through our WordPress SiteGround Optimizer plugin. Now, we are making the cache available on all plans and we are activating it by default on all servers. Thus, all WordPress sites hosted on our platform will be cached out of the box. Additionally, our clients will be able to configure other applications to take advantage of the cache too. For instructions on how to use the Dynamic Cache with some of the other popular applications, you can refer to our SuperCacher Knowledge base articles.

Dynamic cache management options 

As already mentioned, our dynamic cache option will now work with WordPress installations out-of-the-box. However, WordPress users will achieve the best results through the Dynamic Cache controls of our SiteGround Optimizer plugin. The plugin acts as an additional connector between our dynamic cache and the WordPress application. For example, the SiteGround Optimizer tells your server to clean the cache automatically on each relevant content change and it provides you with an easy option to exclude URLs from being cached altogether. You can also turn off the caching through the plugin. 

If you are using another application, you may need to allow the caching from its backend in order to start using it, regardless that it is activated on server level by us.

As for the flush option, if a change on your website is not shown immediately, as the cached version is still served, you may always use the Flush button in your Site Tools. 

Memcached available on all plans to opt-in

Memcached is probably the most popular memory caching system that is used by thousands of database-driven sites, which speeds up these websites by caching results from database queries in the server’s RAM. Thus, if the result of the same query is needed again, it will be instantaneously taken from the RAM, rather than generated again from the Database, which is usually a slower process and requires more computing power.

Memcached is now available on StartUp plans with Site Tools as well. You can enable it from Site Tools > Speed > Caching, look for tab Memcached. However, please bear in mind that you also need to configure your application to use this cache, once you switch it on from our interface. For WordPress, this takes just a click in our SiteGround Optimizer plugin > Memcached control section, for some of the other popular applications you can refer to our SuperCacher Knowledge base articles

Note:

The described changes will affect only our Site Tools based servers. However, in case your account is still on cPanel, don’t you worry – by the end of March 2021 we aim to complete all migrations from cPanel to Site Tools so you’ll also get these SuperCacher enhancements soon.

[subscribe_cta]

What is CRON and What You Can Use It For?

“What the heck is a cron?” I field this question at least once a month from non-developers. It’s a great question. I’m going to break it into two questions though.

“What is a CRON?”
“What is WP-CRON?”

What is a CRON?

At its heart, a cron is a “time-based scheduler”. It handles tasks that need to be done on a regular basis and at a specific time. As an example, if you want your WordPress blog to display the weather forecast in the header, then each morning you need to go get the weather forecast. Yes, you could hire someone to log in each morning, go get the forecast and paste it into a widget.

A better plan is to have a program that runs each morning and talks to an API to fetch the day’s forecast and update your database for you. The program that runs your weather fetching program is called a CRON. The name is derived from “chronological” which roughly translates into “in order of time”.

Most systems these days have some concept of a cron. Unix based systems (Unix, Linux, macOS, etc.) actually have a version of a traditional cron. While some might put a nice graphical interface on them, they all boil down to a program named cron and a file named crontab.

The program cron is always running in the background and every minute it looks at the crontab and figures out if something needs to be done. If not, it goes back to sleep.

The crontab file contains when a program should be run and which program should be run. Each line represents a different task. They look something like this.

1 0 * * * ~/fetchForcast.sh

While this may look cryptic, all it is telling cron is that at 12:01 AM every day, run a program called fetchForcast.sh. Note that time added in the Cron tool is in UTC by default. Here is an easy guide to reading a crontab.

# ┌───────────── minute (0 – 59)
# │ ┌───────────── hour (0 – 23)
# │ │ ┌───────────── day of the month (1 – 31)
# │ │ │ ┌───────────── month (1 – 12)
# │ │ │ │ ┌───────────── day of the week (0 – 6) (Sunday to Saturday;
# │ │ │ │ │ 7 is also Sunday on some systems)
# │ │ │ │ │
# │ │ │ │ │
# * * * * *
1 0 * * * ~/fetchForcast.sh

Now that you have the key, it’s pretty easy, huh?

That really is all there is to a traditional cron. Most hosts like SiteGround allow you access to the cron for your system. Sometimes you have to edit the crontab manually, but many hosts have a much better interface for you to use. Either way, you have the ability to run programs at a specific time and on a regular basis.

What is WP-CRON

Like most things, WordPress does things just a little differently. Because many plugin authors needed to be able to schedule things to happen regularly, and because many WordPress site owners don’t know where their crontab is, much less how to edit it, WordPress re-invented the cron.

At its core, WP-CRON acts like a traditional cron in that a developer can “schedule” a task to be done on a regular basis. However, unlike a traditional cron, WordPress does not have a program that is always running in the background of your server. So to make this world, WP-CRON is a process that is called every time a page is viewed.

On busy sites, this works fine. However, if your site isn’t busy, a task scheduled for 2:00 AM might be run at 5:24 AM if nobody visits your site until then. Sometimes this is ok, other times this is a problem.

If the tasks you need to run are time-sensitive and have to be run at the time scheduled, WP-CRON is not the scheduler you want to use. If on the other hand, the tasks you need to be done can happen “around” the time you schedule them, then WP-CRON is fine. Again, a lot depends on how busy your site is.

What are the alternatives?

If you have tasks that are time-sensitive and your host does not allow you access to the system’s cron, you have 2 alternatives. First, you can switch to a host like SiteGround that gives you this access. If that’s not possible, then there are several services free or paid that are nothing more than cron services.

They run cron and you can set a job to run via a nice web interface. The job would use a program like curl or wget (think of them as headless browsers) that call URLs on your site to fire a specific task. Most plugins that require a cron will give you the URL to call if you want to use an external cron. All you have to do is paste the URL in, set the time for it to run and you are done.

CRON is a valuable tool and once you understand how to work with it, you will find more uses for it. If you have plugins, then I can almost guarantee that your site has wp-cron jobs running. If you are curious, go to the WordPress plugin repository and search for cron. There are plugins you can install that will show you all the WP-CRON activity on your site. Be very careful though. Plugins set these for a reason. If you decide you don’t like one and delete it, the plugin that depends on the job will stop working.

[subscribe_cta]

How to Optimize Your Agency’s Workflow with WP-CLI Commands

Is your agency spending a lot of time on busy work and repeating the same efforts time and time again, from one client to the next? Is the development team wasting a lot of their focus and mental energy on menial tasks and boilerplate work? What if you could free up some or all of these resources and invest them into the added value that the client will see and evaluate instead?

WP-CLI is a command-line tool that can help you accelerate the way you interact with WordPress websites. It is also a framework you can use to formalize and automate all of the processes that are shared amongst your clients if you’re a developer or an agency. Because of its versatility and simplicity of use, WP-CLI has been part of SiteGround’s preinstalled toolkit since 2013. SiteGround has also been one of the first sponsors of the project and continues to do so for the past 3 years, 2020 including.

One of the main reasons for SiteGround’s support is the fact that WP-CLI perfectly complements their mission to provide powerful, yet simple to use tools for WordPress processes automation and optimization. In fact, together with SiteGround, we released this awesome webinar for everyone who hasn’t had the opportunity yet to find out how useful WP-CLI can be:

As one of the main co-maintainers of the WP-CLI ecosystem, I was really glad to accept this new invitation from SiteGround’s and share some practical tips on how you can make use of WP-CLI to level up your workflows and have your clients get more bang for their buck!

Accelerating administrative efforts

WP-CLI is first and foremost a direct replacement to a WordPress site’s admin dashboard. Instead of providing a graphical web interface where you click through menus to get things done, it provides a text-driven command-line interface to perform these same tasks using written wp-cli commands. What at first sounds like added effort eventually turns out to be an infinitely more expressive way of letting the site know what you need to have done, and this makes it scale so much better for complex use cases.

As a result, while it is not necessarily faster to type a command to make a change to a post than it is to click the corresponding button on that same post, the difference becomes more apparent once you deal with multiple posts instead. While you might shudder at the thought of manually making a change on the admin backend to thousands of posts on a large site, all you need for doing so with WP-CLI still happens to be a fairly simple command, usually a one-liner. Granted, it will take a bit more time to execute than it would for a single post, but you can just leave it running in the background and focus on something else in the meantime.

To show an example of this effect, let’s imagine you have a huge multisite network with thousands of sites. An existing user has proven their worth in terms of helping moderate the entire network and is to be promoted to being an administrator on all the sites. How would you go about doing this via the graphical admin backend?

It turns out that this is quite easy to do via WP-CLI:

wp site list --field=url | xargs -n1 -I {} wp --url={} user set-role <user-to-promote> administrator

The above command will retrieve the list of all site URLs for the network, and for each of these sites, set the role of the user in question to that of “administrator”. And while this might take a few minutes to complete, it is a one-liner that does the work for you. Using the web-based admin backend would probably cost you hours to do the same, or require you to write a one-off plugin to do so in a more efficient way.

For an overview of all the bundled commands that come by default with WP-CLI, you can browse the command reference at https://developer.wordpress.org/cli/commands/.

Using agency-wide defaults

WP-CLI supports configuration files at the global level as well as at the project level.

The global configuration file is best used for defining a developer’s personal preferences. The project-specific configuration file however should best be managed centrally across the agency and treated as a part of the project, just like your composer.json file.

To use a project-specific configuration file, all you need to do is create a wp-cli.yml file within the site’s root folder. It will accept a few entries that are specific to configuration files, like providing an array of commands to disable for that specific site. But it will also accept default values for any of the available commands with a unified syntax.

Let’s look at an example configuration file for a hypothetical project:

# WordPress Core is installed in a subfolder.
path: wp-core/
# Load WP-CLI-specific init code before executing a command.
require: wp-cli-init.php

# Provide default flags for the config create command.
config create:
    dbuser: root
    dbpass: 
    extra-php: |
        define( 'WP_DEBUG', true );
        define( 'WP_POST_REVISIONS', 50 );

# '_' is a special value denoting options for this wp-cli.yml.
_:
    # Inherit configuration from an arbitrary YAML file.
    inherit: agency-defaults.yml
    # Merge subcommand defaults instead of overriding.
    merge: true

As you can see, it is pretty straight-forward to provide defaults for any known command. Also, you can load centralized YAML files within such a project-specific config file as well, if you need it.

You can read more about WP-CLI configuration files at https://make.wordpress.org/cli/handbook/references/config/.

Automating recurring tasks

After you’ve used the command-line for a while to deal with administrative site work, you might start to notice recurring patterns. Are you always installing the same set of plugins to get started? Are you deleting a set of options from the database every time you want to test the onboarding flow? Maybe you constantly need to reset a user’s meta values to trigger that one piece of logic in your member’s area that is constantly being changed?

Instead of needing to remember a list of multiple commands and hopefully typing them without spelling mistakes, you should take a minute and put these into a shell script to automate that work. After all, a shell script is nothing more than a “step-by-step replay” of doing something manually in the console.

As an example, here’s a script that will automate the installation of a new WordPress site:

#!/usr/bin/env bash

# Configure the script to exit immediately if any command fails.
set -e

# Download WordPress core files.
wp core download

# Create wp-config.php file.
echo "Please enter your database credentials:"
wp config create --prompt

# Install WordPress.
echo "Please enter your WordPress installation details:"
wp core install --prompt

# Install standard plugins.
echo "Installing plugins..."
wp plugin install query-monitor user-switching wordpress-seo

# Activate and configure a few plugins:
echo "Configuring plugins..."
wp plugin activate wordpress-seo
wp option patch update wpseo_titles metadesc-home-wpseo "My new website"

echo "Done!"

You can, of course, improve this script over time to add more bells & whistles or to give more precise feedback. Sharing it with all of the agency’s developers makes sure you only need to invest once into the automation part, for everyone to reap the benefits later.

Furthermore, a collection of such scripts makes for excellent onboarding help when new developers join your team.

Extending for custom use cases

With more complex projects come more complex administrative requirements. WP-CLI provides its framework to developers so they can easily create their own custom commands to solve very specific business needs in an efficient way.

Running bulk checks across the entire range of an online shop’s products? No need to build an extra user interface for that – just wrap the checking logic in a WP-CLI command and you’re good to go. Then, take it a step further and automate these checks by running that command at a recurring schedule via a cron job!

Note that you can either include these custom commands within a site’s plugin or theme, or you can publish them as a separate package that can be installed via WP-CLI’s built-in package manager:

wp package install awesome-company/manage-all-the-things

While the range of commands bundled with WP-CLI already covers quite a few use cases, the possibility to build your own custom commands removes any remaining limits and leaves it up to your imagination only as to what you can do.

Executing tasks on remote sites

WP-CLI can connect to remote sites directly via the –ssh flag, provided that the WP-CLI binary is also installed and accessible on the remote machine:

wp --ssh=admin_user@123.456.78.90/var/www/my_site config set WP_DEBUG --raw true

What’s more, you can define aliases to denote the individual machines:

wp cli alias add @staging --set-ssh=123.456.78.90 --set-path/var/www/my_site --set-user=admin_user
wp @staging config set WP_DEBUG --raw true

The most powerful property of this is yet to come: you can group these aliases, and run a command on a group of machines instead of only a single machine. The built-in group @all is added by default, running the command on all the machines for which the alias was defined. But you can add your own groups that define a custom subset of machines. Groups can overlap, of course, and groups can contain other groups as well, letting you create an entire hierarchy of site management goodness! With these groups in place, you’ll do things like update all plugins on all staging sites, or add a user to all of your multisite networks, etc…

Browse to this link to learn more about connecting remotely to your servers or development machines.

Reaching for the black belt

To truly reap the biggest benefits from WP-CLI, you’ll want to combine the use of script automation, shared configuration, custom commands, and site aliases to ensure you cannot only address all of your agency’s usual needs but also do so at the exact point they are needed in one fell swoop.

Keep in mind that most of that work can be shared by and to all the members of the team. The return on the time you invest in this form of tooling will be multiplied by the members on your team that make use of them – it’s therefore very hard not to get a substantial benefit out of this!

In the end, optimizing the time it requires to deal with menial tasks and streamlining your workflows is what regains this time so you can use it where it matters most – creating value for your clients and gaining a competitive edge in a crowded market!

Getting started

The best place to get started right now is to read the WP-CLI documentation at https://make.wordpress.org/cli/handbook/ or you can read SiteGround’s details tutorials on WP-CLI. If you hit blocking issues or just have the odd question, head on over to the make.wordpress.org Slack team via https://make.wordpress.org/chat/ and join the #cli channel!

[subscribe_cta]

What’s New in WordPress 5.5 (+ Screenshots and Tips)

what's new in WordPress 5.5

It’s that time again! WordPress 5.5 will be out today if everything goes as planned. I feel quite excited about this new version. I had the chance to be part of the magic that happened behind the scenes of this WordPress release as a mentor and  I would love to share the most important WordPress 5.5 features and improvements that will soon come your way. Our customers will receive the new version shortly after its official release, as always depending on the individual settings in the WordPress auto-updater for each of their installations.

Security Improvements

Easy Control of Plugins and Themes Automatic updates

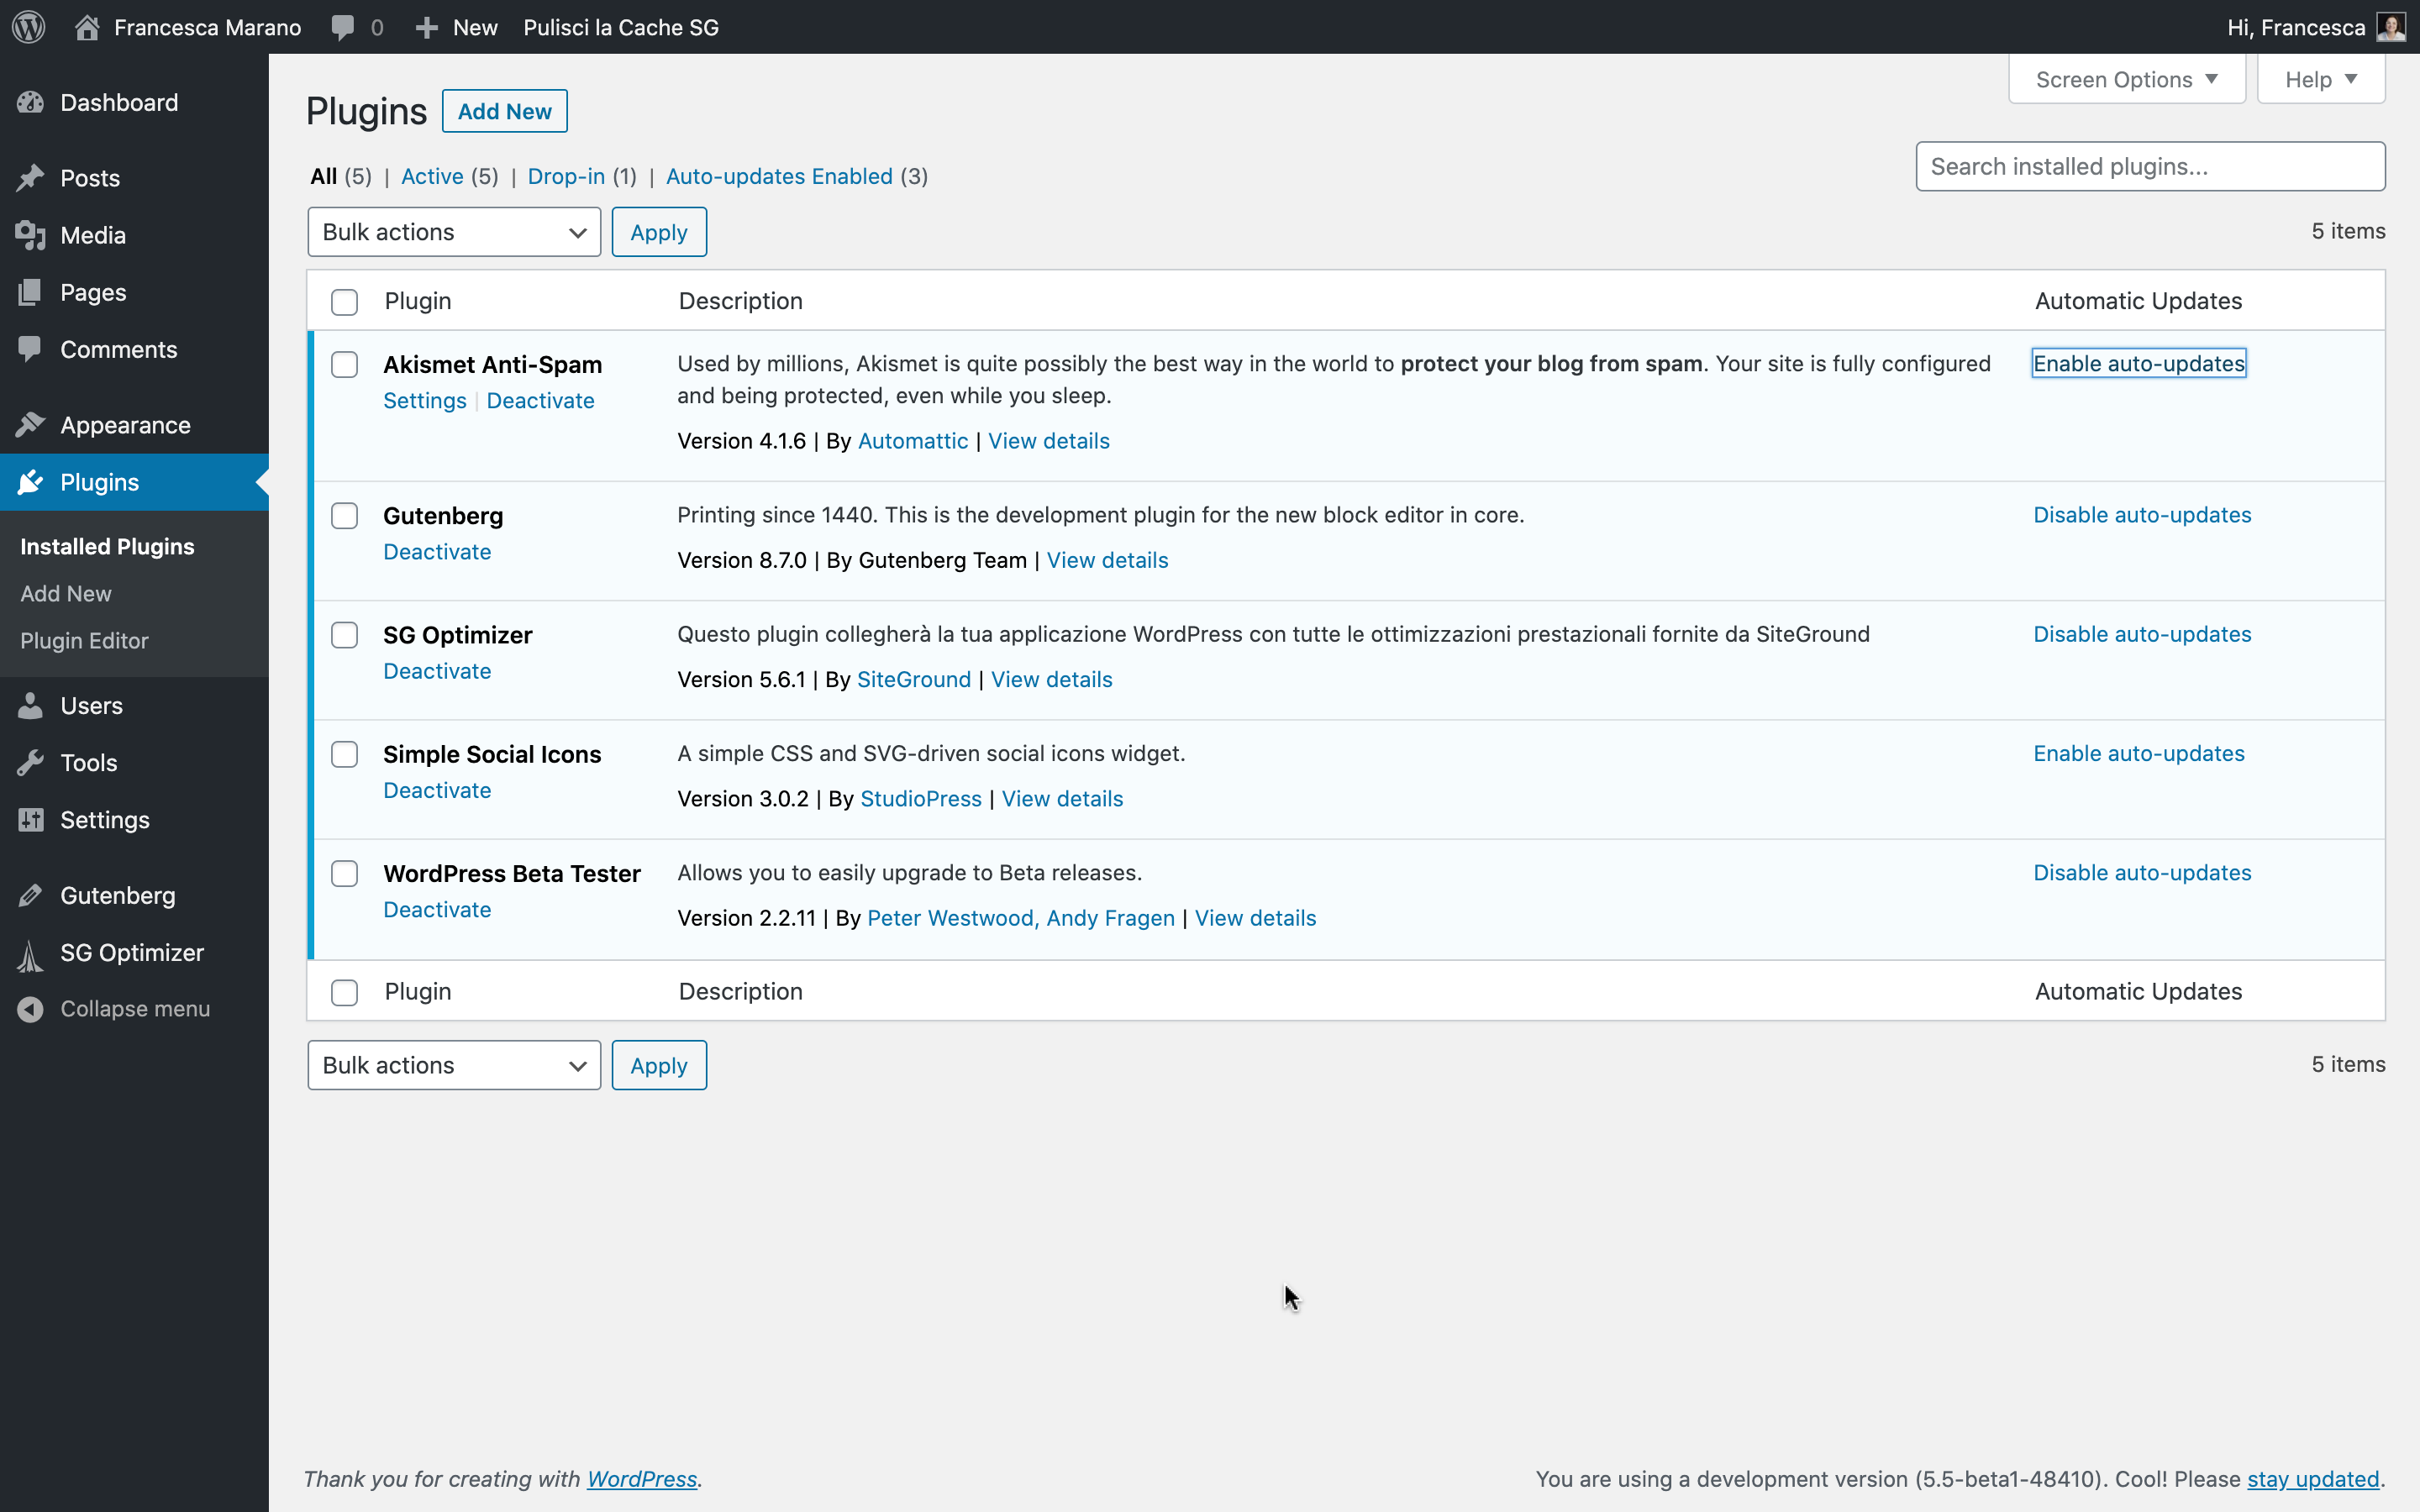
Since WordPress 3.7 users have been able to turn on/off WordPress native auto-update for their plugins and themes through their wp-config file. Now with WordPress 5.5 turning on/off plugin and themes, auto-updates can be done much easier by clicking a link in the admin interface. 

Plugin Auto-updates

Most of the massive attacks on WordPress websites happen through outdated vulnerable plugins. That is why making the option for plugin auto-update so accessible to all users in the interface has the potential to greatly improve WordPress security. 

To review the Plugins auto-update feature in WordPress 5.5 when it rolls out, go to “All Plugins”, and you will see a new column “Automatic Updates”. We highly recommend that you keep plugin auto-updates ON for all your plugins, as this is the easiest way to receive security updates as soon as possible and keep your site safe. 

plugin auto-update in WordPress 5.5

The SiteGround auto-updater also provides an option for plugin updates in its interface. We check for new versions of your plugins when we do core WordPress auto-updates and we do automatic backups of your WP installation right before the upgrade begins to guarantee a safe failover in case anything goes wrong. Choosing which plugin auto-update option to use is up to you: if you want to get your plugins updated as soon as a new version gets out, make sure you enable the new WordPress feature. It will work fine, regardless of the plugin auto-update setting in our own auto-updater. If you feel you better wait and get a backup before any update, you may rely only on our system. 

Themes Auto-updates

Based on our experience, auto-updating themes can be a trickier process than auto-updating plugins. That is why we have not included such an option so far in SiteGround WordPress auto-updater. After all, changing something in the theme can change the outlook of your website and you may not want this to happen automatically without being pre-viewed by you. 

Still, we believe it is a good idea to keep your themes up-to-date from a security point of view. The best way is to create a staging copy of your site when there is a theme update, check how your site with the updated theme there, and if everything is OK, update the theme on your production installation. 

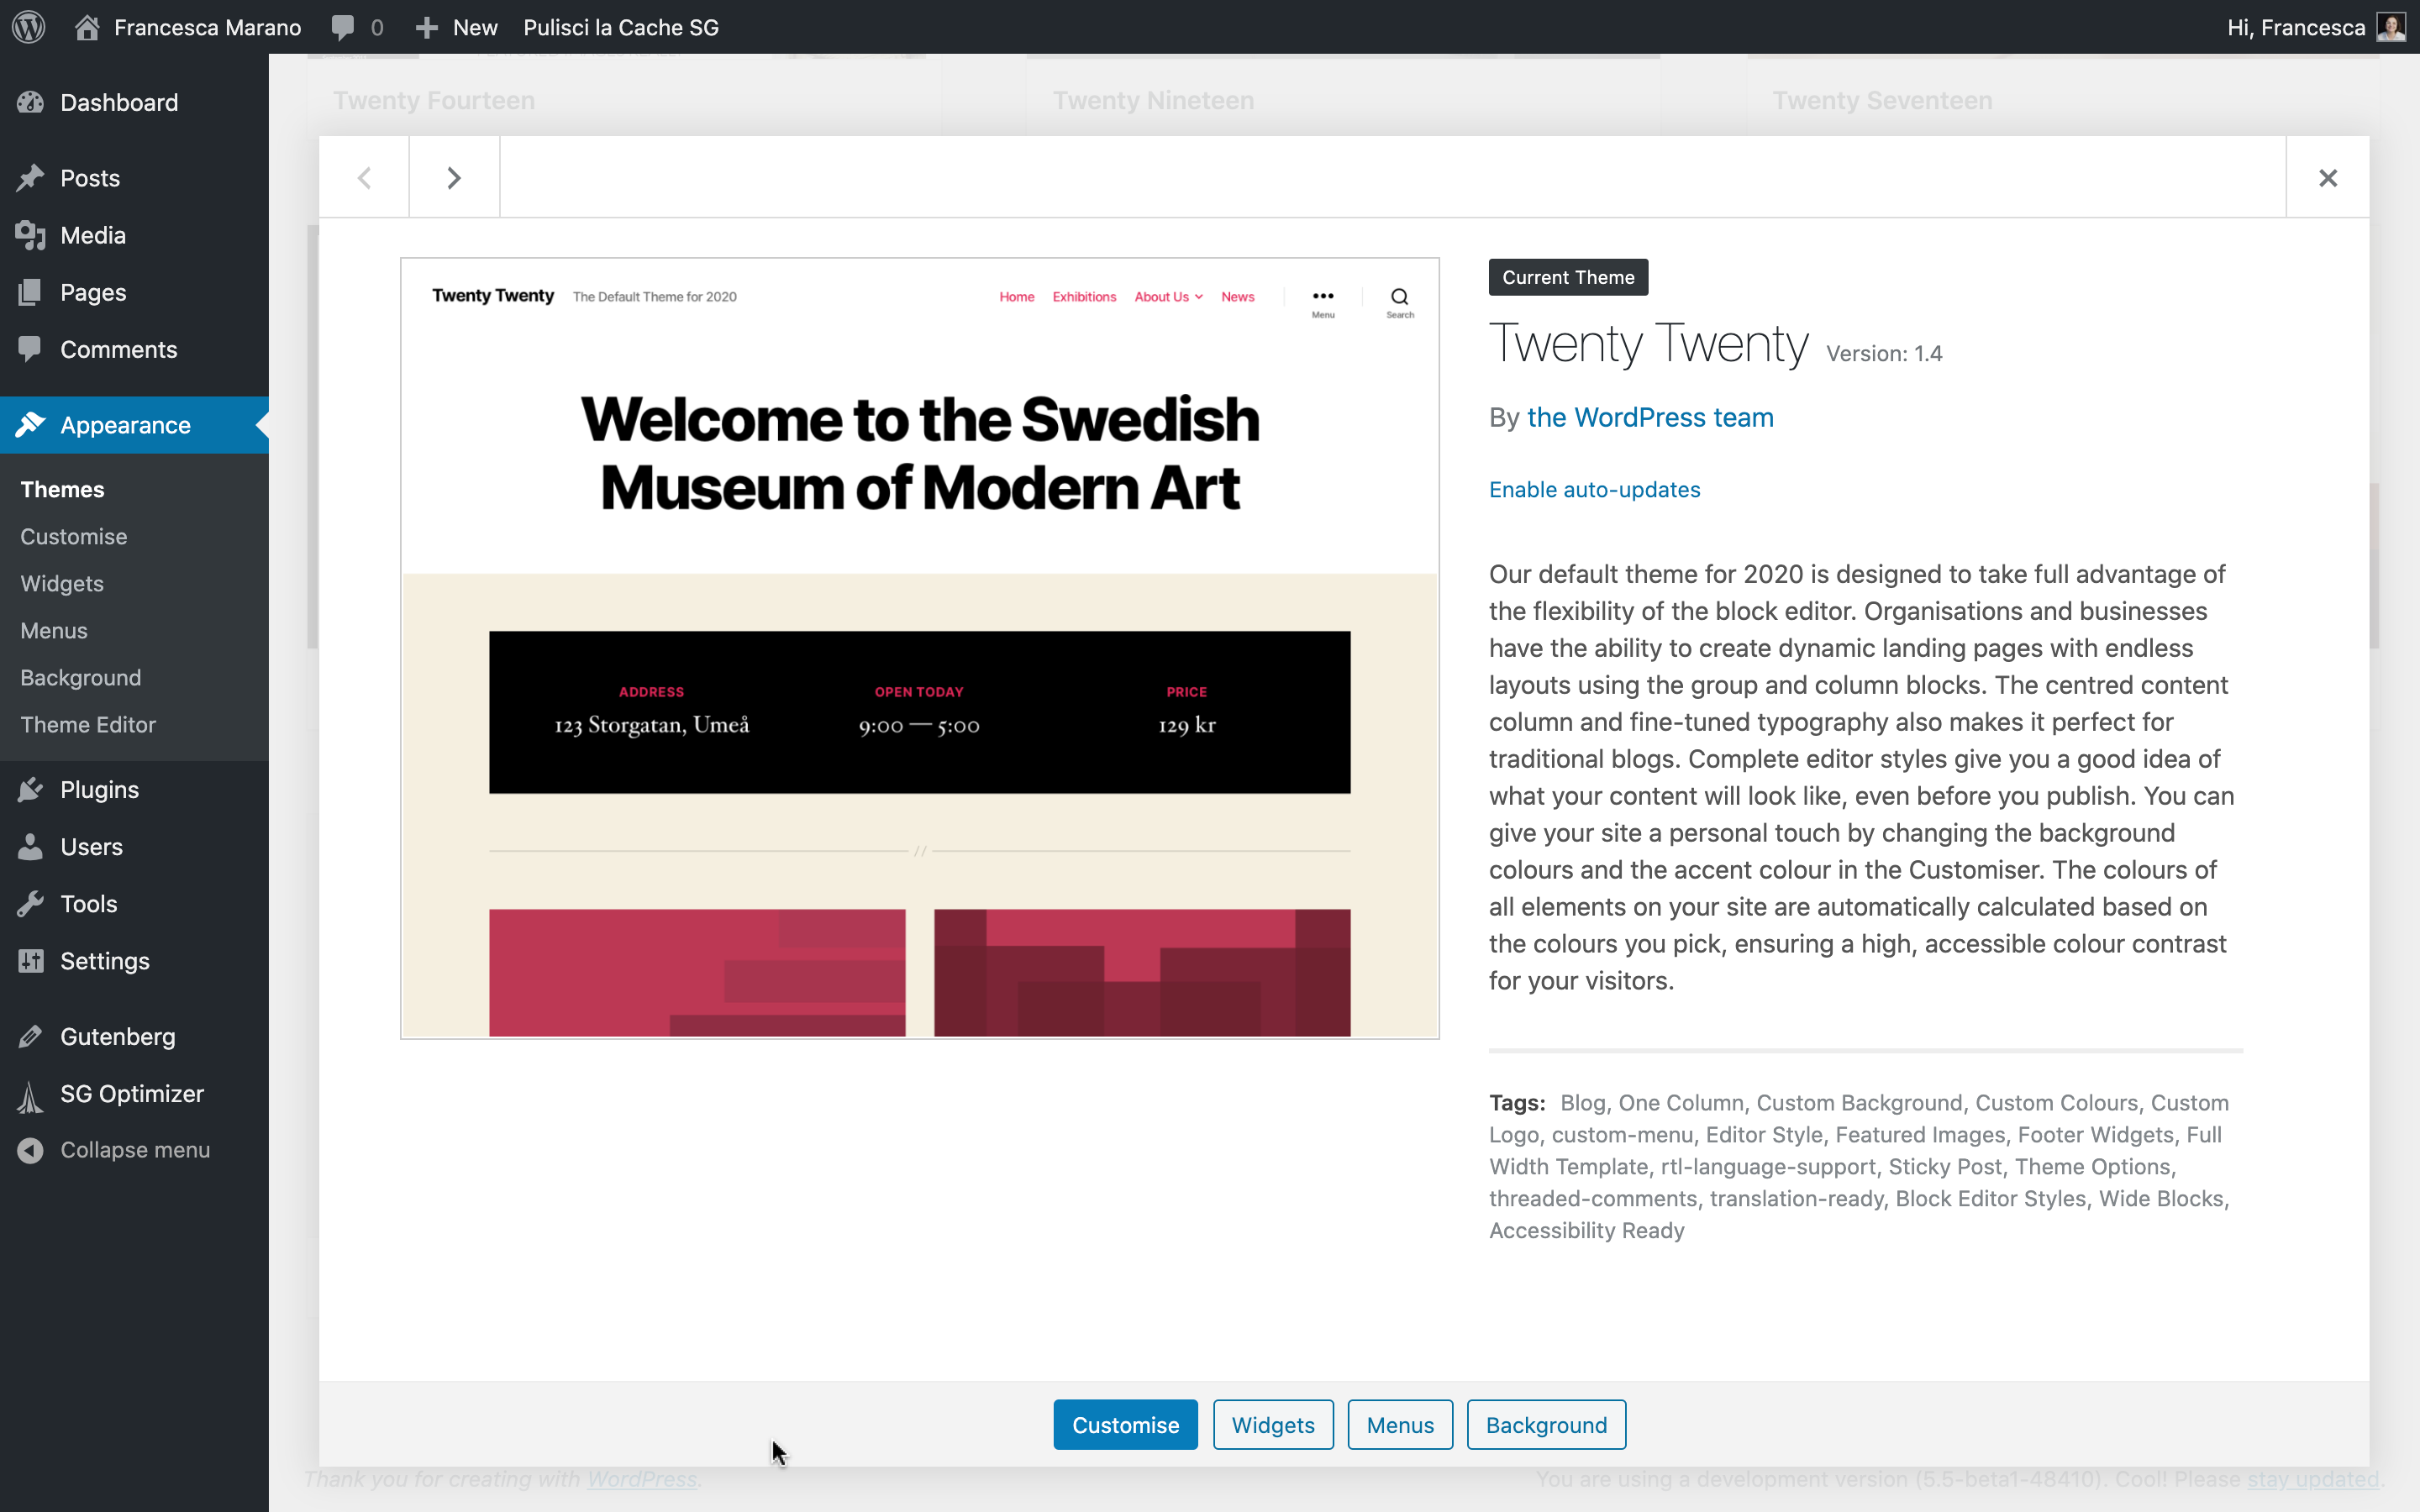
If you none-the-less want to switch on the themes auto-updates, you need to click on each theme you have installed and enable the option from the theme screen.

theme auto-update in WordPress 5.5

Speed Improvements

There are a lot of factors that determine the performance of your website. However, images are one of the main culprits when it comes to slow web pages. WordPress 5.5 introduces image Lazy loading as a default feature in the WordPress core. This is a great optimization that stops images from loading in bulk when you open a web page and load them gradually instead as you scroll through. 

At SiteGround we have been big fans of Lazy Load for a long time. It is a feature we provide to our users through of SiteGround Optimizer plugin since 2018. Since we initially launched the Lazy Loading optimization we have been actively developing it adding support for iframes, videos, WooCommerce products, shortcodes, and much more. At this point, Lazy load options in the SiteGround Optimizer are more advanced than what is introduced in the WordPress core. That is why, for people that have Lazy load enabled through the SiteGround Optimizer, we will disable the native Lazy load. 

SEO Improvements

Search engine optimization is always evolving and writing unique, useful content that responds to people’s search intents is still the main differentiator between websites that rank well and those that rank poorly. 

However, on top of meaningful copywriting, you should also help your SEO standing by using some more technical tools, like XML Sitemaps for example. XML sitemaps make it easier for search engines to crawl all content elements included in your site and more likely for them to be indexed and shown in searches.

Starting with WordPress 5.5 you will be able to get an XML sitemap generated directly from your WordPress installation without relying on third-party plugins to achieve this.

native sitemaps in WordPress 5.5

This native option is great if you want a map that will list:

  • Pages
  • Posts
  • Categories
  • Tags
  • Users

If you want a more complex sitemap, that includes images, news, and videos, you’ll still need to rely on a third party plugin but I think this is definitely a great option for website owners that don’t want to add plugins.

If you want to dig deeper into more practical SEO tips, check out our series of articles from guest author and SEO expert Rebecca Gill.

Gutenberg UI and functionality

The block editor got a major UI overhaul, as well. Eleven versions of the Gutenberg plugin have been merged into WordPress 5.5, bringing with them new functionality, speed improvements, and a changed UI. 

New Block Editor UI

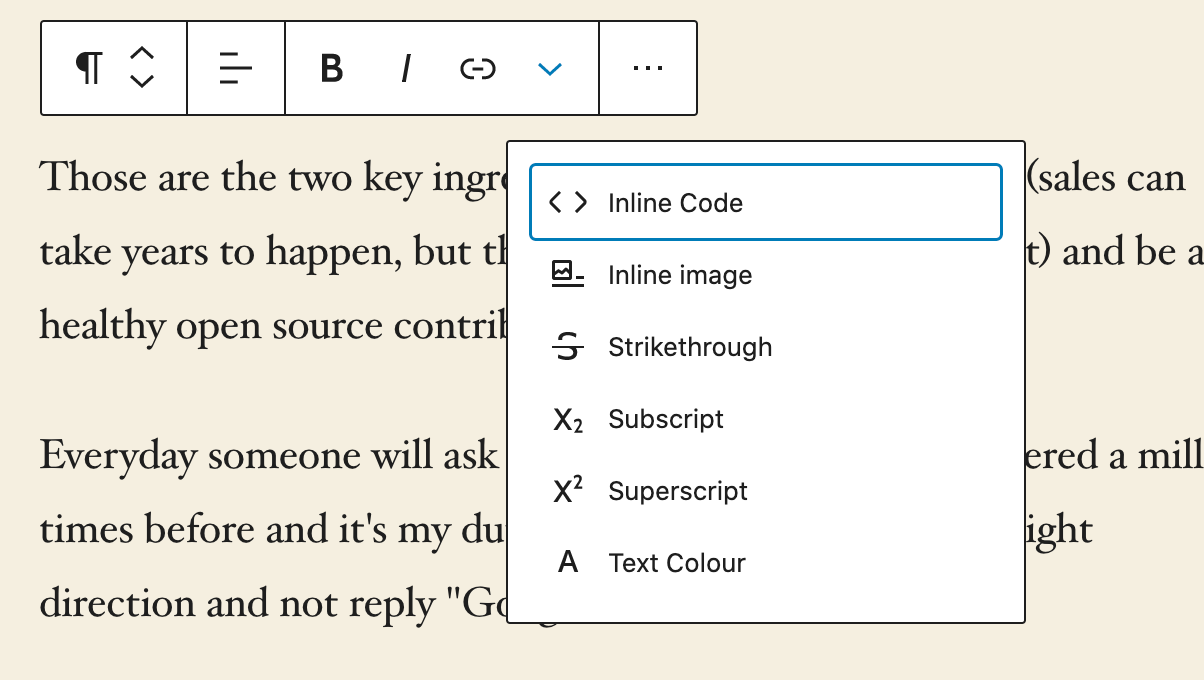
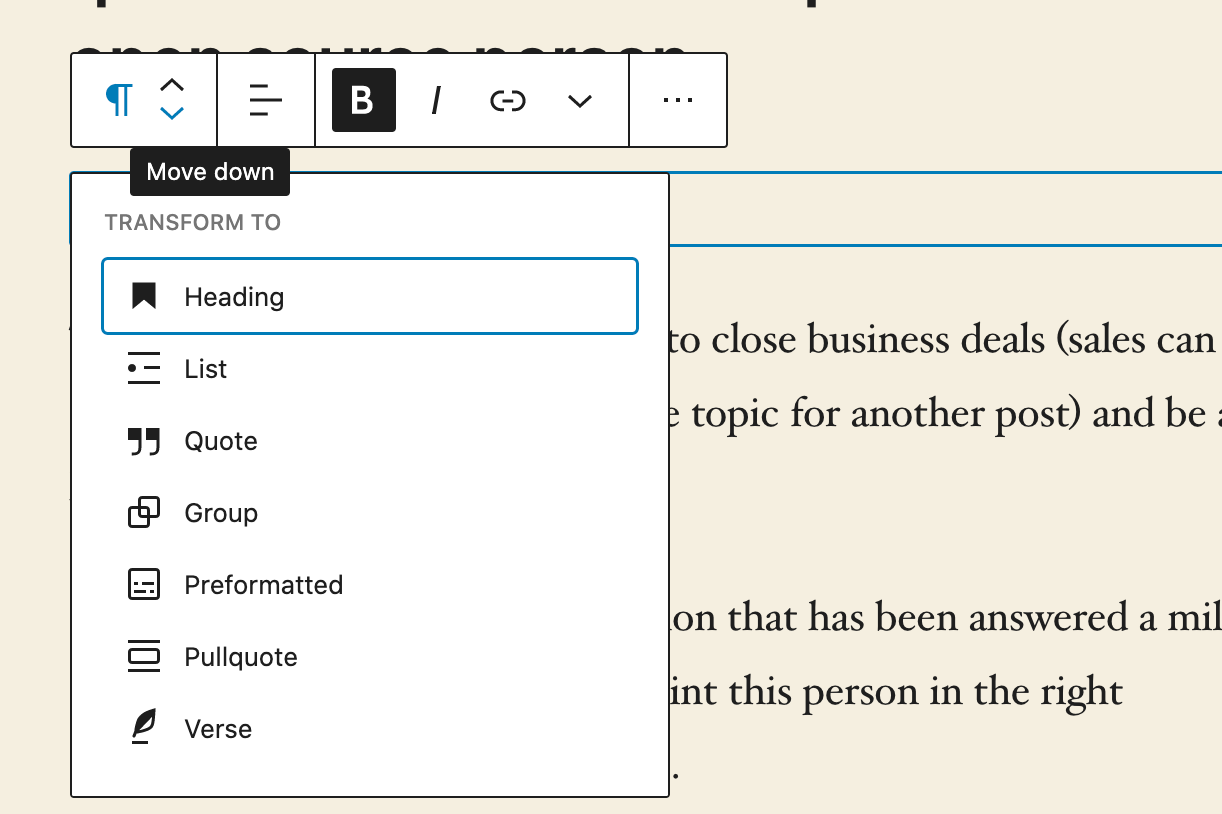
You will immediately notice how the modal bar that appears when you click into a block is bigger, with more contrast and more compact. The options are still there, and more!

new gutenberg features in wordpress 5.5
improvements gutenberg in wordpress 5.5

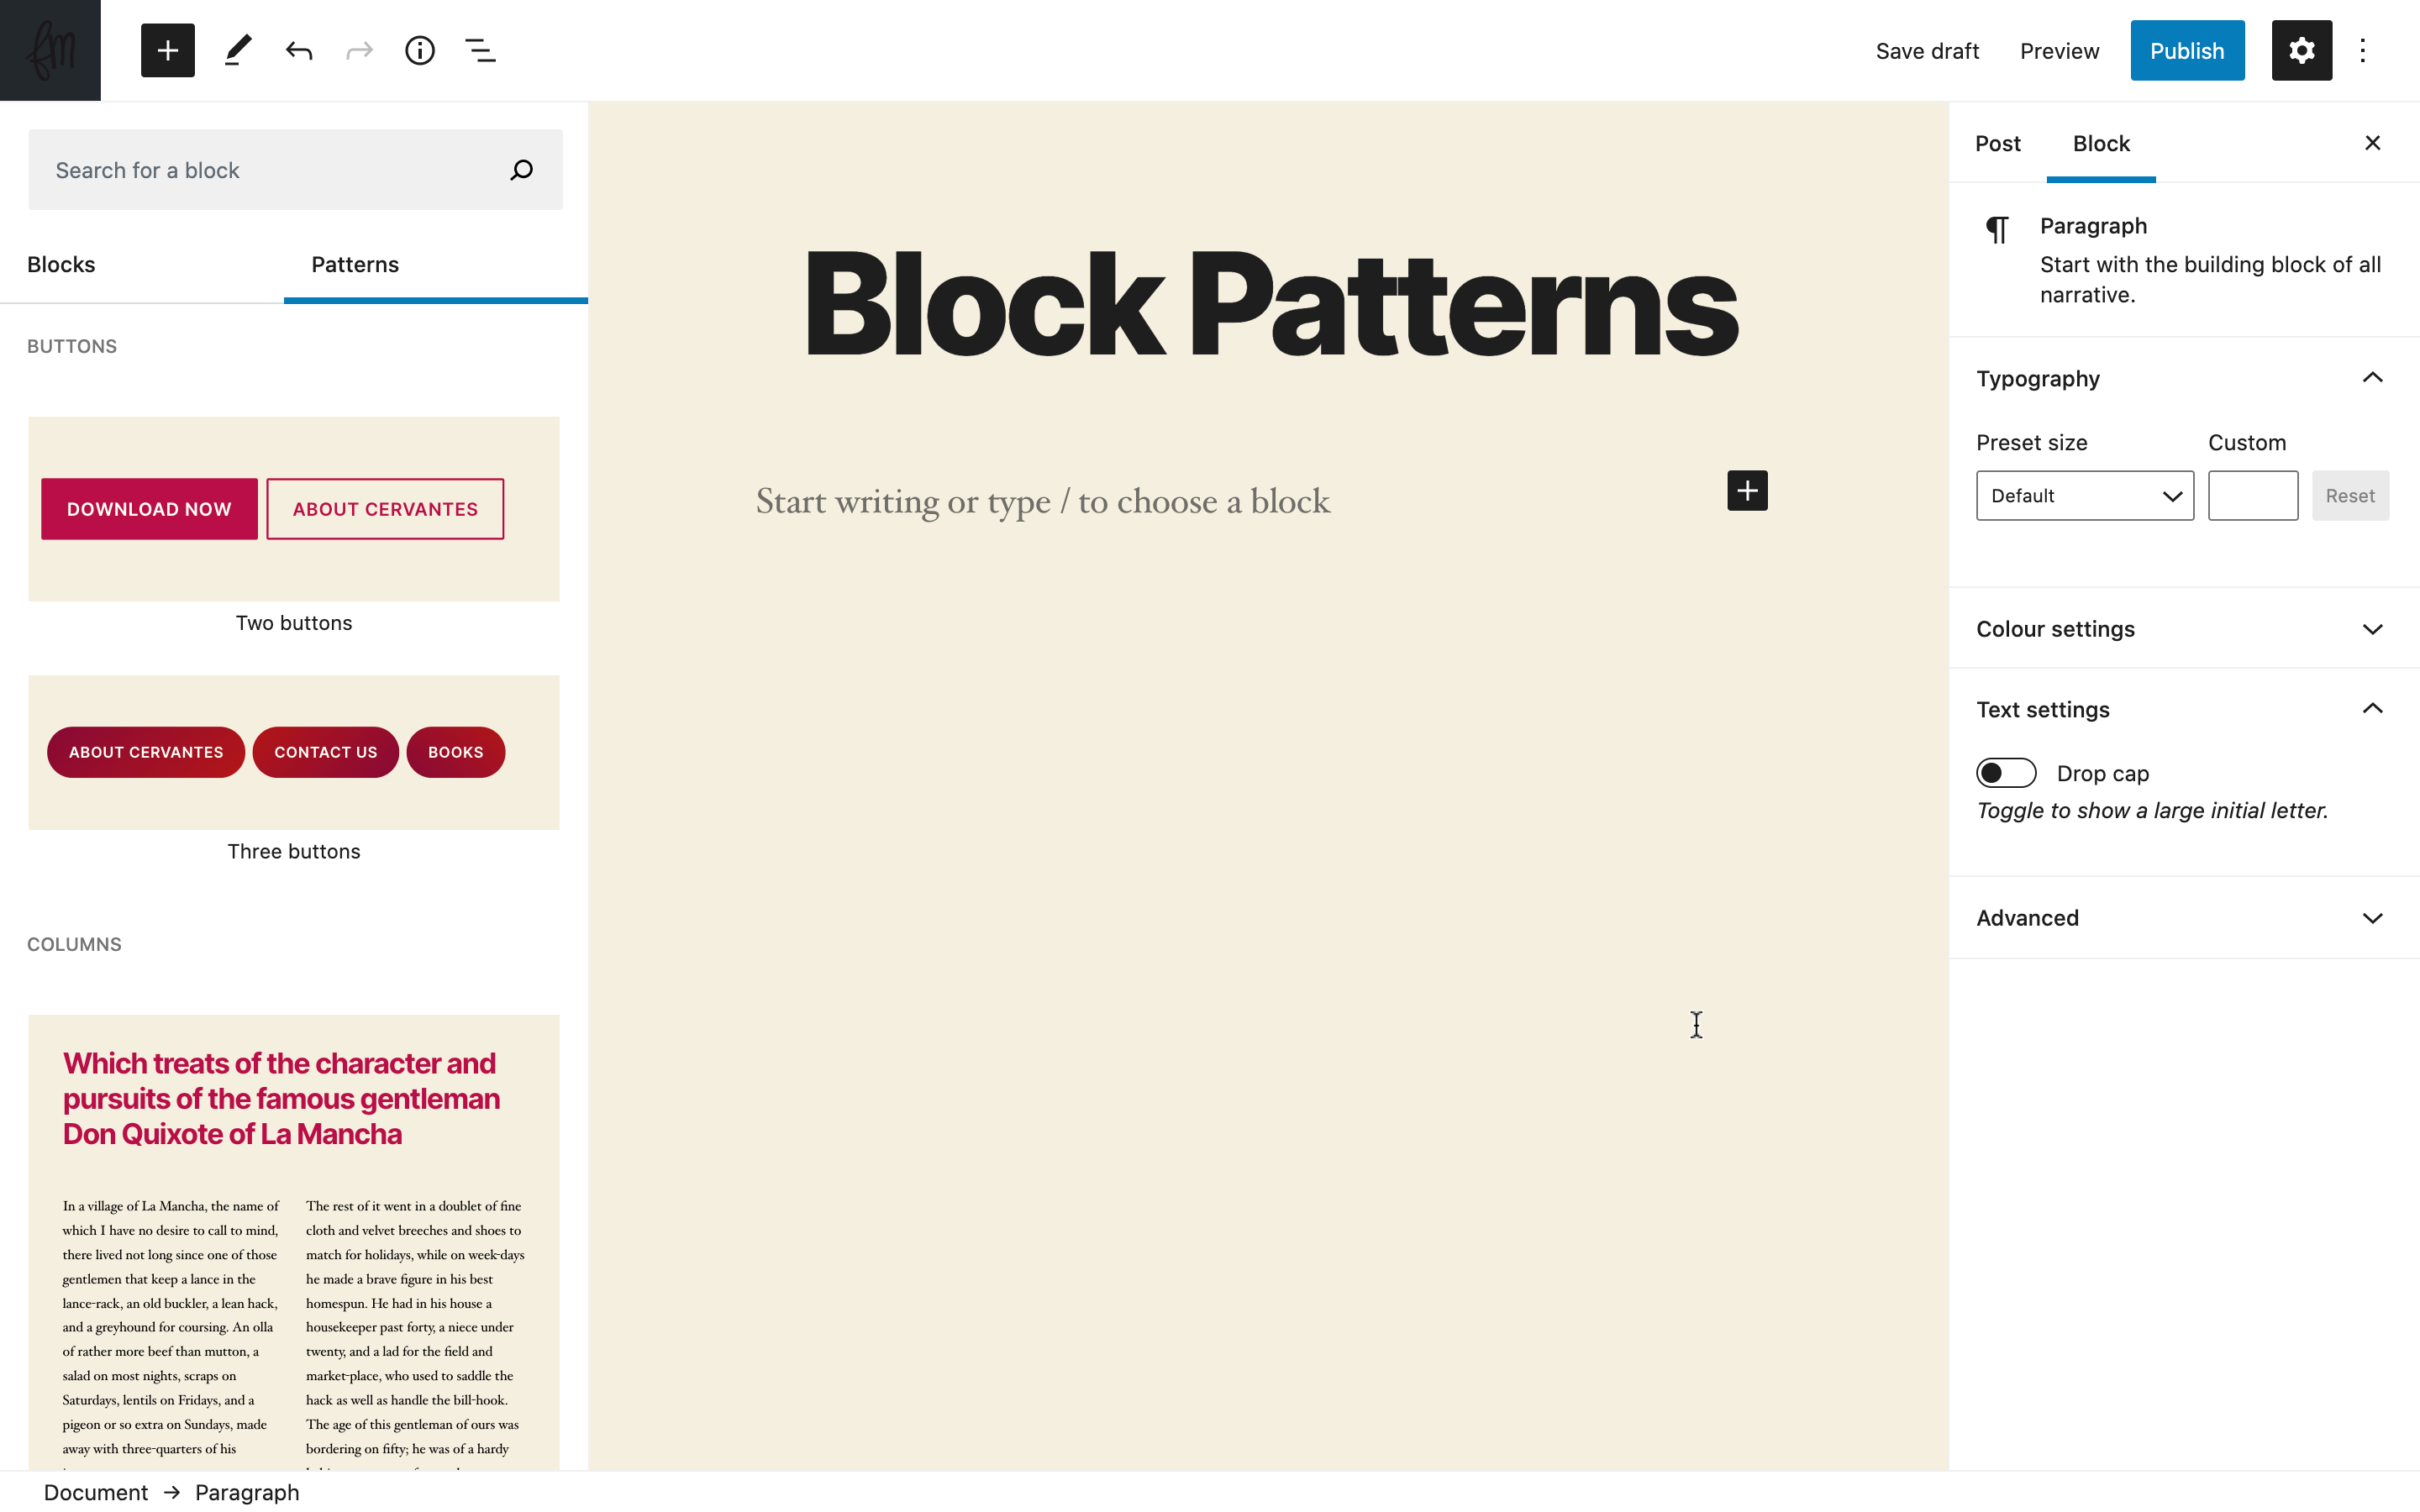
New Block Patterns

You will be able to add block patterns, which are combinations of blocks commonly used together. Text and media, two or three buttons in a row, headers with text, you name it. This is a great way to save time when you write your blog posts and an encouragement to be more creative with your content design.

block patterns in WordPress 5.5

Inline Image Editing

During WordCamp Europe 2020 Online, Matt Mullenweg, co-founder of WordPress.org and Matias Ventura, one of the leading engineers of the Gutenberg project, gave a demo of this new feature. You can now zoom, crop, and rotate images directly into the block image. You can see it for yourself in the video recording of the conversation and think about how this can also speed up and improve your editorial workflow. 

And much more

With eleven versions of Gutenberg going into WordPress 5.5 as you can imagine there are a lot more exciting features included. To see them all in detail, you can check out the release posts in the Core blog.

Accessibility Changes

No WordPress major release would be complete without some Accessibility improvements and 5.5 is no different. In this release a number of changes were introduced, with these being the most notable:

  • The first iteration of alternative view modes for list tables
  • Link-list widgets can now be converted to HTML5 navigation blocks.
  • Primary buttons actually look disabled when they are disabled
  • Meta boxes can now be moved with the keyboard.

Pro Tips For Developers

There are a lot of changes under the hood as well, which will be especially interesting for our developer customers. Don’t forget to check the Field Guide with all the Dev Notes related to major changes. I would also recommend you sign up for the Core blog: it’s very active and it’s the best way to keep up to date with changes that might affect your code. The more time you have to test changes, the better… don’t wait for release day to discover that something broke.

Over to you

Have you tried some of the things mentioned above, maybe through the Beta Tester plugin or the Gutenberg plugin? Even if you haven’t tried anything yet, what are you excited and curious to try?

[subscribe_cta]