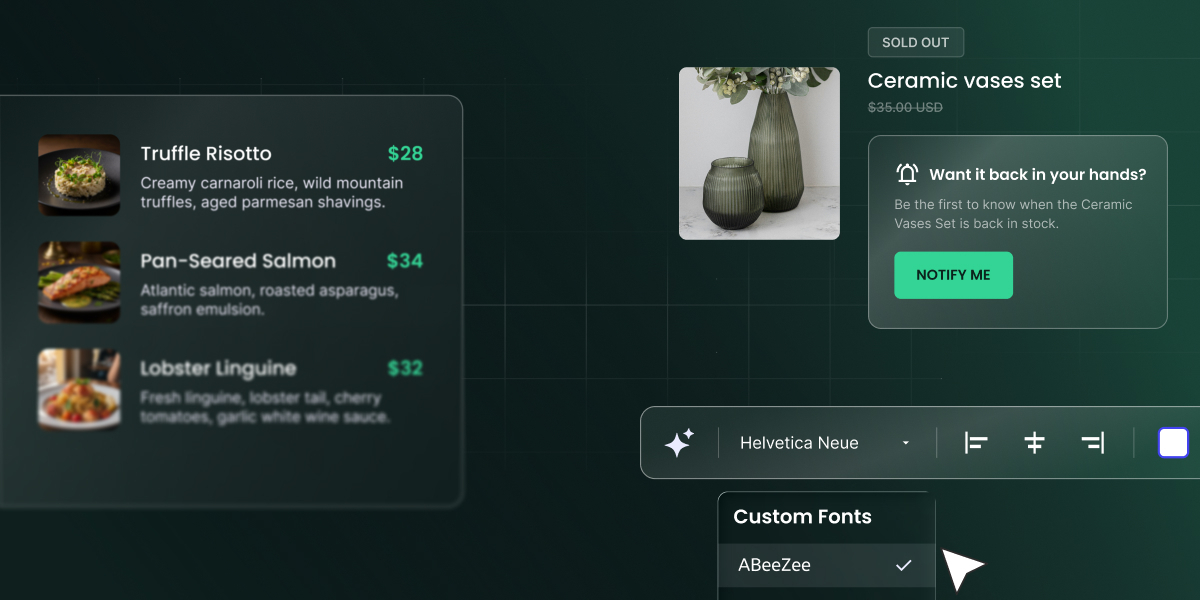
Two updates just went live in SiteGround Ecommerce. Back-in-stock notifications now turn a sold-out product page into a waiting list, so the shoppers who wanted the item hear from you the moment it’s back. Meanwhile, product add-ons let shoppers choose extras in the same step as the purchase, so each order is worth more without a separate upsell step.
Back-in-stock notifications
What are back-in-stock notifications?
Back-in-stock notifications let shoppers leave their email on a sold-out product page and receive an automatic email when the item is restocked. In SiteGround Ecommerce, they work for whole products and for individual variations, such as a specific size or color.
How back-in-stock notifications work
Shoppers can sign up from any sold-out product page. On products with variations, the button follows the shopper’s choice: pick a size or color that’s out of stock, and Add to Cart switches to Notify Me for that exact variation.
Logged-in shoppers sign up straight away. Guests, on the other hand, confirm their email address first, so every notification goes to a real address that asked for it.
When the item is restocked, the email goes out automatically. If several items a shopper is waiting for come back within the same hour, they get one email instead of several.
Back-in-stock notifications make the biggest difference in stores where stock runs out unevenly: clothing and shoes where the popular sizes go first, small-batch goods like candles or ceramics, and limited drops that sell out on launch day.
Know what to reorder first
Every Notify Me sign-up is also a vote for what to restock. SiteGround Ecommerce counts them in a new Restock Priority metric in your store analytics under Analytics → Products, so you can see which sold-out item has the most shoppers waiting and know what to reorder first.
When cash for inventory is tight, that’s the difference between reordering what you think will sell and reordering what people have already asked for.
Product add-ons
What are product add-ons?
Product add-ons are extras a shopper chooses on the product page and pays for together with the product, like gift wrapping, engraving or insurance. They’re part of the order rather than a separate listing, and they work with physical and service products.
How product add-ons work
You create each add-on in the Add-Ons section on a product’s edit page, or from the Add-ons menu in the left sidebar, then decide how it behaves:
Required or optional. Make it part of every order for that product, or leave it as a choice.
Free or paid. Charge for engraving, include gift wrapping at no cost, or the other way round.
Display. Choose how the options appear: colors, buttons, images, checkboxes, or an input field.
Quantity. Let shoppers pick more than one option, or set how many they want.
Templates. Save any add-on as a template and attach it to other products without setting it up again.
After the sale, orders that include add-ons get a badge on the order page, so you can easily spot the ones that need extra work, like engraving or wrapping. If an add-on uses physical stock, such as gift boxes, you can track its stock too and see when it’s running low.
One thing to know: an add-on is refunded together with the product it belongs to, not on its own.
Add-on ideas for your store
The best add-ons are things shoppers already ask for after they’ve ordered, or would happily buy if they saw them at the right moment. A few places to start:
Store
Add-on
How to set it up
Jewelry
Engraving
Optional, paid
Gifts and homeware
Gift wrapping
Optional, free or paid
Electronics
Insurance
Optional, paid
Toys
Batteries
Optional, paid, with a quantity
Bakery
Birthday candles
Optional, paid, with a quantity
Which plans include these updates
Both features are live now and included in the 14-day free trial, so you can test them before you pick a plan.
Feature
Plans
Free trial
Back-in-stock notifications
Sell, Grow, Scale
Yes
Product add-ons
Grow, Scale
Yes
How to get started
Log in to your Client Area and open your Ecommerce site’s Site Admin.
To turn on back-in-stock notifications, go to Settings → System Emails and switch on Back-in-Stock Notifications.
To create an add-on, open a product and scroll to the Add-Ons section, then click Add New. Six templates come ready to use, or you can create your own.
Once shoppers start signing up for notifications, check Restock Priority under Analytics → Products before your next reorder.
The next time your best seller sells out, you’ll know exactly how many people are waiting for it, and they’ll hear from you the moment it’s back.
New to SiteGround, or don’t have an Ecommerce site yet? Try SiteGround Ecommerce free for 14 days, with both features included in the trial.
[103]
Frequently asked questions
What is a back-in-stock notification?
A back-in-stock notification lets a shopper leave their email on a sold-out product page and get an automatic email when the item is restocked.
Can shoppers sign up for a specific size or color?
Yes. When a shopper picks a variation that’s out of stock, Add to Cart switches to Notify Me for that variation.
Do shoppers need an account to get notifications?
No. Logged-in shoppers sign up straight away, and guests confirm their email address first.
How do I know which sold-out items to restock first?
Every sign-up counts toward the Restock Priority metric in your store analytics, which shows which items have the most shoppers waiting.
What are product add-ons?
Extras like gift wrapping, engraving or insurance that shoppers choose on the product page and pay for together with the product.
Can I reuse an add-on across products?
Yes. Save it as a template and add it to other products without setting it up again.
Can I refund an add-on separately from the product?
No. An add-on is refunded together with the product it belongs to.
Which plans include these updates?
Product add-ons are available on Grow and Scale, for physical products and services. Back-in-stock notifications are available on Sell, Grow and Scale. You can set both up during the free trial, though notifications only reach shoppers once your site is live.
Five updates just went live in SiteGround Website Builder. Two give you more control over how your whole site looks and moves: custom fonts and section animations. The other three each solve a specific job: counting down to your launch, getting visitors to follow you on social media, and putting a restaurant or cafe menu online.
Upload your own fonts
If your brand uses a specific typeface, your website can now use it too. Your site then matches your logo, packaging and printed materials, so customers recognize the same business wherever they find you. It’s most useful for businesses with brand guidelines, and for designers and agencies building sites for clients who have them.
Upload your font files in WOFF2, the standard format for web fonts, then set them once for your headings and body text. They apply across every page of your site. If you only have TTF or OTF files, convert them to WOFF2 first and check that your font license covers use on a website, since some desktop licenses don’t.
How to add it: In the Website Builder, go to Styles → Typography → Upload Font, upload your WOFF2 files, and choose which font to use for headings and which for body text.
Add animations to any section
A little motion draws the eye to what matters most on a page. Animate the sections you want people to notice, like a new offer, a testimonial or a call to action, and they stand out from everything around them. Keep it to a few sections, though: a page where everything moves is harder to read than one where nothing does.
Choose from animations including Fade, Scale, Slide up, Click, and Flex, then set the speed, from a slow ease-in to a quick entrance.
How to add it: Select any section on a page, open Styles, pick an animation and set its speed.
Add a countdown to your coming-soon page
Without a date, a coming-soon page gives visitors little reason to return. A countdown tells them exactly when to come back, and with the redirect option you can send them straight to a booking page or a launch offer the moment the clock runs out. It works for a shop opening, a product release or an event.
Set a launch date and time, and a live countdown appears under the message on your coming-soon page. Pick a boxed or plain style to match your design, then decide what happens when it reaches zero:
The timer freezes at zero.
The timer disappears.
A message of your own replaces it.
Visitors are sent to a URL you choose.
How to add it: Open your coming-soon page settings, switch on Show Countdown Timer, then set the date, time, style and what happens at zero.
Add social media icons to your header or footer
Most visitors won’t buy on their first visit. A follow keeps you in their feed, so you can reach them again with your next post, offer or launch. With your profiles in the header or footer, following you is one click away on every page.
Add your profiles to the header, the footer or both. Choose from platforms including Facebook, Instagram, TikTok, YouTube and LinkedIn. Show the icons in each platform’s own colors, in black or in white, and add a label of your own, like “Follow us”.
How to add it: Open the navigation drawer, click Add Item and choose Social Profiles. Pick your platform, add the link, then choose the header, the footer or both.
Create a restaurant menu with pictures, prices and more
Your menu is one of the first things visitors look for, and the menu component puts it right on your page instead of in a PDF. Visitors can read it on their phone without zooming, and when a price changes or a dish comes off the menu, you edit one item instead of redesigning a file. It’s built for restaurants, cafes, bakeries and anyone else who serves food.
For each item, add a photo, title, description and price, then tag its allergens from a list of 14 predefined options. Choose left or center alignment, one to three columns and the spacing between items. You can also show or hide section names, images, descriptions and allergen information.
How to add it: Add the menu component to any page from the General tab in Add component, then add your items and choose the layout.
Which plans include these updates
All five updates are available on every SiteGround Website Builder plan, and you can try them during the 14-day free trial.
How to get started
Log in to your Client Area and open your site in the Website Builder. If you’re about to launch, start with the countdown. If you run a restaurant or cafe, start with the menu. If you’ve been waiting for your site to match your brand, upload your fonts first.
New to SiteGround? Try SiteGround Website Builder free for 14 days.
Starting a website usually means one of two things: scrolling through templates hoping one feels right, or staring at a blank page trying to figure out where to even begin.
Skip both. SiteGround Website Builder now make creating a site just as smooth as running one. Describe what you’re building, and an AI Wizard turns it into a real website or online store, using the same Page Builder you’d use to build one yourself. And if you’d still rather pick a template yourself, that option isn’t going anywhere.
Describe your site in your own words
Type it out, or say it out loud, whichever’s easier. Simply describe what you have in mind, whether that’s a consulting business, a boutique, a photography portfolio, or otherwise. Pages and sections, tone, any color inspiration you have, all of it goes into the description.
Check the details before your site is generated
Once you’ve described your website needs, nothing gets built from a guess. You’ll see an editable summary based on what you described, including details such as your site name, the main goal (showcase your work, get bookings, sell products, and so on), the tone of voice, a color palette, plus a blank text field for anything else worth mentioning. When everything looks right to you, the site gets built. And while you wait, a short video walks you through the Page Builder itself, so by the time your site’s ready, you already know your way around it.
A starting point built around your description
What comes out is a real starting point: structure, layout, and sections built around your description. It fills in the gaps, choosing pages that fit if you didn’t spell them out, adding placeholder copy, and only including specifics like your address, hours, or contact info if you’ve described them. The more detail you give it, the less of that filling-in it has to do.
From there, everything is yours to edit directly in the Page Builder. Want a different starting point altogether? You can regenerate the whole site from a new description anytime.
Pick up where you left off, no matter what interrupts you
Setting up a website in one sitting isn’t always realistic. Maybe your laptop dies, maybe you get pulled into a call, maybe you just close the tab by mistake.
With SiteGround Website Builder’s AI Wizard, though, you can come back later and see a simple prompt to pick up exactly where you left off, whether that’s back at the review step or partway through generation. Your site sits marked as unpublished with editing paused until setup’s done, so there’s no confusion about what’s live and what isn’t.
If generation fails partway through, it retries on its own. Separately, if you refresh the page by accident, you land back on the right step, not a blank tab wondering what happened.
Same foundation, built around exactly what you need
Using the AI Wizard feature offers a faster way to get started inside SiteGround Ecommerce and Website Builder. And using it doesn’t draw from your AI tokens yet, so there’s no cost to try it now. Once your site or store is generated, you’re working in that same setup, running on the same solid infrastructure, backed by the same support behind every other SiteGround site or store, AI-built or not. Now you can just say it, and the rest follows.
Key takeaway: The SiteGround Website and Ecommerce Builder now includes a built-in blog functionality, available at no extra cost for existing customers. You can add a blog page, publish posts and embed store products directly in them, with no plugins or separate platform needed.
Your SiteGround Website Builder or Ecommerce site can now have a voice. You can add a blog to it the way you’d add any other page. No new platform to learn, no plugins to install, no need to call a developer. Start publishing right inside the builder you already know.
Why add a blog? Because it gets you found.
Search engines love fresh content. So do all the AI tools that customers now ask for recommendations. Every post you publish is another chance for someone to discover your business: a question answered, a tip shared, a new product introduced.
The hard part is setting it up. It’s either a complex platform that takes real time and technical know-how to run, or a stripped-down tool that’s too limiting in terms of look and feel. With the SiteGround Website Builder blog, you finally get a blog that fits right into your site, with the flexibility you’d expect from a dedicated blogging platform and the simplicity of a page you already know how to build.
Make it look like you
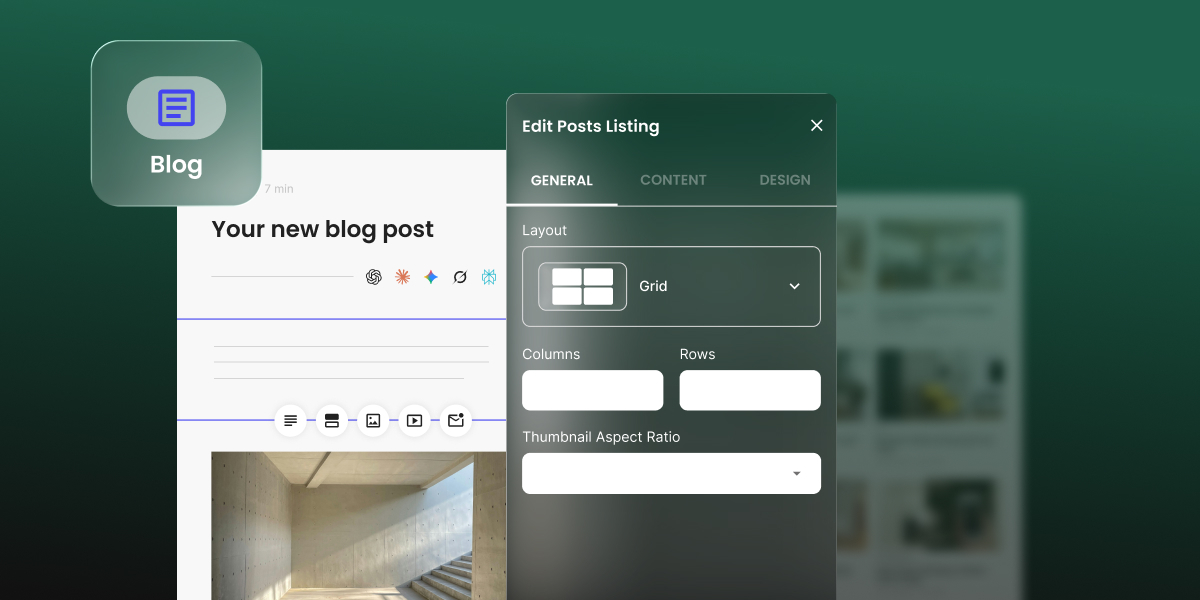
You can customize every part of your main blog page. Start with a template, then make it yours. Go grid or list. Pick your colors. Show three posts or thirty. Decide whether readers see images, categories, descriptions and reading time.
Want a showstopper at the top? Add a carousel and fill it with your newest posts, a favorite category or your personal hand-picked best.
Write your own way
Start from a blank page, or let the built-in AI writer draft your post for you. Either way, you’re in control. Edit the AI’s draft until it sounds like you, or write every word yourself.
Then bring your post to life with the tools you already use to build your website and ecommerce store pages. Text, images with captions, video, galleries, buttons, icons, contact forms, subscription forms and products from your site or store are all there, ready to drag in and style.
Turn every post into a sale
Yes, you can sell products directly from a blog post.Blog posts aren’t only for storytelling, they can be for selling. Writing about your new summer collection? Drop the actual products right into the post. Show one, a few or a full scrolling carousel. Choose the columns, the text and whether it autorotates.
Your readers go from “ooh, nice” to “add to basket” without leaving the page. Got a big launch or a seasonal sale? Pin that post to your blog’s carousel and put it front and center.
Built to be found and shared
A post is only as good as its odds of actually being found. That’s why each post comes with its own SEO title and description that you can edit directly, so you can tell search engines exactly what each post is about. You can also set a custom title, image, and description for social media, so your posts look sharp every time someone shares them.
Your first post is waiting
Open your SiteGround Website Builder or Ecommerce site, add a blog page and hit publish. Share your story. Show off a product. Post customers’ feedback, or answer the question your customers always ask. A blog brings readers back, brings new ones in and helps you turn them into customers.
If you’re already a SiteGround customer, you can add the blog feature to your existing Website Builder site, or start a new one completely free in an available slot in your hosting plan. If you’re new to SiteGround, you can try the SiteGround Website and Ecommerce Builder free for 14 days.
How to add a blog to your SiteGround Website Builder or Ecommerce site:
Open your site in SiteGround Website Builder or Ecommerce and choose Blog from the navigation menu.
Pick a template for your Post Listing page (your main blog page).
Customize the layout, colors, and post details.
Create your first post and click Publish.
Frequently asked questions
Does SiteGround Website Builder have a blog?
Yes. SiteGround Website Builder and SiteGround Ecommerce include a built-in blog as of September, 2026.
Can I sell products from a blog post?
Yes. You can embed a single product, several products or a product carousel from your SiteGround Ecommerce store directly in any post.
Do I need plugins or coding to add a blog?
No. You add the blog like any other page in the builder.
Is the blog available with any SiteGround hosting plan?
Yes. Every SiteGround hosting plan includes access to the SiteGround Website Builder, and the blog feature comes with it. If you’re running a WordPress site instead, you’ll use WordPress’s own blogging tools.
Can I edit SEO settings for each post?
Yes. Every post has its own editable SEO title and description, plus a separate title, image and description for social sharing.
Running a small business means wearing every hat: designer, marketer, accountant, shipping department. Website troubleshooter shouldn’t be one of them. So every time we update the SiteGround Website Builder, the question is the same: does this actually make your day easier? This latest batch does, across shipping, marketing, and everything in between.
Professional shipping, without the headache: introducing our Shippo integration
Shipping is one of those things that sounds simple until you’re actually doing it. Which carrier? What rate? Did you overcharge and lose a sale, or undercharge and eat the cost? It adds up fast.
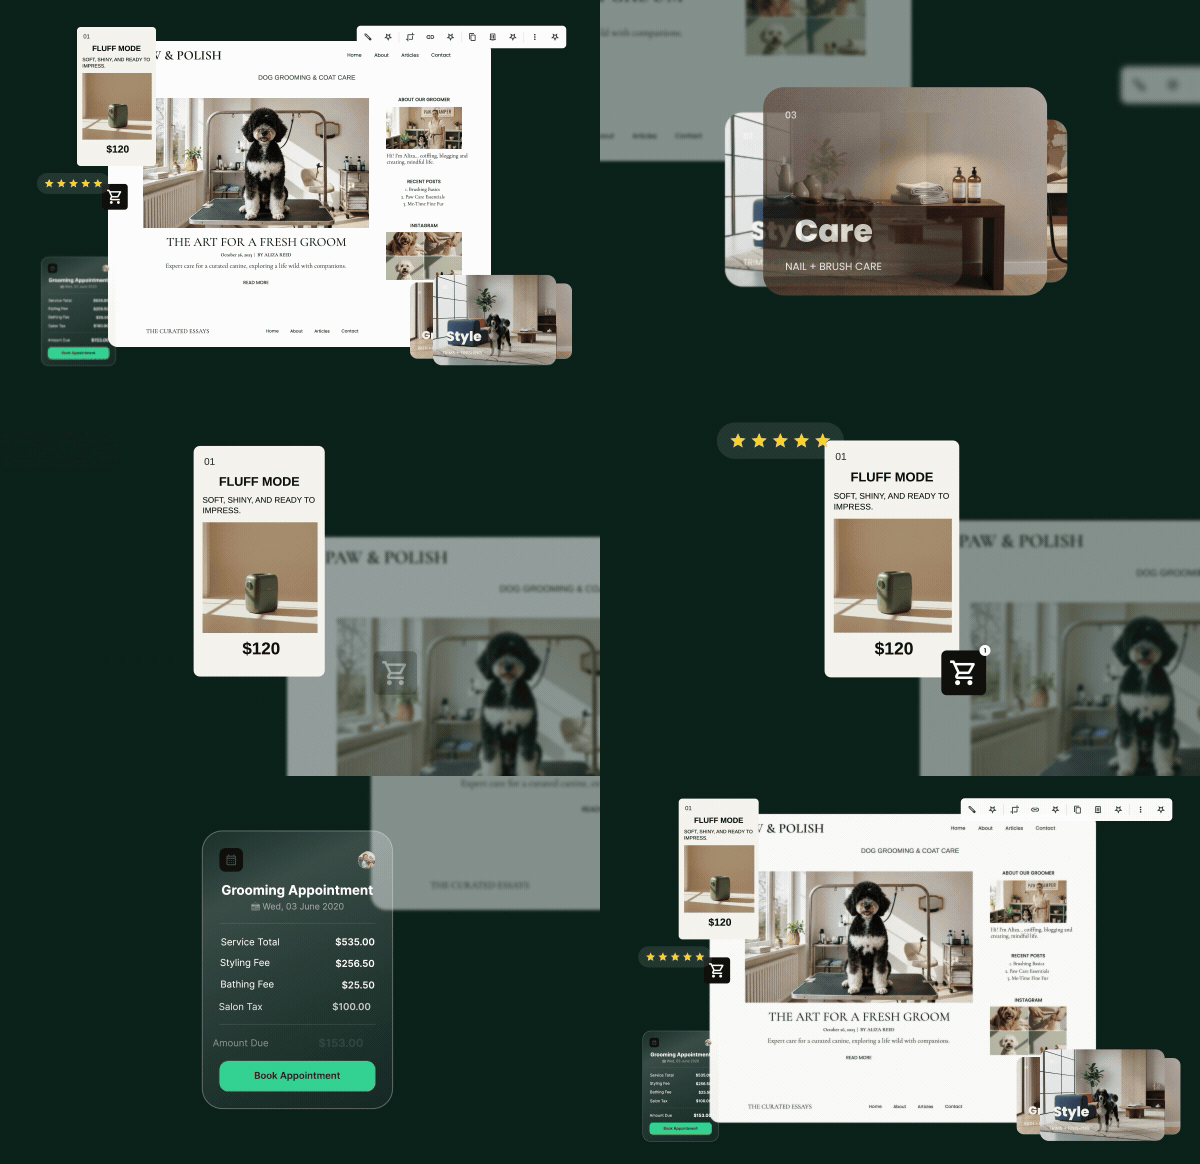
With our new Shippo integration, those decisions get a lot easier. Your customers see live shipping rates at checkout, calculated in real time based on package size, weight, and destination. Behind the scenes, you get access to discounted rates from 16 carriers, including FedEx, UPS, USPS, DHL, and Royal Mail, across 49 countries.
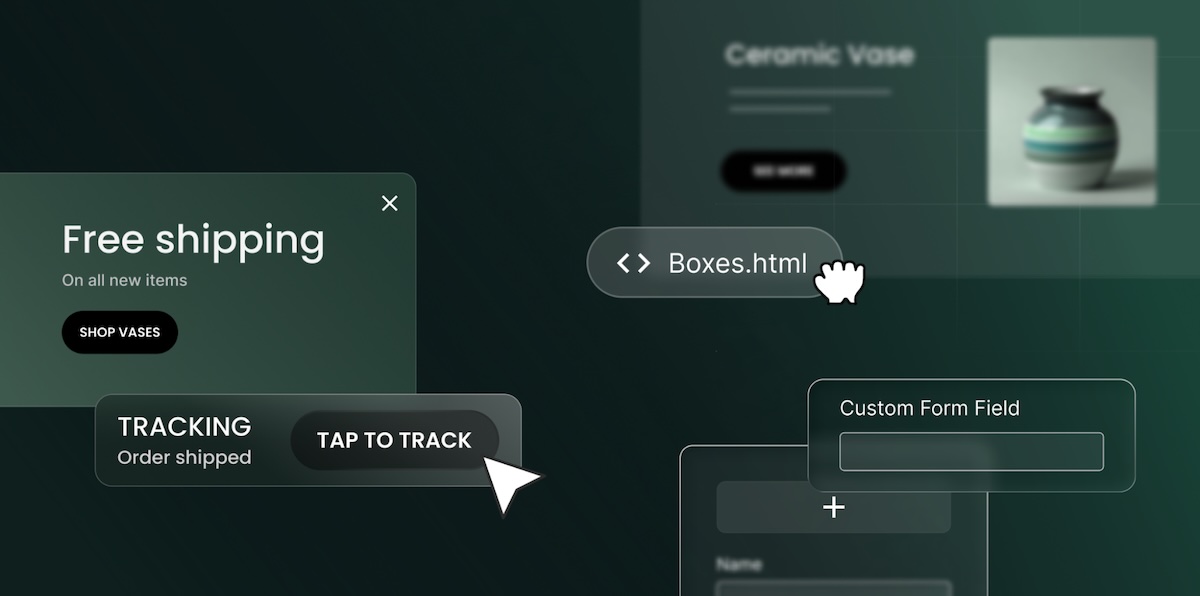
And when an order is ready to go, generating a label takes a few clicks. The tracking number goes to your customer automatically, and the order status updates itself. No copy-pasting, no chasing down confirmations.
For anyone shipping products regularly, this is the kind of update that quietly saves hours every week. Note that the Shippo integration is available on Grow and Scale plans.
Engage visitors when it counts with popups
Sometimes the most effective message is the one that shows up at exactly the right time. The new popups feature lets you build and display targeted messages directly on your storefront, no code needed.
You control who sees each popup and when: set time-based or scroll-based triggers, define reappearance frequency, and target specific pages, categories, or products. Toggle any popup between Active and Inactive at any time.
Creating and editing popups is available on all plans. Setting a popup to Active requires a Trial or Scale plan.
Pull your sales data whenever you need it
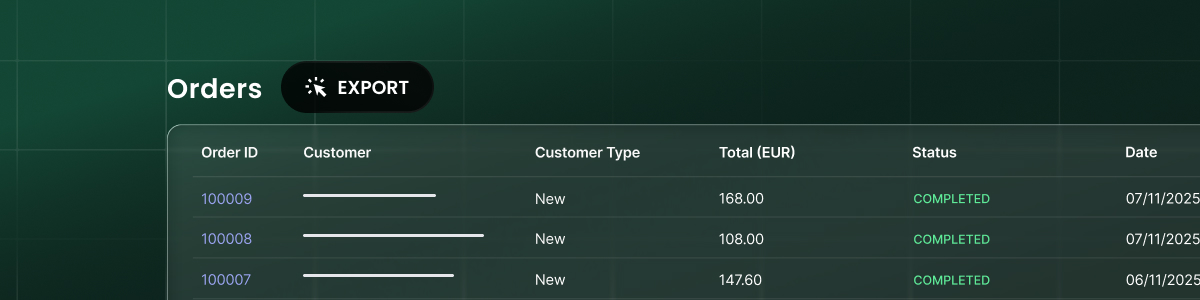
Tax season, a monthly reconciliation, a gut-check on last month’s numbers. Whatever’s prompting it, digging through orders one by one is nobody’s idea of a good time. Now you don’t have to. Export your orders as a CSV, filtered by date range and order status, and you’ll receive an email with a download link once it’s ready.
Make your site look exactly how you want it to
When you need something the builder doesn’t have out of the box (say, a booking calendar, a launch countdown, a specific embed) the new custom code component lets you drop in HTML, CSS, JavaScript, iframes, or Markdown directly onto any page. No developer needed, and nothing else on your site is affected.
Collect the right information
A generic contact form gets generic responses. But a form built for your business gets exactly the responses you need. With that goal in mind,custom form fields let you add short and long text, email, dropdowns, radio buttons, checkboxes, and dividers to any contact form. Whether it’s a client intake, a quote request, or a signup, your form works the way your business works.
Move elements faster
Reorganizing a layout used to mean moving elements one by one. Now, multi-component select lets you grab multiple elements at once and move them together. Small change, big difference when you’re deep in a redesign.
Built for you and with you
Every one of these updates came from listening to you: your feedback, your frustrations, and the things that were taking longer than they should. Building a professional website or running an online store should be something anyone can do, without needing a development team or a logistics department behind them. These updates make that happen, and there’s a lot more to come.
The internet can often feel like the Wild West—a vast frontier filled with opportunities but also teeming with hidden dangers. Cyber threats are everywhere, and while website security vulnerabilities might not sound as thrilling as a high-stakes showdown, it’s absolutely vital.
Imagine leaving your front door wide open—hackers are like unwelcome visitors who can sneak in to steal sensitive data, damage your reputation, or drain your wallet. Sounds rather unpleasant, doesn’t it? This guide addresses the most common website security vulnerabilities, breaking it all down in plain English, with explanations that are easy to understand and actions you can take to keep your site safe.
What are Website Security Vulnerabilities?
Website security vulnerabilities are weaknesses or flaws in a website’s code, architecture, or implementation that can be exploited by attackers. These web vulnerabilities may allow unauthorized access by hackers to sensitive information, to manipulate data, or even to attain total control over a website. They can arise from various sources, including poor coding practices, outdated software, and human error. These include website vulnerabilities as well as web application security vulnerabilities, which specifically target the functionality of web applications and their underlying code.
Not only can dealing with these kinds of issues create loads of extra work for you and your business, but the fallout can be much more widespread: loss of sales or, worse, loss of consumer confidence. So that’s why it’s so very important to understand how to prevent, identify and fix website vulnerabilities.
Most Common Website Security Vulnerabilities
While there’s an unfortunately long list of ways your website could be vulnerable to hackers and other bad actors, most web security vulnerabilities boil down to just a common handful. So today we’re tackling the top seven most-likely issues, and, thankfully, explaining them—and how to address them—in terms that we can all understand and act on.
First, we’ll tackle the most common website vulnerabilities in order to understand what they are and how they impact your site. Then, we’ll discuss the solutions separately, as many fixes address multiple vulnerabilities at once, making them more efficient and impactful.
1. SQL Injection
So let’s say your website has a form—as it probably does!—such as a login box or a search bar. With SQL injection, hackers trick the form into giving them access to your website’s database, where all the important information is stored. This can happen if the website doesn’t double-check what users type into these fields. Hackers might steal customer information, change data, or even erase everything.
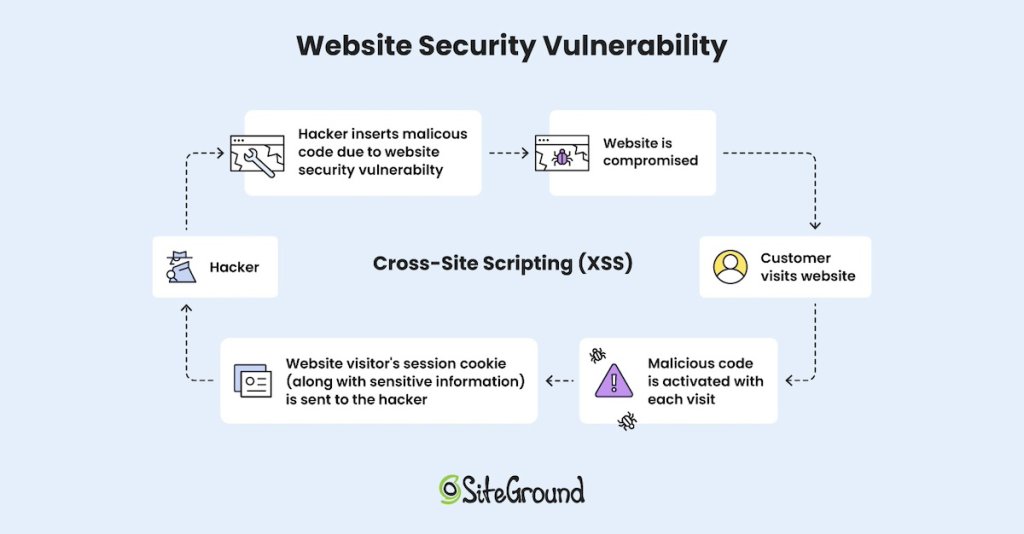
2. Cross-Site Scripting (XSS)
Cross-site scripting (XSS) is like someone slipping a harmful note into your website that your visitors accidentally read. These harmful notes (scripts, or malicious codes, as they are called) are a threat to site security, as they can steal personal information, mess up how your site looks, or send users to dangerous websites. The worst part? Your visitors might think it’s your fault, even though the hacker is behind it.
3. Broken Access Controls
This happens when your website doesn’t do a good job of keeping certain areas or actions off-limits to unauthorized users. For example, picture someone sneaking into a staff-only area of a store—that’s what broken access controls are like online. Hackers might use this lack of login security to view private information or make changes they shouldn’t be allowed to.
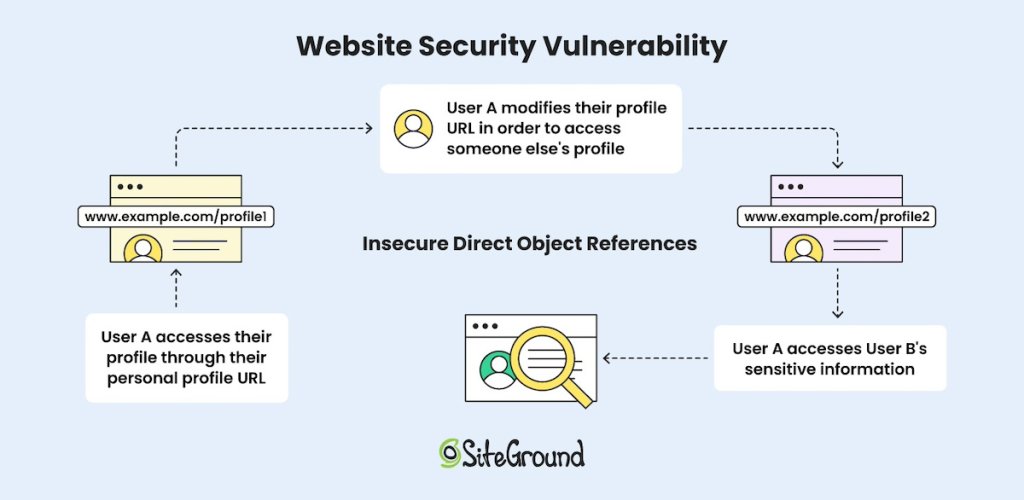
4. Insecure Direct Object References (IDOR)
Would you leave a key under the doormat where anyone could easily and predictably find it? With IDOR you’re doing just that if you give website users direct links to sensitive information (such as “www.example.com/profile1”). That’s because a hacker could guess or change those links (like to “www.example.com/profile2”) to see someone else’s sensitive information. As such, IDOR happens when websites don’t check who’s allowed to see what, and pay close attention to user roles and access and other security measures.
5. Security Misconfiguration
Security misconfiguration occurs when websites are launched with default settings, outdated software, or unnecessary features enabled, leaving the door wide open for hackers. Common examples include using default passwords, failing to apply security patches, or enabling services that aren’t needed. These oversights give attackers more opportunities to exploit vulnerabilities, gain unauthorized access, or steal sensitive information.
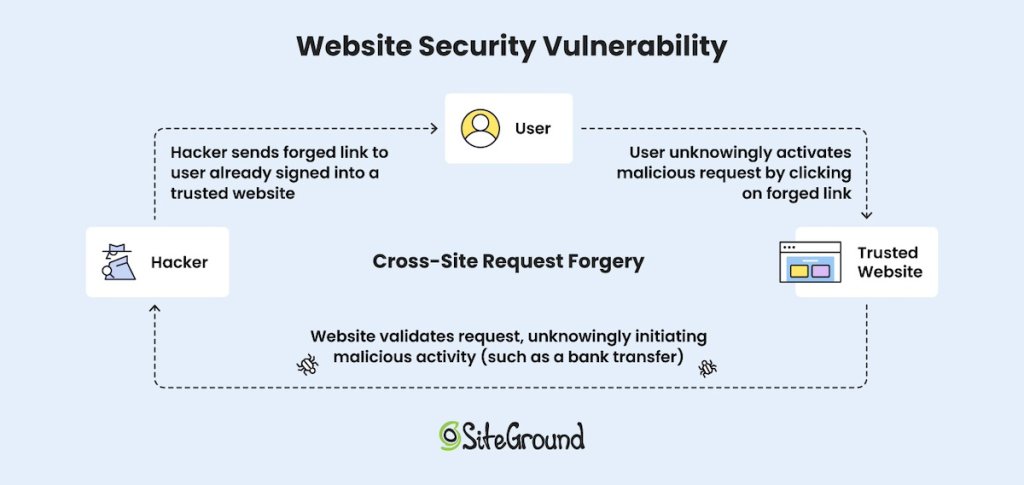
6. Cross-Site Request Forgery (CSRF)
CSRF is when hackers trick you into doing something you didn’t mean to do. For example, you’re already signed into your bank account, then you receive a bogus email with a link or button that’s disguised as something harmless. You innocently click on it, and it ends up transferring money from your account to the hacker, or perhaps it performs some other malicious action on the website where you’re logged in. You’ve essentially just been fooled into signing a virtual blank check.
7. Unvalidated Redirects and Forwards
This issue occurs when a website sends users to another page without checking if the destination is safe. Hackers can use this to redirect your visitors to harmful sites, like phishing pages or ones that install viruses. Think of it as though someone handed you directions to a fake address where bad things happen.
With all of these web vulnerabilities, it might seem a bit intimidating to even think about how to mitigate them. But there’s great news: we’re going to break it down into simple solutions that can quickly and easily improve your website security outlook.
Simple Fixes to Address Website Security Vulnerabilities
Now that you understand the most common website security vulnerabilities, let’s discuss some of the straightforward ways you can address them, as well as other website security tips. The bonus is that these web vulnerability solutions are easy to understand and act on, even if you don’t have a technical background.
1. Choose a Good Hosting Provider
The first and most important step you can make in this process is choosing a solid hosting provider—it’s essentially the online home for your website, and it plays a vital role in protecting your site from the website security vulnerabilities we’ve discussed above. Not only that, but a good hosting provider will offer maximum uptime and optimized website speed, ensuring that your website performance is reliable and top notch.
How to do it:
Look for a hosting provider that provides a free SSL certificate and daily backups, as well as other important security measures, such as daily malware scans, and a server-level WAF (not sure what we’re talking about here? Don’t worry, we’ll cover it all in a minute!). Do your research, and check reviews to make sure the provider you choose has a good reputation, along with superb customer service.
2. Perform Regular Maintenance and Updates
Keeping your website’s software, plugins, and tools up to date is a no-brainer on your list for stronger web security. Developers frequently release updates to fix vulnerabilities and improve performance. By staying on top of these updates, you can protect your site from previously mentioned web vulnerabilities, such as SQL injection, cross-site scripting (XSS), and insecure direct object references.
How to do it:
Create a schedule to check your CMS (such as WordPress), plugins, themes, and tools weekly, or enable automatic updates if your platform supports them. This is where those free daily backups are essential, though, because before you make any updates, always back up your website to prevent data loss or compatibility issues.
For added safety, test updates in a staging environment to ensure everything works smoothly before applying them to your live site.
To make web management easier and less stressful, consider using a managed WordPress hosting with free backups that handles updates, (free!) backups, and maintenance for you, helping keep your site secure without all the extra effort on your part.
[80]
3. Implement Input Validation
Input validation verifies that any data users enter into forms or search bars is checked and cleaned to fit the expected format, thus blocking harmful code. This security measure helps prevent hackers from injecting malicious commands, protecting your website from SQL injection and cross-site scripting (XSS) attacks that could compromise data or functionality.
How to do it:
Use easy-to-install tools or plugins that automatically clean up and check the information users enter on your site.
Focus on areas like forms, search bars, and comment sections.
For extra protection, set up these checks both on the user’s side (their browser) and on your website’s server, so you catch anything suspicious before it can cause harm.
4. Strengthen Access Control
Access control means deciding who can do what on your website. This includes using strong passwords, setting up roles like “admin” or “user,” and limiting what each role can access or change. These steps help keep hackers out of sensitive areas and protect your website from common vulnerabilities like unauthorized access or data leaks.
How to do it:
Assign user roles carefully, making sure each person only has the permissions they need.
Also be sure to implement strong, unique passwords for all accounts and enable two-factor authentication (2FA) for an extra layer of security.
It’s also helpful to install a plugin that keeps an activity log of your website, tracking events like login attempts, user activity, and bot visits, so you can quickly spot and address suspicious behavior.
5. Use Monitoring Tools and Scanners
Monitoring tools and scanners act as security guards for your website by watching for unusual activity or hidden threats. They can alert you to suspicious or malicious behavior, such as injected code, compromised files, or web vulnerabilities that could be exploited by attackers. This helps you catch problems early before they cause serious harm.
How to do it:
Look for a malware scanner tool that offers automated file scans and malware cleanups. A good tool will offer detailed reports and recommendations for resolving issues, making it easier to maintain a secure website. This can also help prevent future attacks by identifying weak points in your website’s security configuration.
6. Secure Your Connections
A secure connection encrypts data sent between your website and its users, often using HTTPS (look for the padlock symbol in the browser). The distinction between HTTPS versus HTTP is an important one: it signals this secure connection—and thus trust and confidence—to your website users. It also keeps hackers from intercepting sensitive information, adding extra protection against data theft.
How to do it:
Make sure your site uses HTTPS by installing an SSL certificate. Certain hosting providers, including SiteGround, will provide you with a free SSL certificate that can easily be implemented on your website, making HTTPS implementation as easy as the flip of a switch.
7. Improve Redirection Security
A redirect is when a user is automatically taken from one URL to another. So redirection security involves checking these links or forwards from your website to make sure they lead to safe destinations. This stops hackers from tricking your site into redirecting visitors to malicious websites.
How to do it:
Limit the use of redirections and always verify that any destination URLs are trustworthy before implementing them. Regularly review your redirects to ensure they haven’t been altered or exploited, and consider using tools to monitor and secure your redirection paths.
8. Employ a Web Application Firewall (WAF)
A Web Application Firewall (WAF) is specifically designed to protect your website from security vulnerabilities, such as SQL injection, XSS, and CSRF, by safeguarding features like user forms, search fields, and API endpoints. It works by stopping harmful requests before they can cause damage, ensuring your site remains secure.
How to do it:
Many hosting providers offer built-in WAF options, as it’s an essential security feature. While there are numerous WAF options available, including WordPress plugins and third-party services, having a server-level WAF is imperative. This type of WAF operates with large-scale data and provides real-time protection, ensuring a higher level of security.
At SiteGround, our security team keeps a close eye on security bulletins to identify potential exploits and web vulnerabilities. In doing so, they promptly develop custom security rules and integrate them into an advanced, in-house managed WAF. This robust protection is automatically applied to all websites hosted on our platform.
A CDN, or Content Delivery Network—as it’s called—helps protect your website by spreading traffic across multiple servers around the world.It not only improves your site’s speed but also provides an essential layer of protection against web server vulnerabilities. By distributing traffic and blocking harmful bots, a CDN prevents malicious traffic from overwhelming your server, keeps data safe with encryption, and stops potential attacks before they reach your site.
How to do it:
Quite simply, select a hosting provider that leverages a CDN. SiteGround’s CDN, for example, helps safeguard your website by mitigating web server vulnerabilities, blocking harmful traffic, and encrypting data. Additionally, with the Always Online feature, even if your server goes down, the CDN enables a cached version of your site that remains accessible and secure.
10. Install a Reliable Security Plugin
There are many plugins out there to help address the web security vulnerabilities mentioned above. And if you’re using WordPress, the SiteGround Optimizer Plugin is particularly ideal, as it allows you to prevent many of the aforementioned web vulnerabilities but with just one plugin – easily and for free.
The SiteGround Security Optimizer Plugin provides a combination of enhanced login security, firewall settings, and activity tracking, with an all-in-one solution that fortifies your site. It safeguards key system directories, enables protection against XSS, prevents unauthorized access, hardens login security, and continuously monitors for any unusual activity. In the event of a breach, the comprehensive activity logs allow you to swiftly identify what occurred and take the necessary steps to resolve it. It’s basically a one-stop shop for securing your WordPress site.
Final Word on Website Security Vulnerabilities
In the end, website security doesn’t have to be a daunting task. By applying simple fixes to these common website security vulnerabilities, you not only protect your site but also build trust with your visitors. Take action today to lock down your site and keep those Wild Western cyber bandits at bay—after all, a little effort now can save you a lot of headaches down the road.
Meanwhile, you can make addressing website security extra worry-free by taking advantage of SiteGround Hosting. We put our all into security measures that go above and beyond so that you can rest easy. Plus, we offer unparalleled speed and service.